19 Cheap Wood Ceiling Ideas That Look Expensive
A wood ceiling changes a room instantly. It adds warmth, texture, and a finished, architectural feel that flat white drywall simply cannot match. The catch is the price tag most people expect — but a wood ceiling does not have to cost a fortune. With budget lumber, plywood, reclaimed boards, and a few clever layout tricks, you can get the same rich look for a fraction of what custom millwork costs. The ideas below are all genuinely cheap: they use affordable materials, install over your existing ceiling in most cases, and suit a weekend DIYer with basic tools. Each idea includes practical tips on materials, installation, and finishing, so you can pick the one that fits your room, your skill level, and your budget.
1. Reclaimed Fence Picket Planks
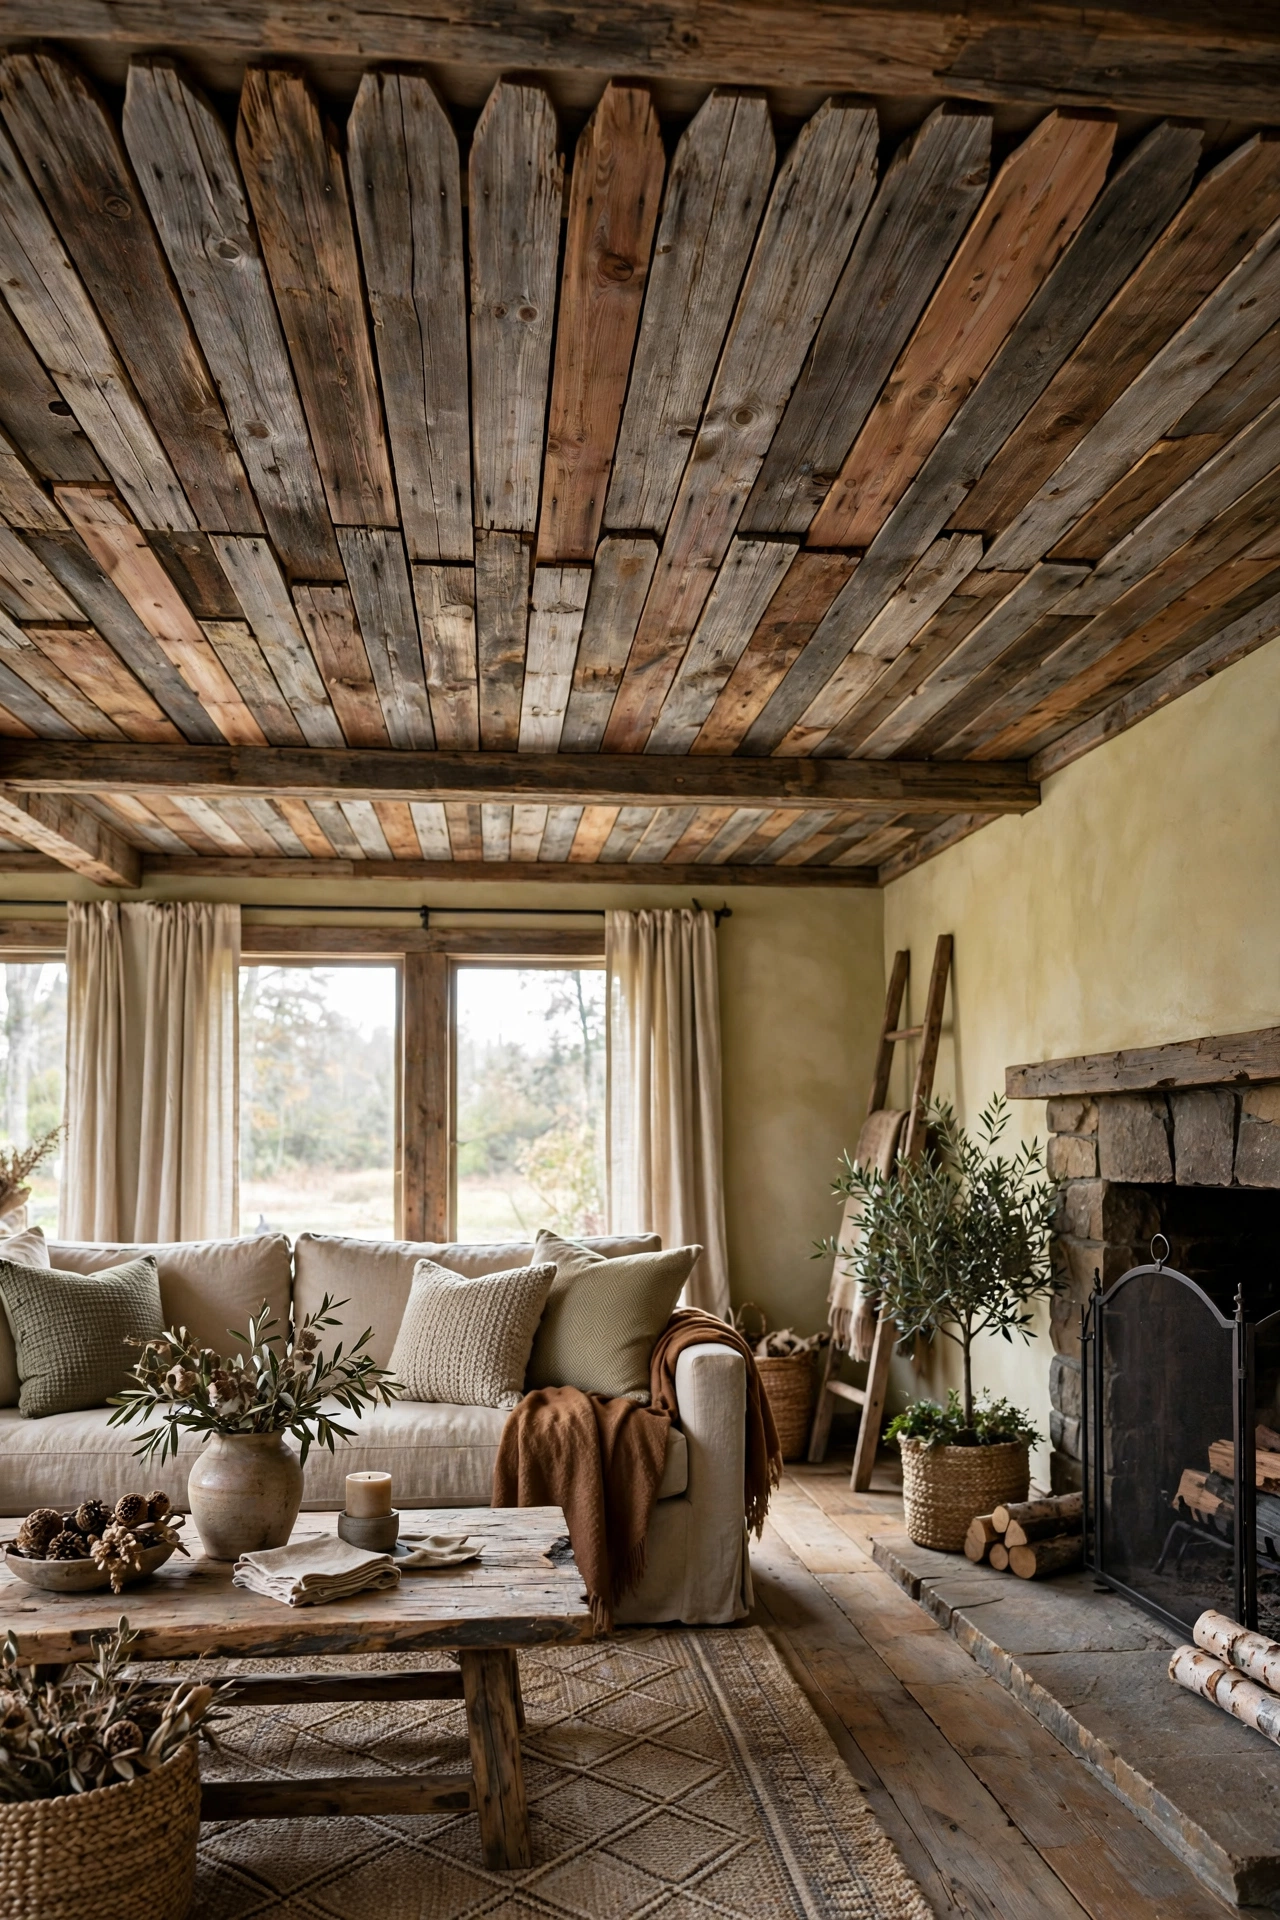
Cedar fence pickets are one of the cheapest ways to get a real wood ceiling. At a couple of dollars per board, they cost far less than hardwood planks, and their natural weathering gives you a rustic, reclaimed look for free. Install them straight over drywall with furring strips screwed into the joists, leaving small, even gaps or butting them tight depending on the look you want. Skip staining entirely and let the natural grain do the work — that alone saves money and a weekend of finishing. Before you start, sort the pickets and set aside any that are badly warped. A quick pass with sandpaper on rough edges is usually all the prep this ceiling needs.
2. Plywood Planks Ripped From Sheets
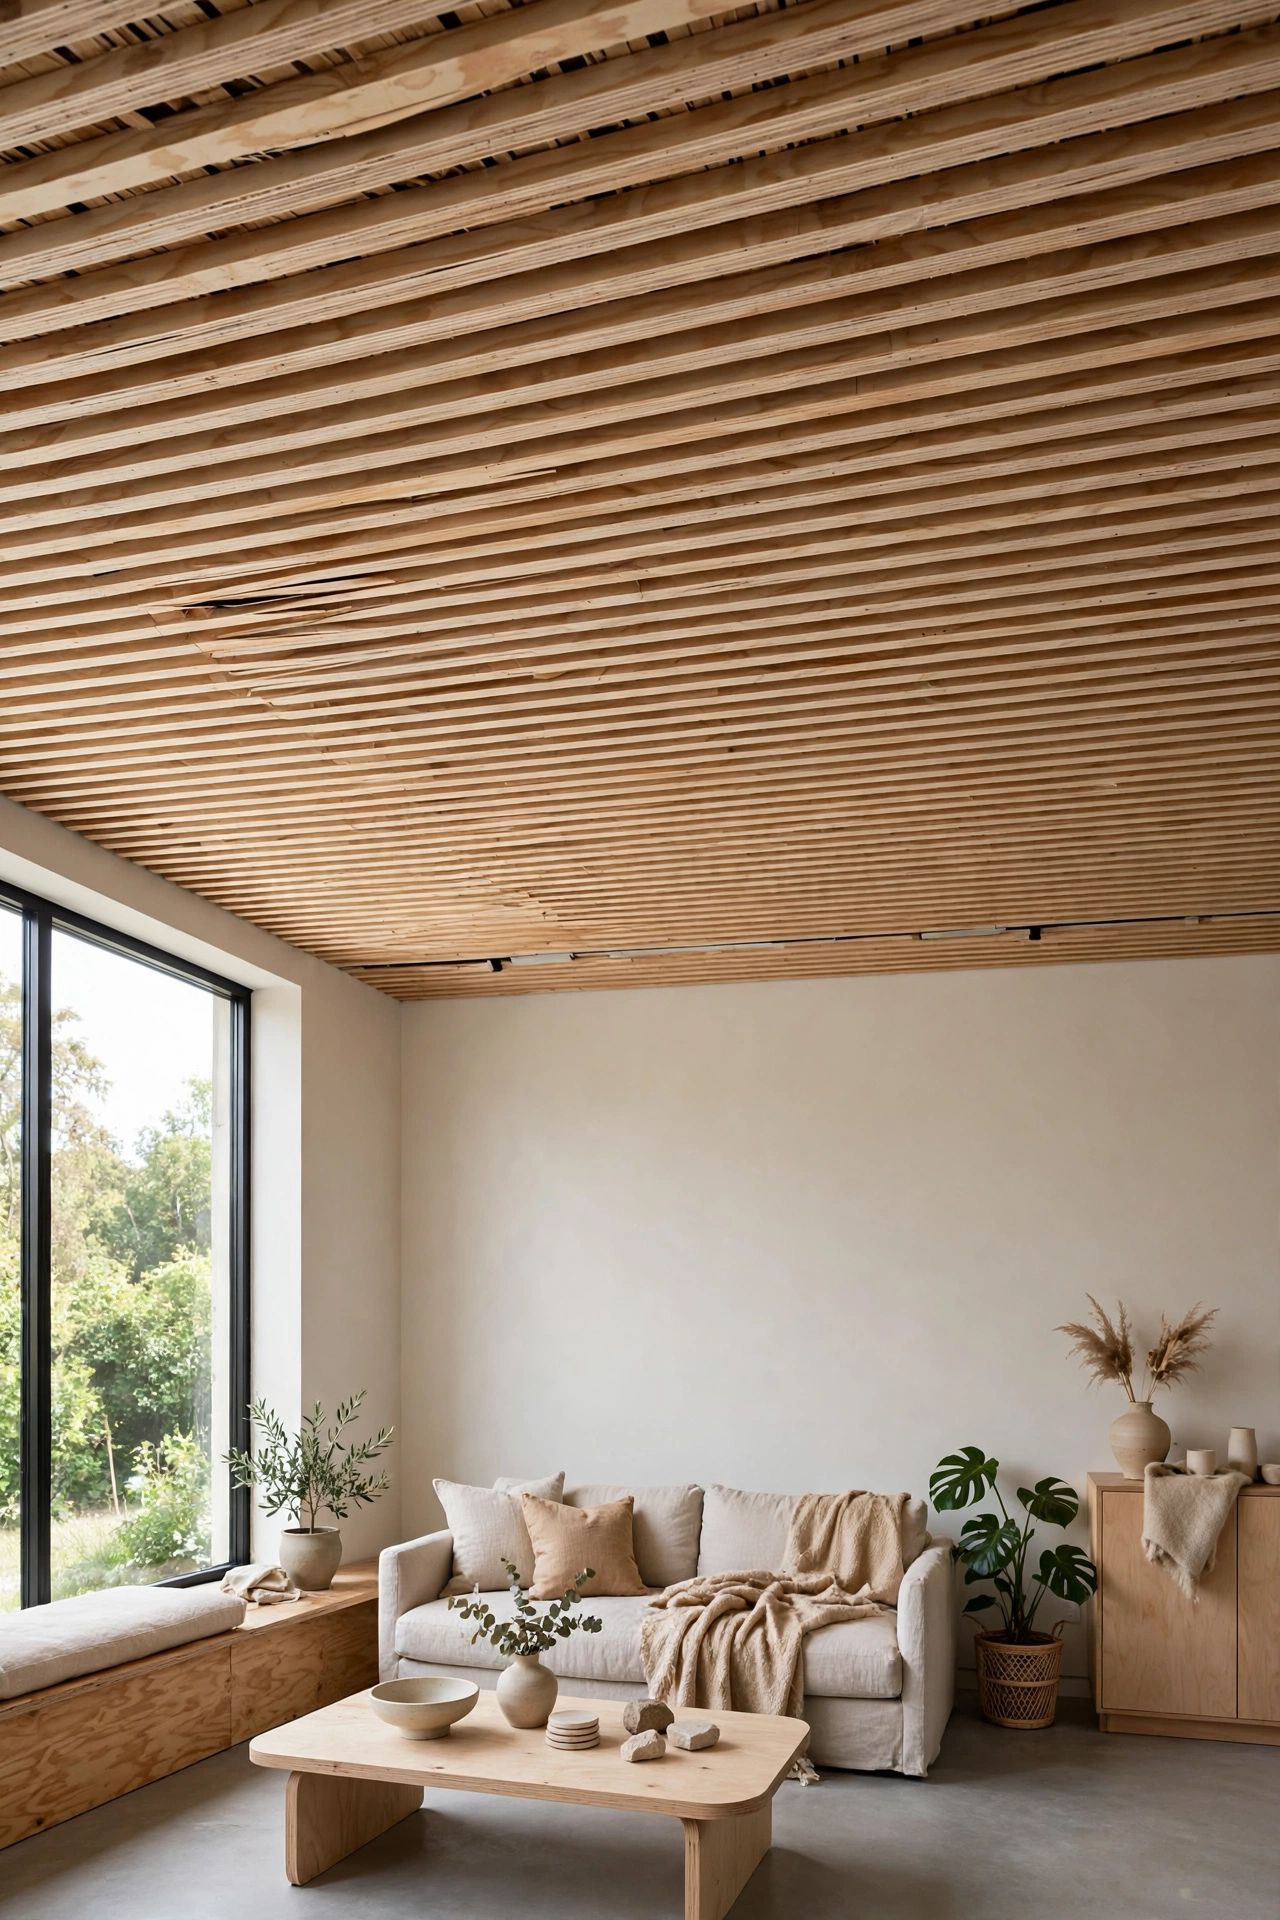
A single sheet of plywood becomes a whole ceiling’s worth of planks when you rip it into strips on a table saw. Cut 5- to 6-inch strips, sand the edges lightly, and nail them up in a straight-lay pattern for a clean, modern plank ceiling at plywood prices. This is the method behind many budget basement ceilings, and it works because plywood’s thin veneer looks surprisingly like solid boards once it is up and finished. Stain the strips before installation — it is far easier than staining overhead — and keep the stain consistent by mixing batches. Leave a hairline gap between strips or paint the ceiling beneath dark first so the gaps read as intentional shadow lines.
3. Peel-and-Stick Wood-Look Planks
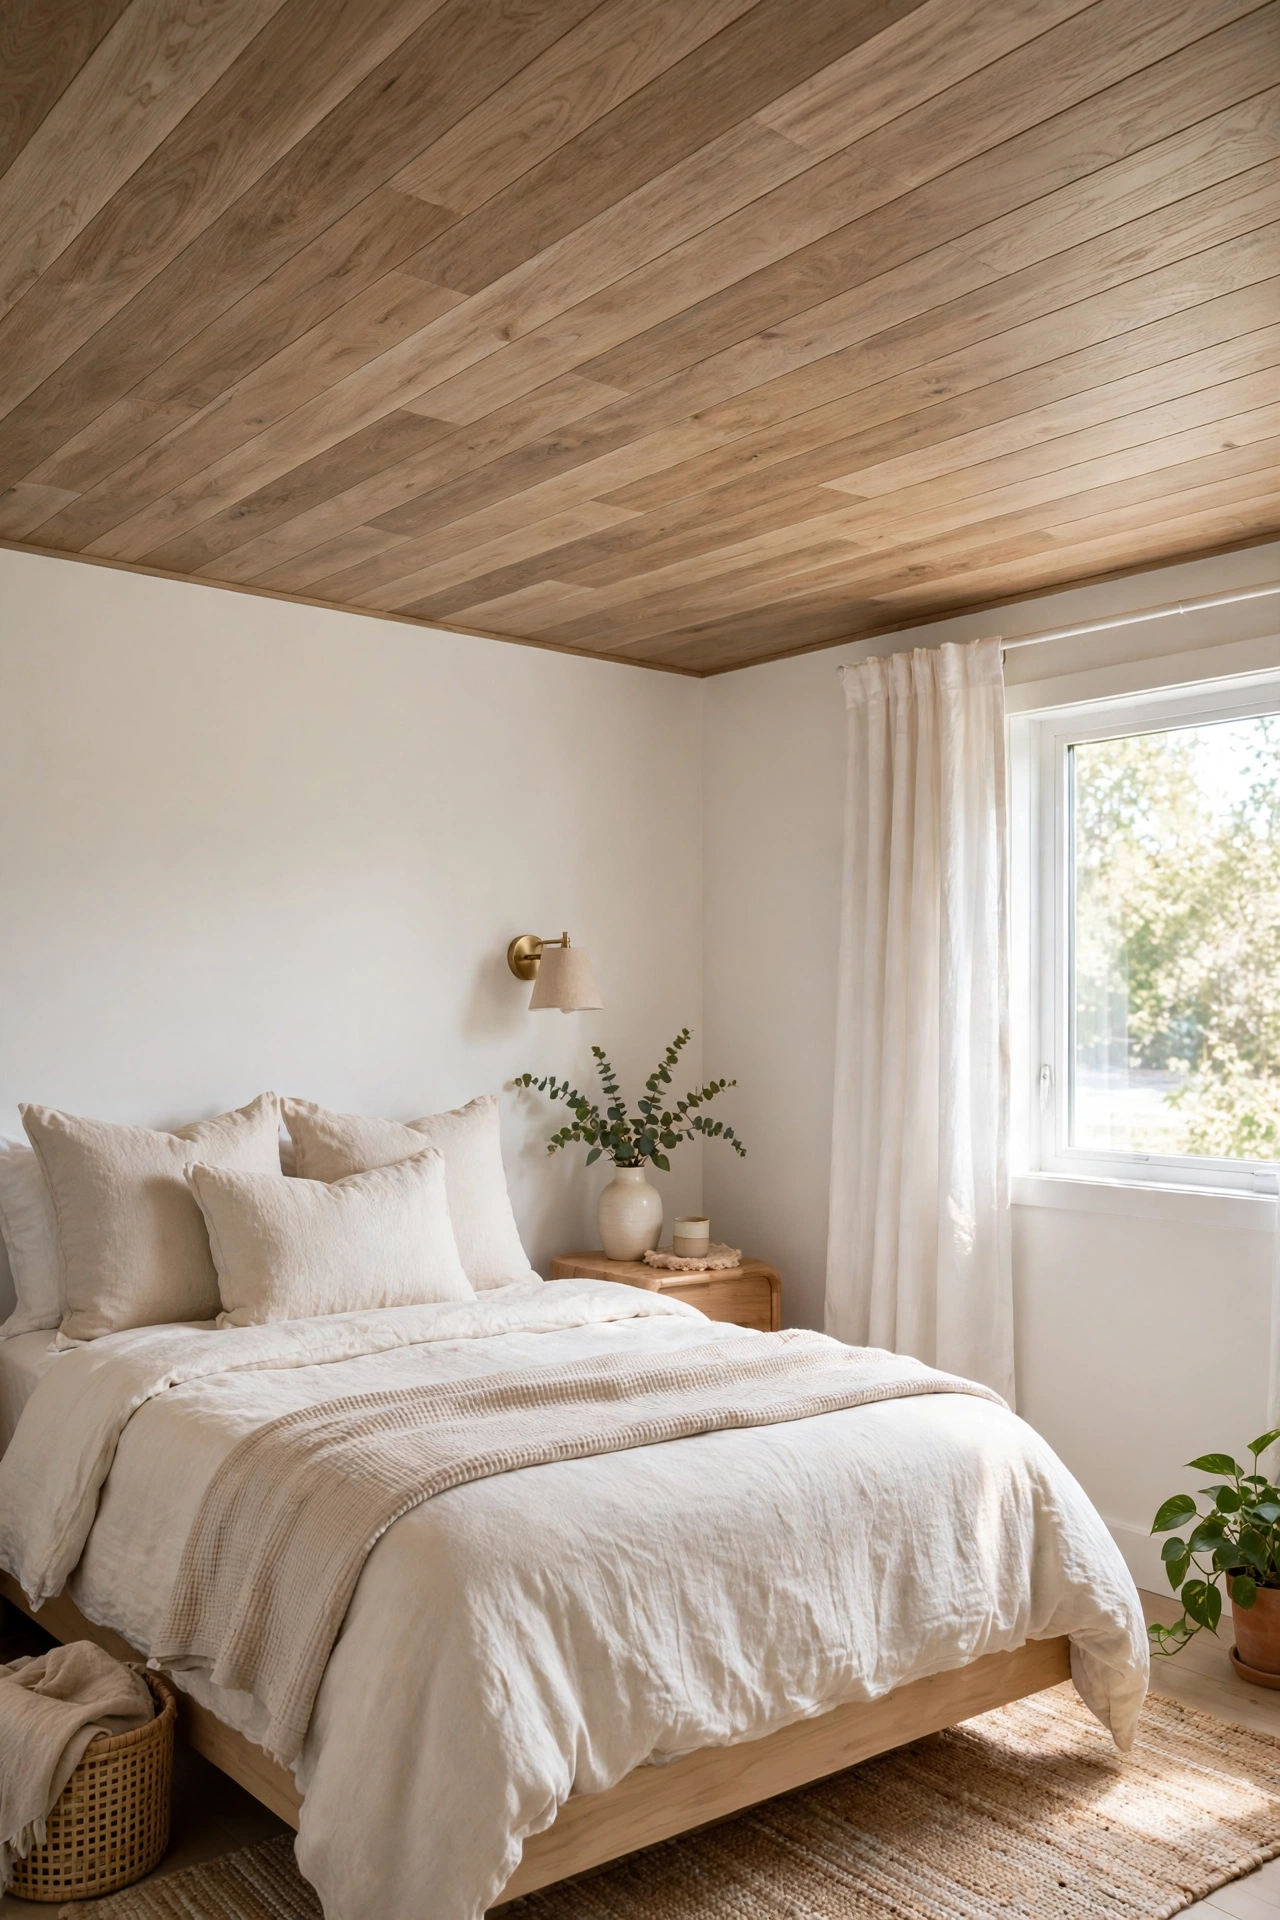
If you want the fastest, cleanest install, peel-and-stick wood-look planks are hard to beat. They press directly onto a smooth, clean ceiling, need no nails, no saw for most cuts, and no finishing at all. They are ideal for renters and for small rooms where a full lumber project feels like overkill. The trick to making them look expensive is surface prep: clean the ceiling thoroughly, fill any texture that would show through, and plan your layout so seams stagger like real boards. Work in short sections, press firmly, and use a sharp utility knife for cuts around lights and vents. The result reads as wood from any normal viewing distance.
4. Hollow Faux Beams From Cheap Boards
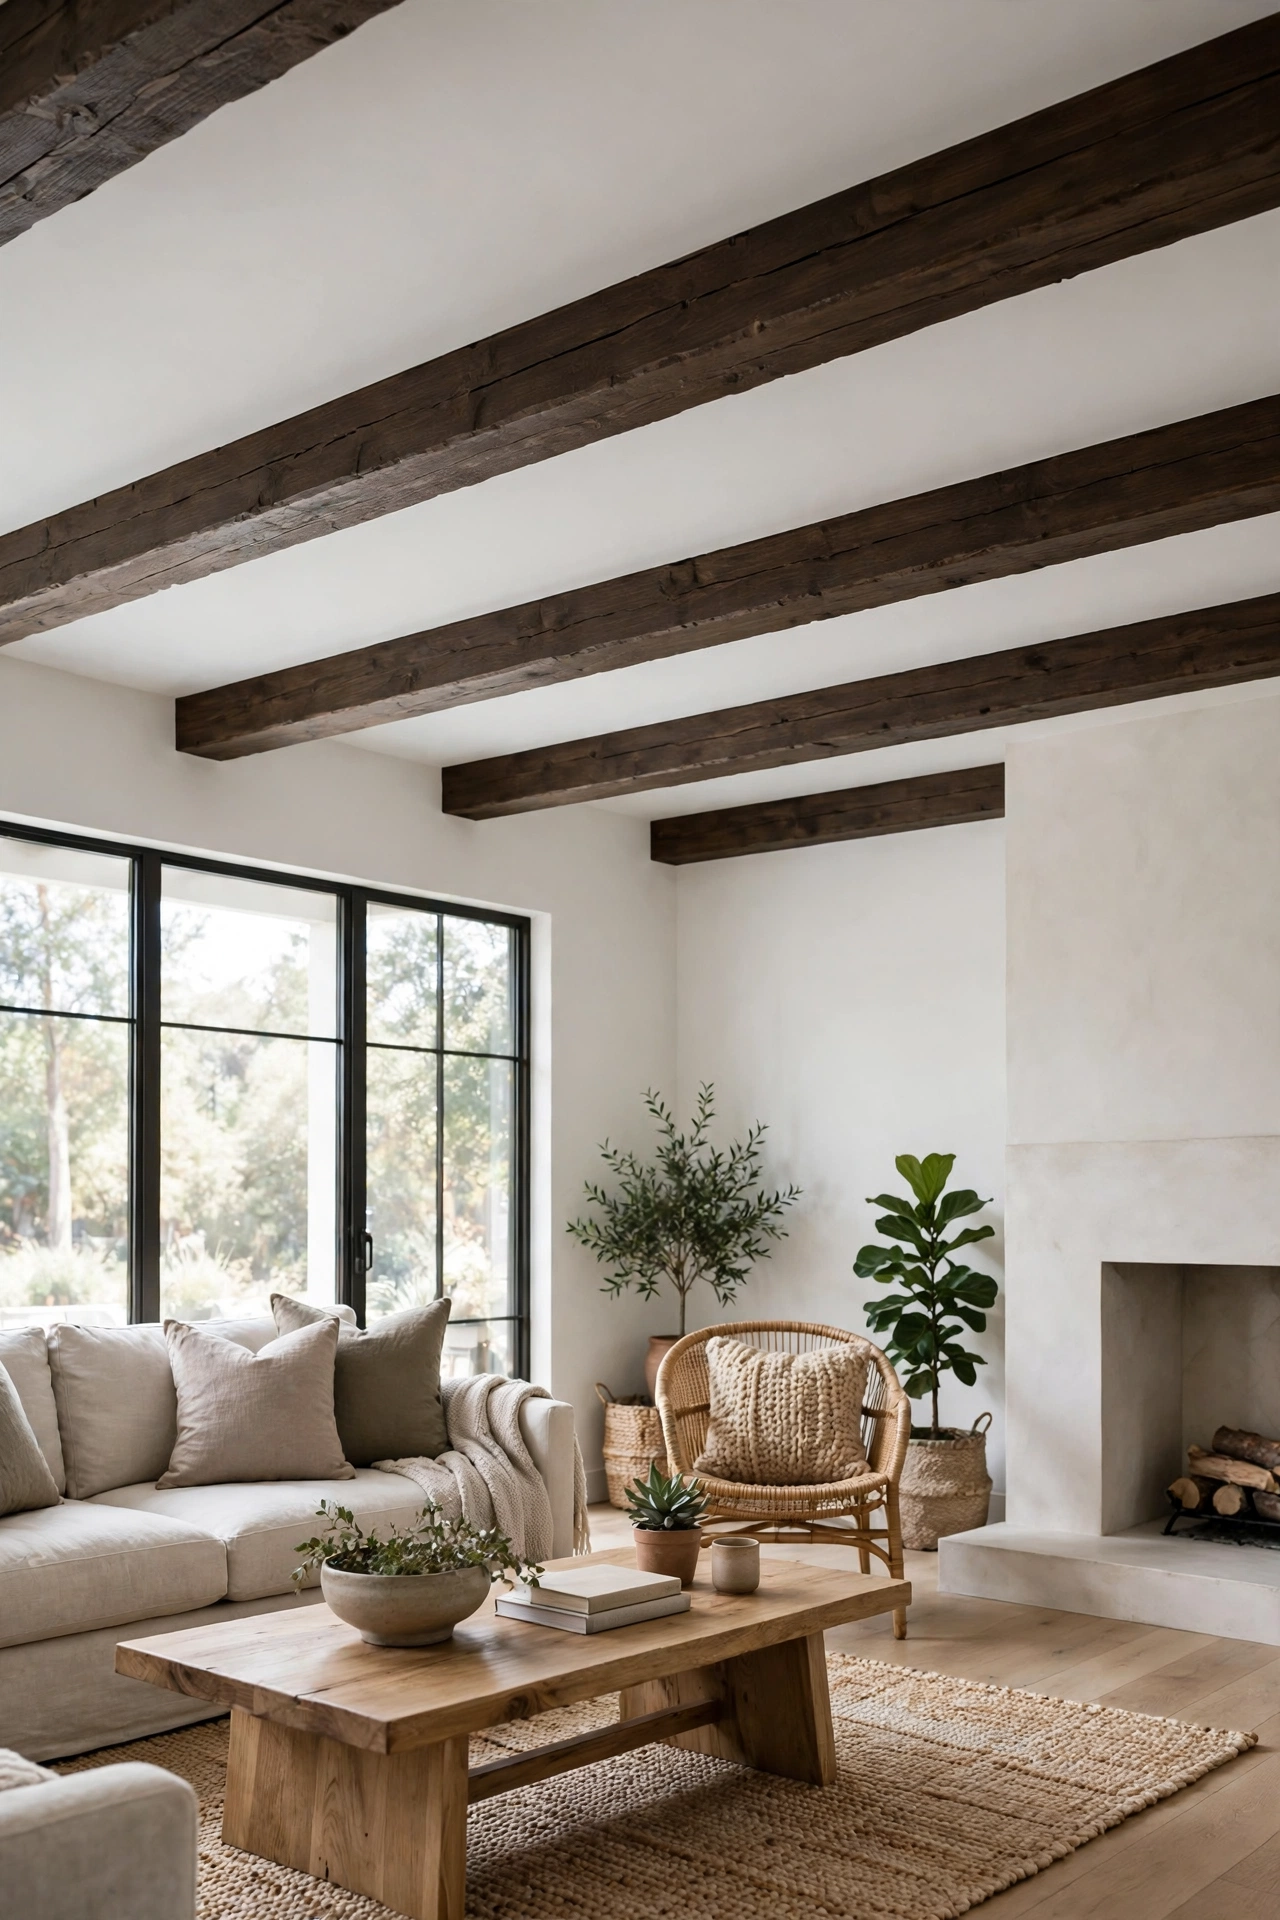
Real beams are heavy and expensive; hollow faux beams are neither. Build a simple three-sided box from inexpensive pine or plywood, stain it dark, and mount it to the ceiling with blocking screwed into the joists. A few beams across a room instantly add architecture and make even a plain plank or painted ceiling look custom. Space them evenly — typically 4 to 6 feet apart — and run them in the direction that makes the room feel longer. Because the boxes are hollow, you can hide wiring for lights or speakers inside them. Add a second, smaller cross beam at each end for a finished, joined look.
5. Painted Pine Tongue-and-Groove
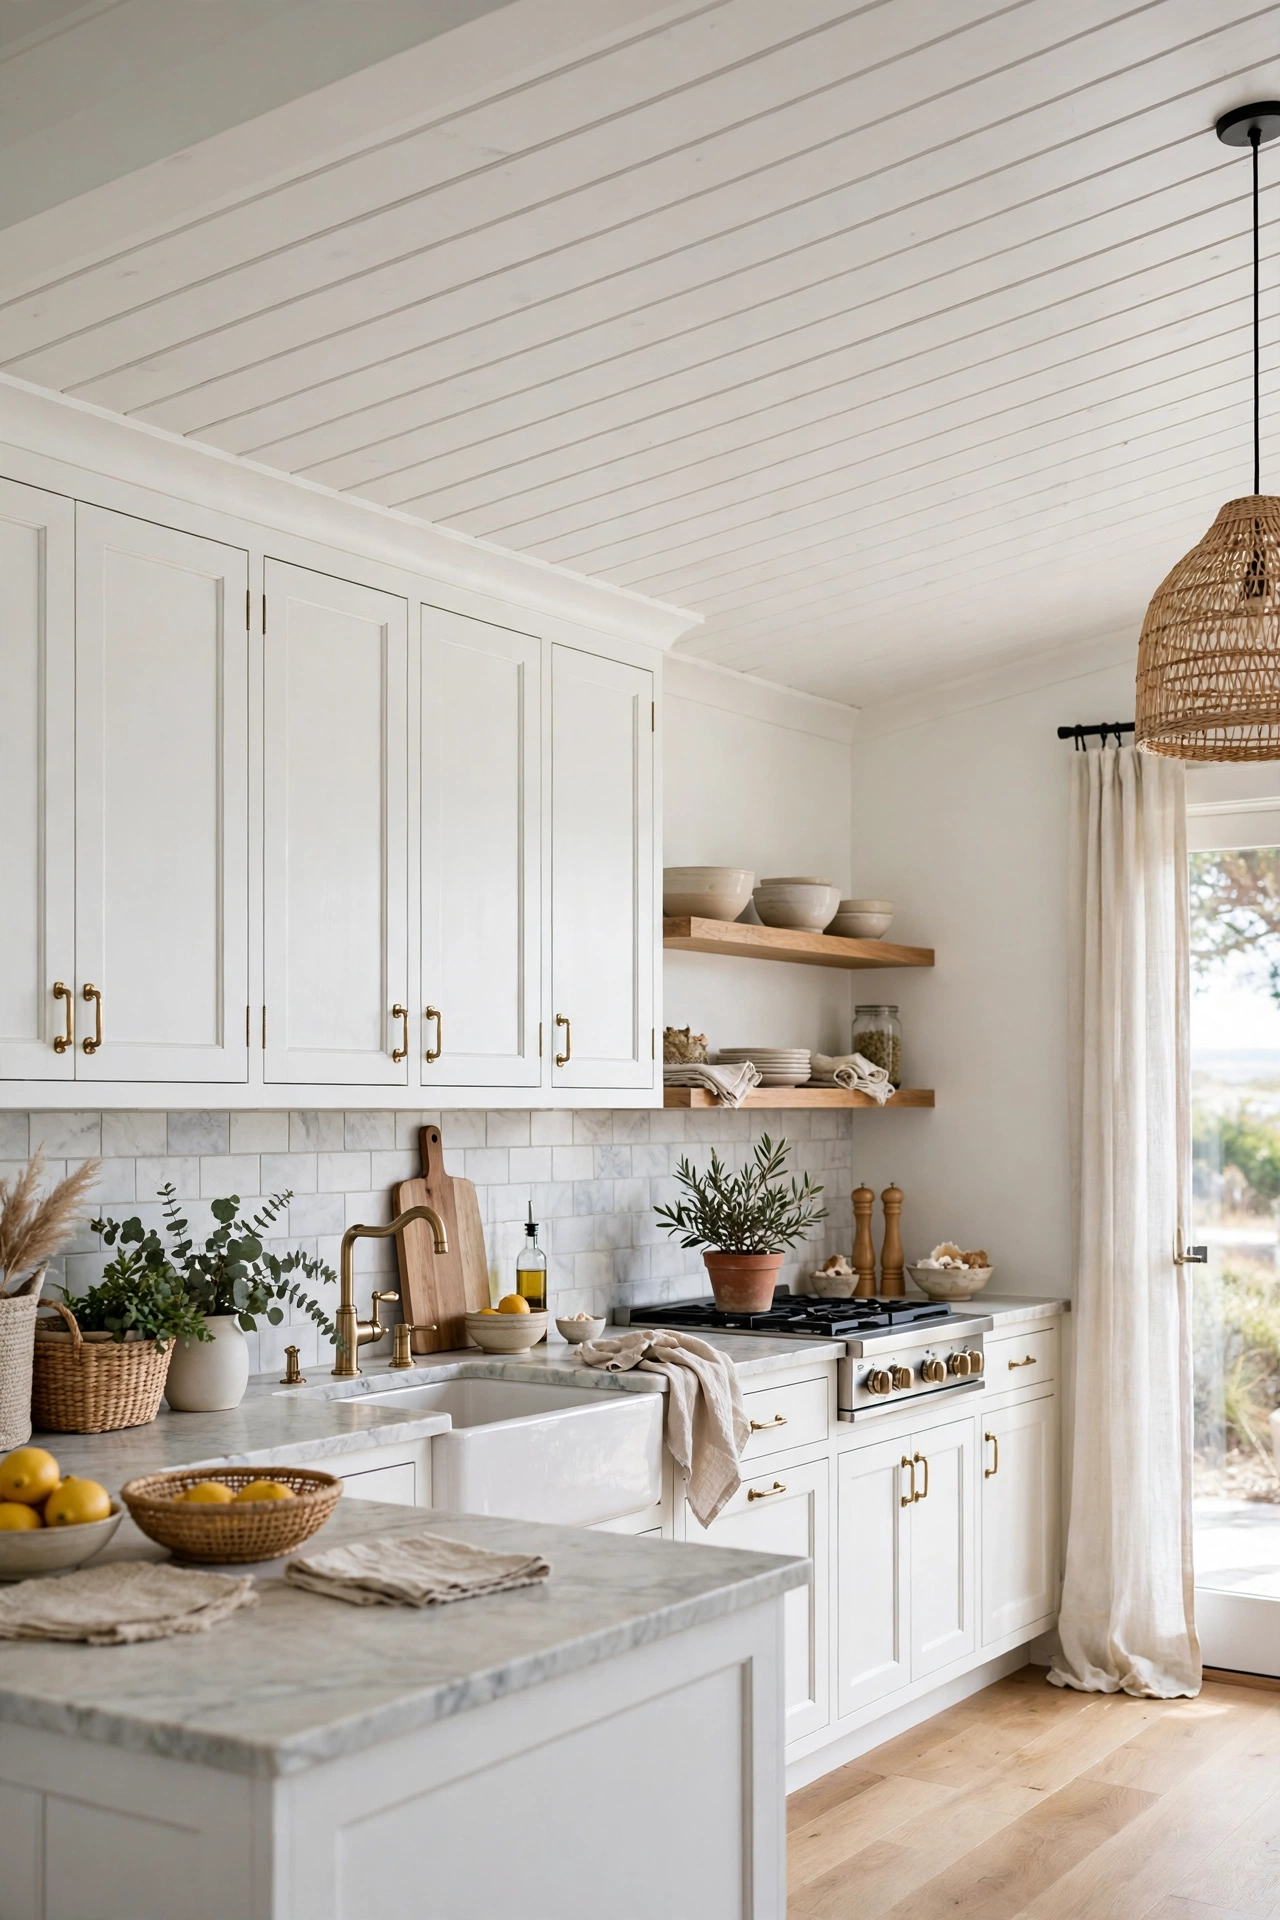
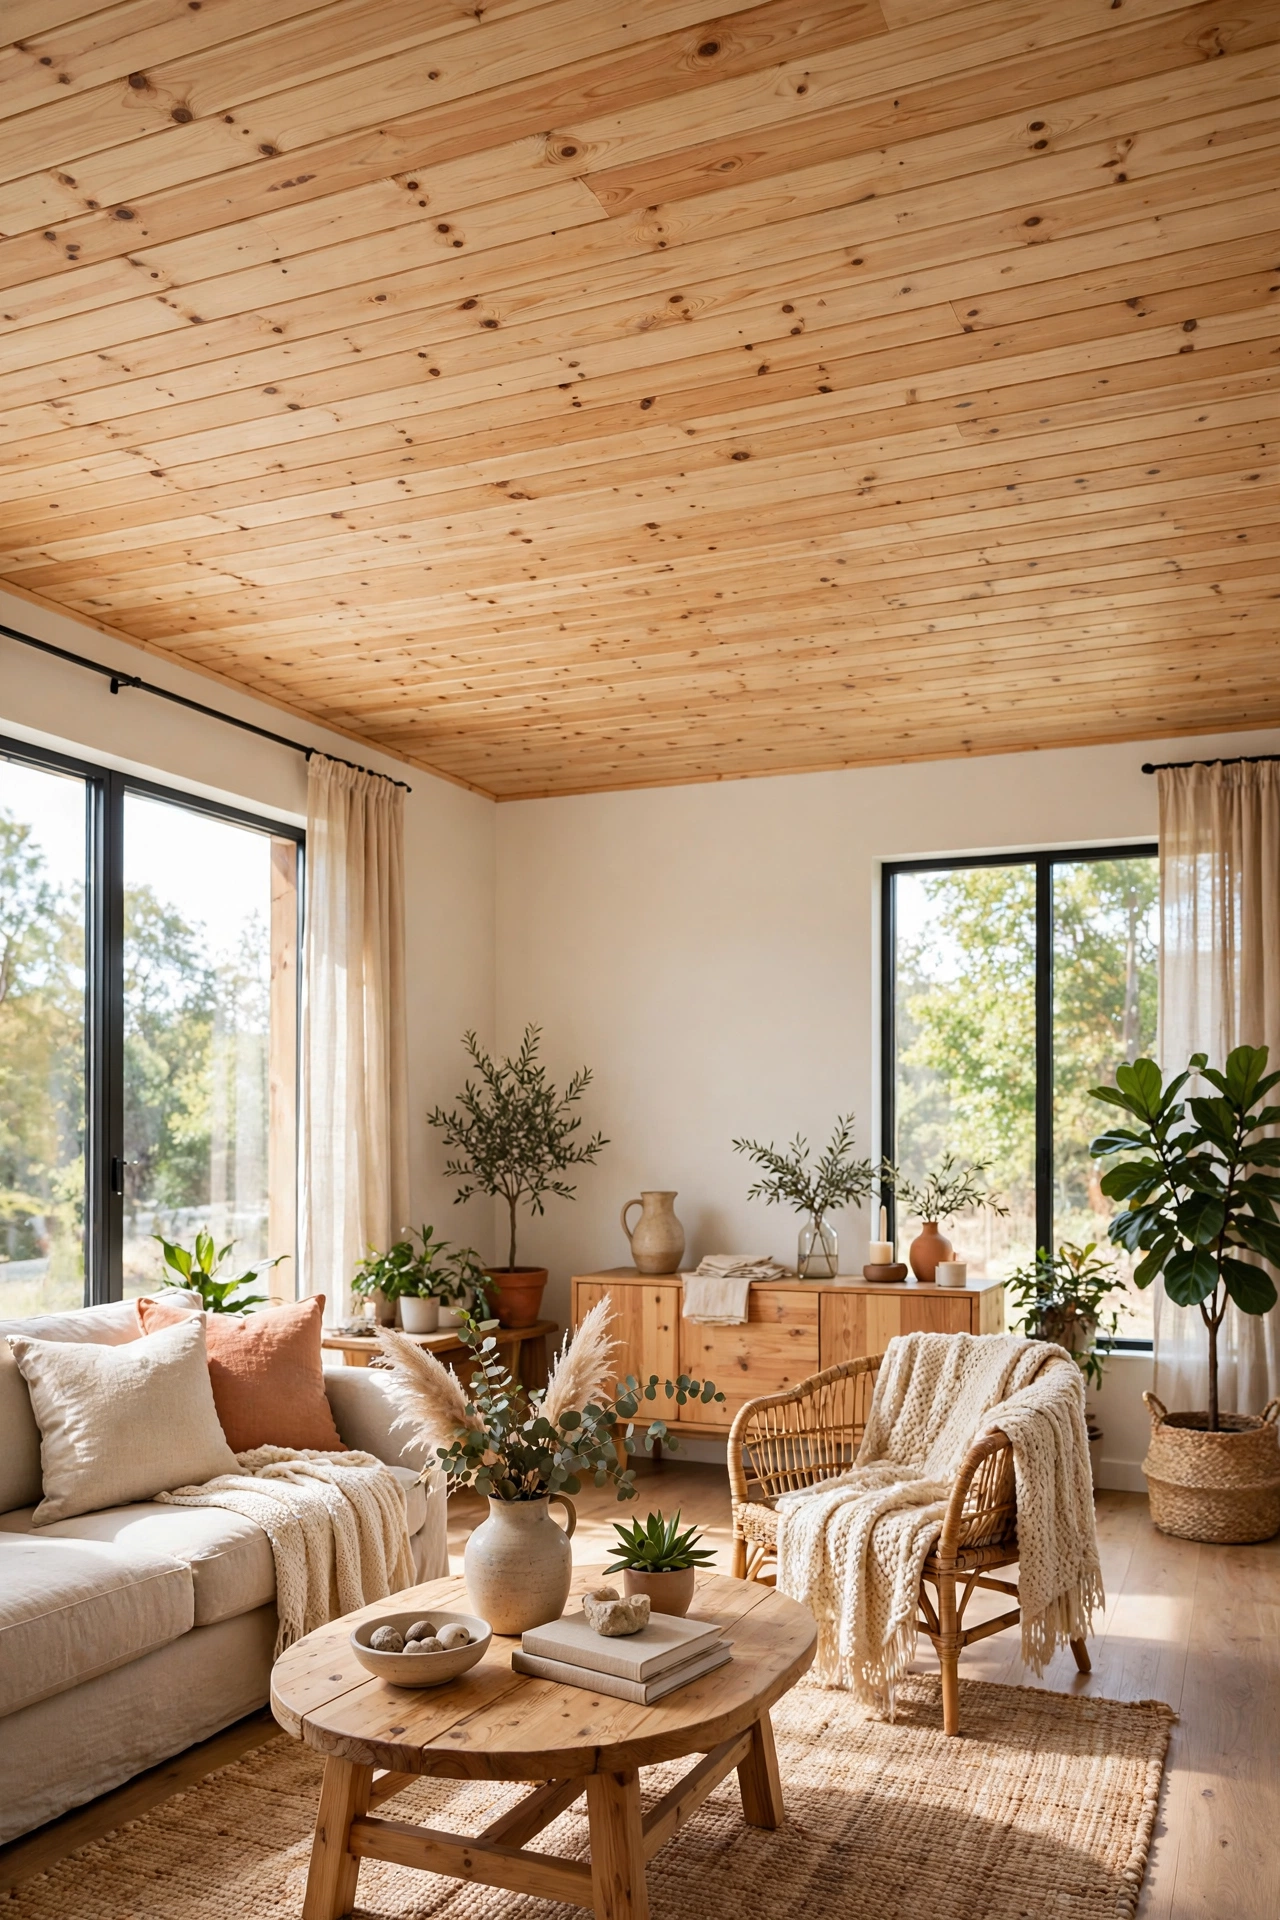
Pine tongue-and-groove boards are already affordable, and painting them stretches the value further: paint hides knots, color variation, and lower-grade boards that would look patchy left natural. A crisp white or soft cream painted pine ceiling brightens a room while keeping all the texture of real wood. Install the boards with a nail gun through the tongue so fasteners stay hidden, and prime before painting for an even finish. This ceiling suits bedrooms, kitchens, and coastal-style rooms especially well. If you ever want a change, painted pine takes a new color easily, so the ceiling can evolve with the room.
6. Whitewashed Pine Boards
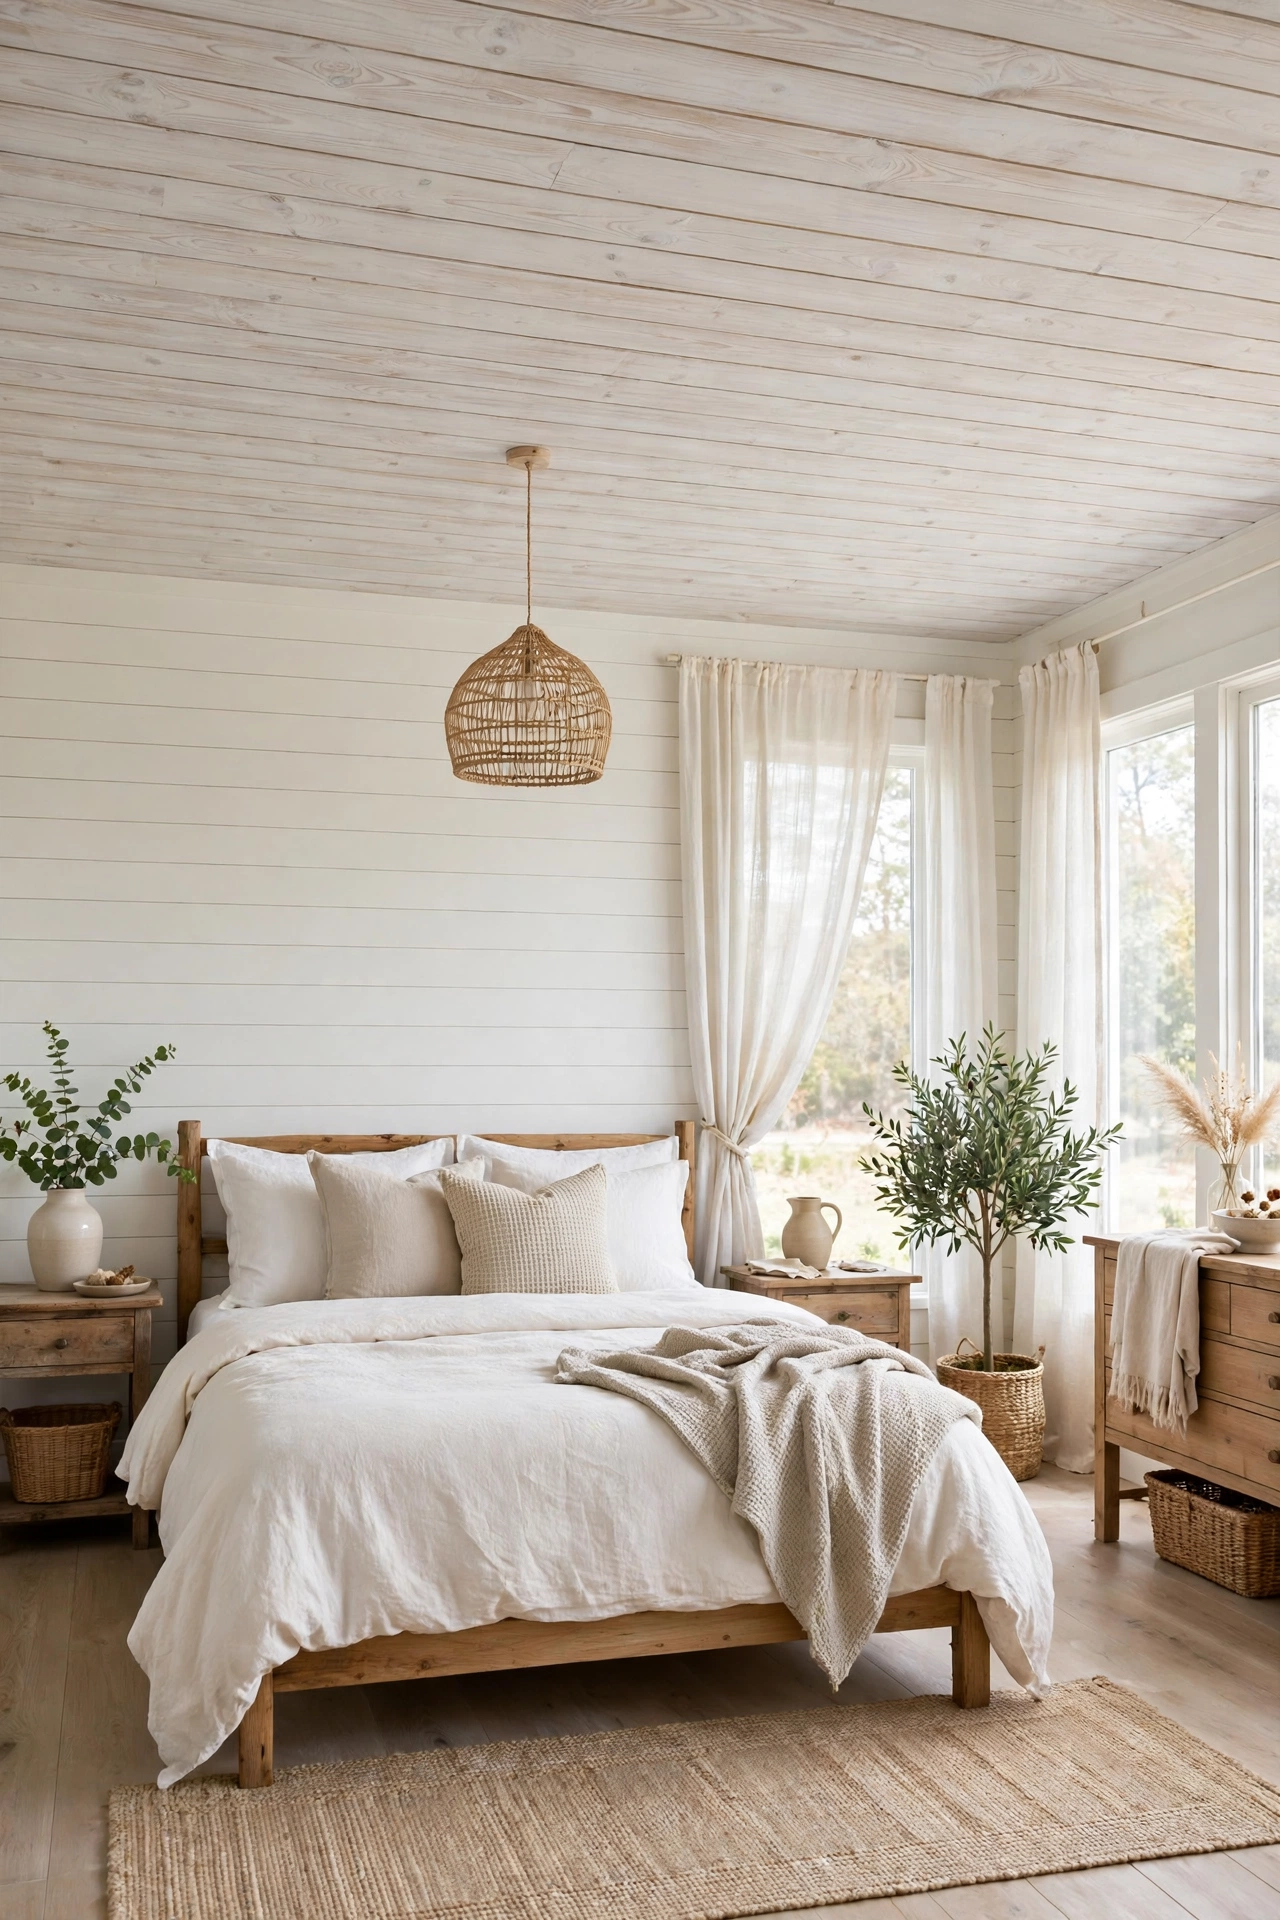
Whitewash gives you the best of both worlds: the grain of real wood with the lightness of a white ceiling. Mix white paint with water, brush it over pine boards, and wipe off the excess so the grain shows through in soft, pale tones. The finish costs almost nothing beyond the paint you probably already own, and it makes small or dark rooms feel taller and brighter. Whitewashed ceilings pair beautifully with natural wood floors and white walls, and they suit farmhouse, coastal, and Scandinavian rooms. Test your wash ratio on a spare board first — a 50/50 mix is a good starting point — and seal with a matte clear coat if the room gets humid.
7. Dark-Stained Budget Pine for Contrast
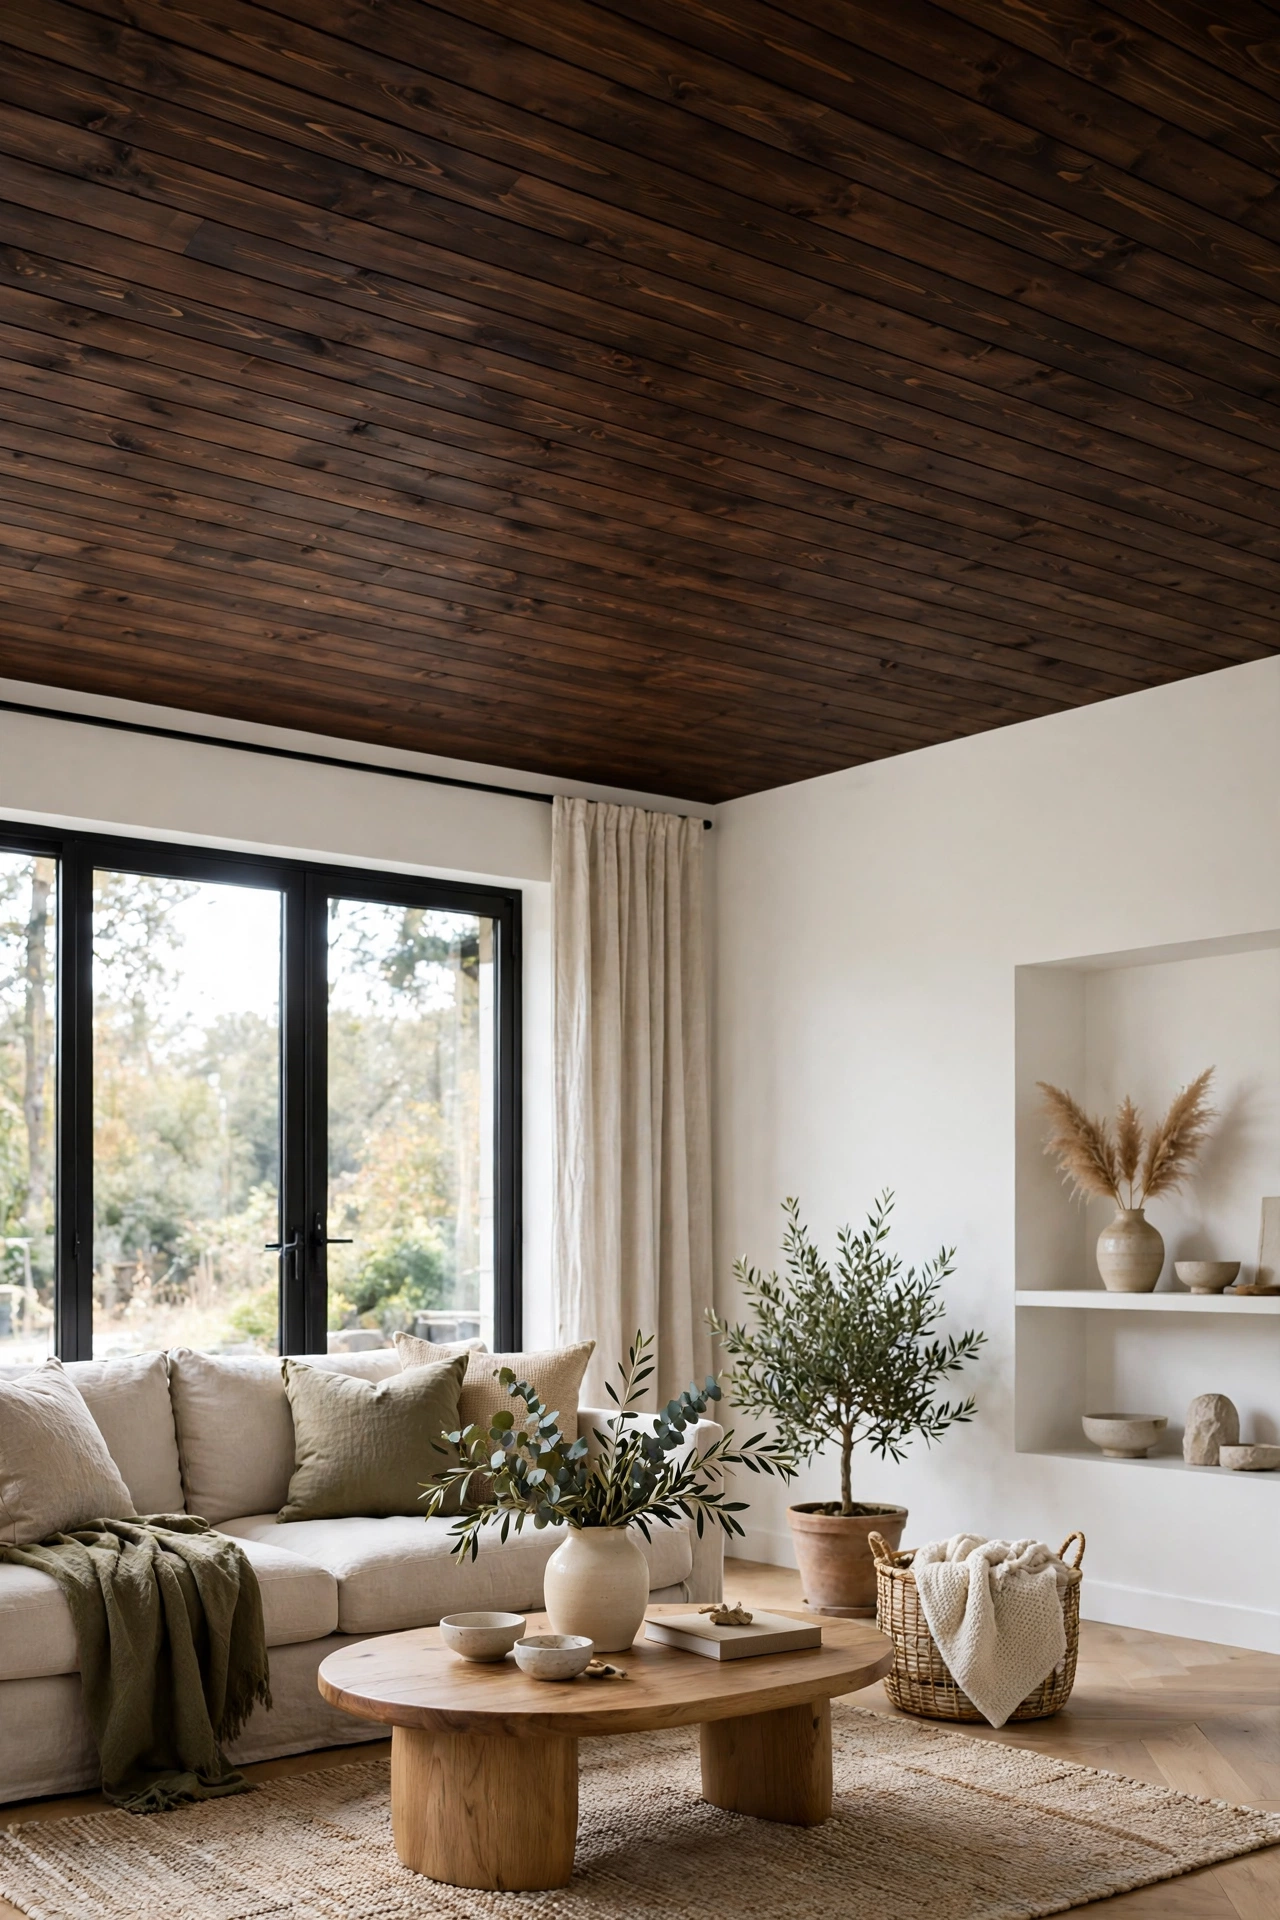
Dark stain is the cheapest way to make budget pine look like walnut. A deep walnut or espresso stain transforms plain pine planks into a rich, dramatic ceiling that anchors a room, especially against white walls and light furniture. The contrast is what sells the look: dark overhead, bright everywhere else, so the ceiling reads as a deliberate design choice rather than a dark room. Stain every board before it goes up, work in consistent coats, and seal with a satin finish to keep the color even. Use this treatment in living rooms and bedrooms with good natural light, and keep the rest of the palette light so the room stays balanced.
8. Beadboard Ceiling Panels
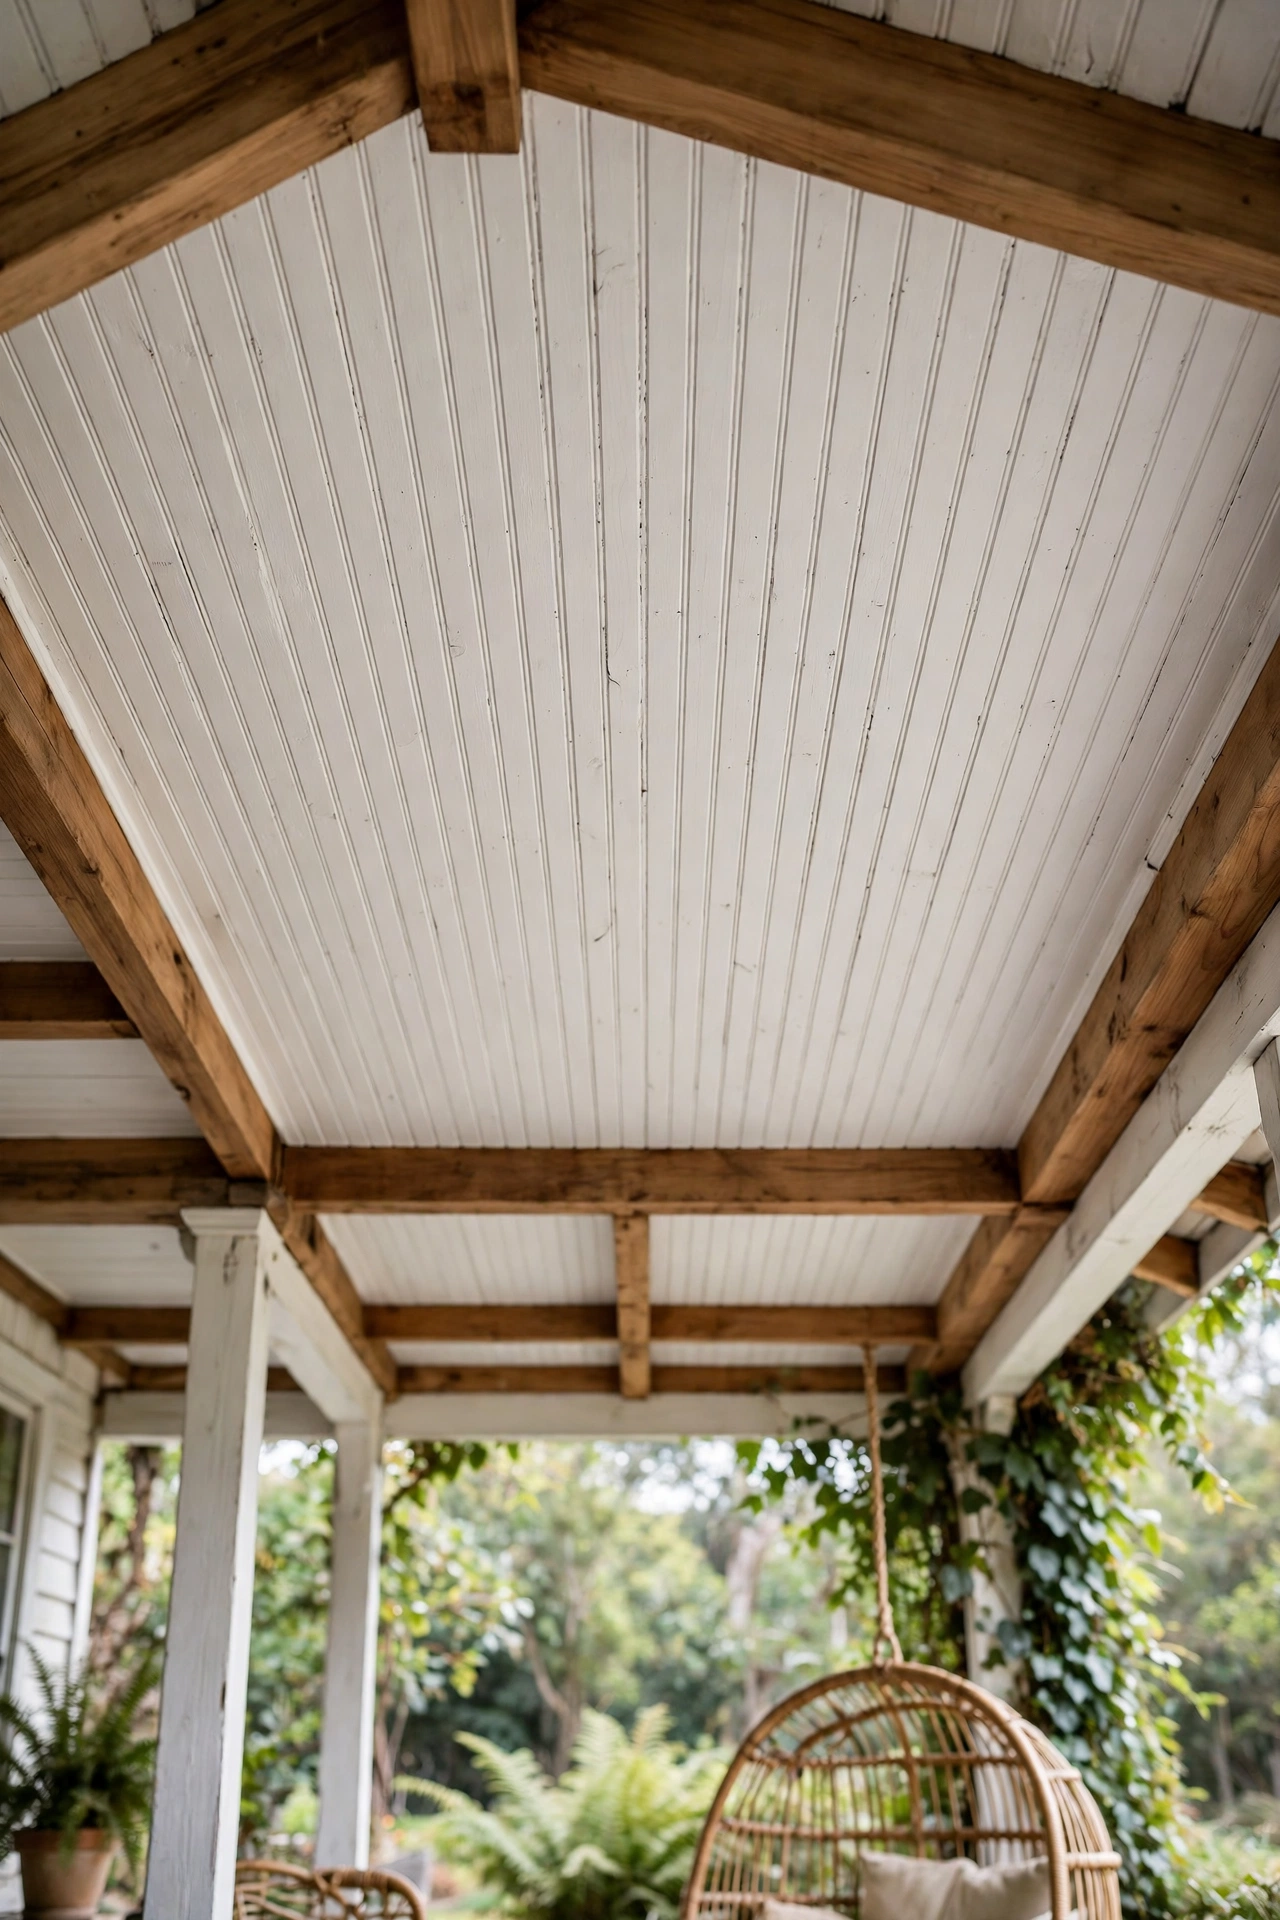
Beadboard panels — large sheets with a grooved, beadboard face — cover a ceiling fast and cheaply, with far fewer seams than individual boards. Cut the sheets to fit, nail them to furring strips, and cover the joints with thin battens for a paneled, cottage-style finish. Painted white, beadboard reads as classic and clean; left in a light natural stain, it feels warm and informal. The sheet format also makes it one of the easiest ceilings for a beginner: fewer pieces, fewer cuts, and a forgiving layout. This is an excellent choice for porches, kitchens, and bathrooms where a traditional plank install would take twice as long.
9. A Pallet-Wood Accent Section
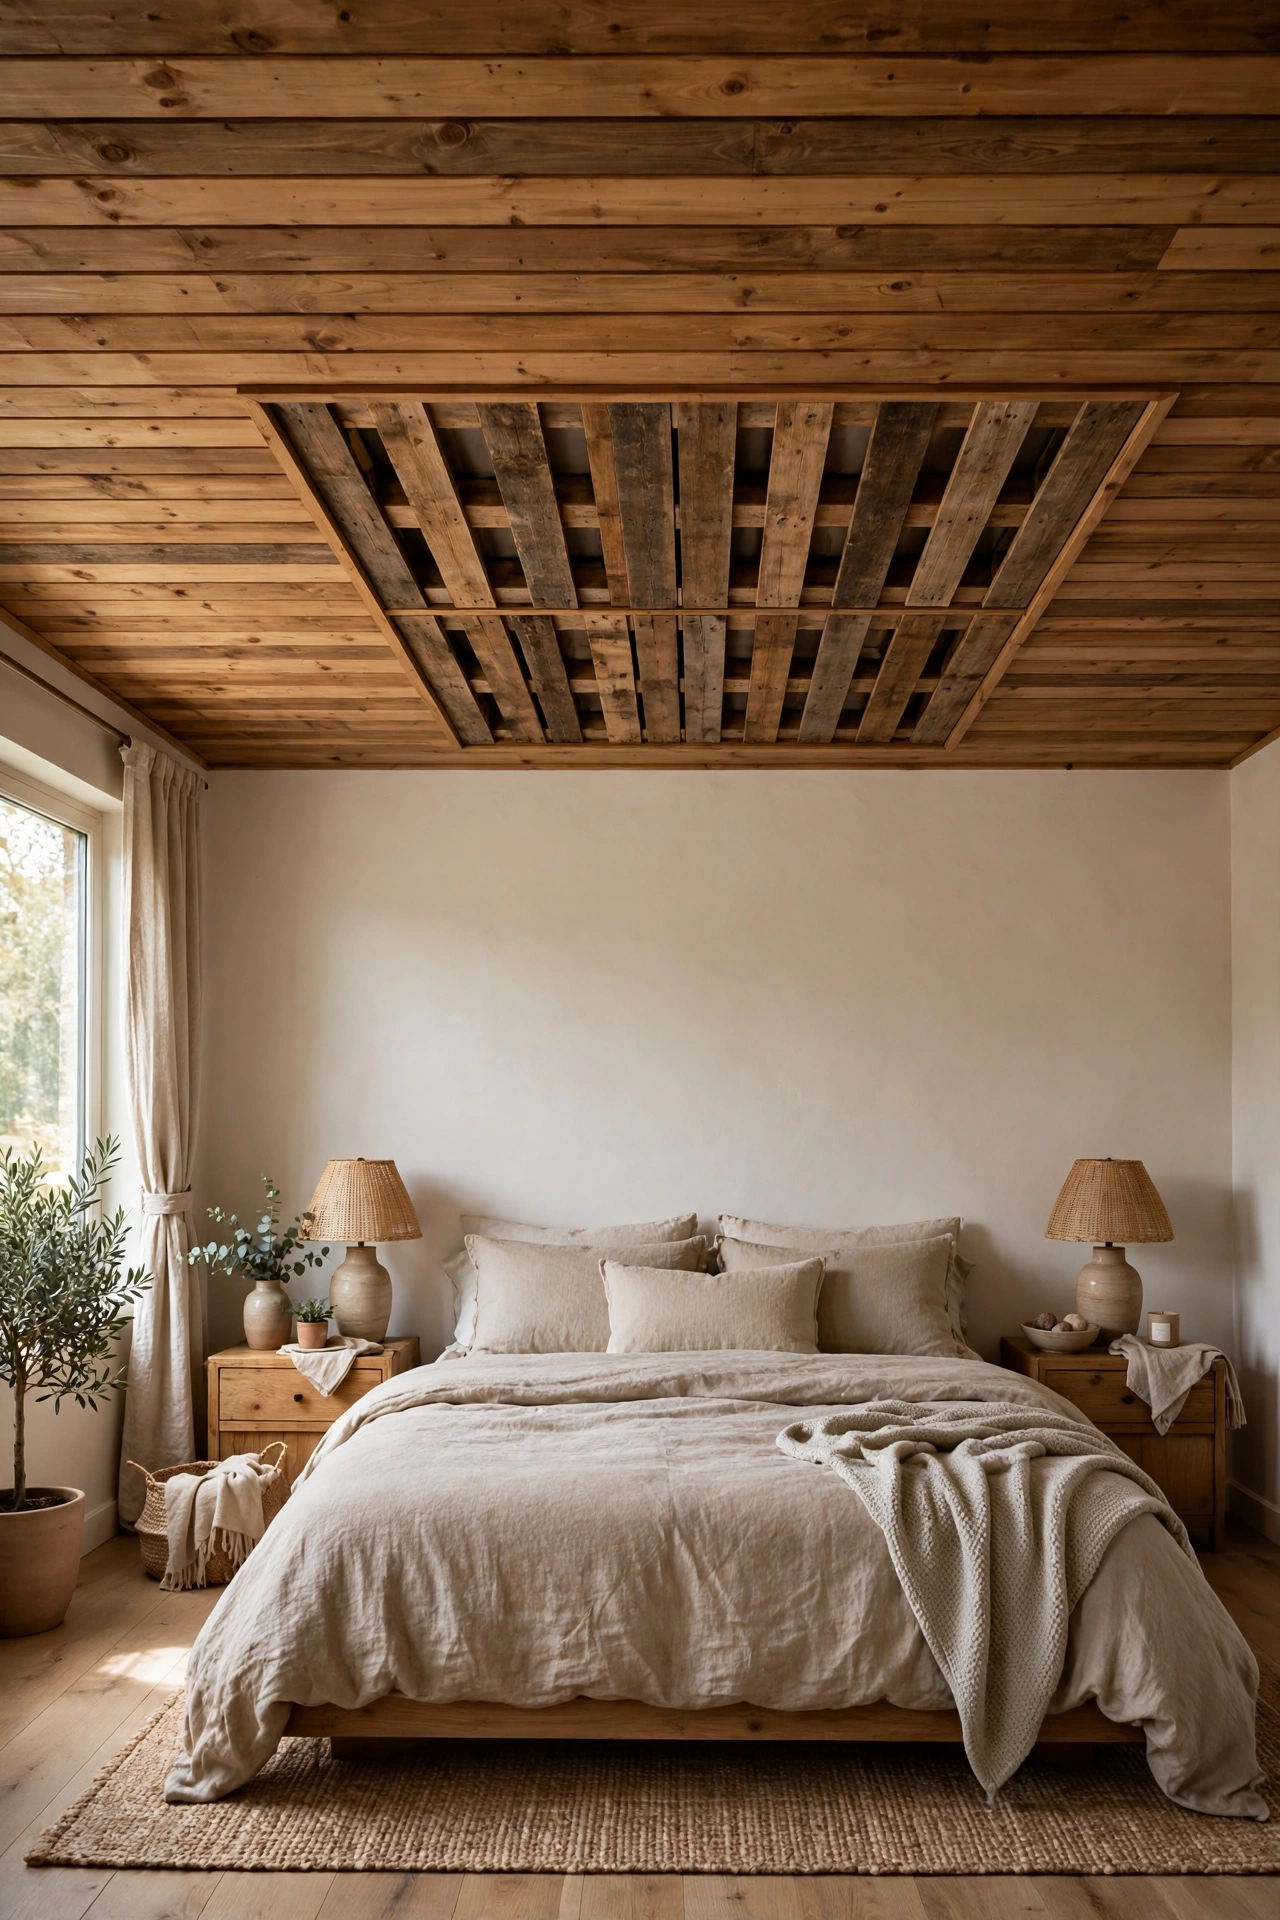
You do not need to cover the whole ceiling to get the wood effect. A pallet-wood accent section — one zone of the ceiling, such as over a bed, a dining table, or a reading nook — delivers the warmth of wood at a fraction of the cost and effort. Source pallets free or cheaply, break them down carefully, remove all nails, and sand the boards smooth before installing. Because the section is small, you can afford to be picky: use only the best boards, vary the tones for a patchwork effect, and frame the section with trim so it reads as an intentional feature. The rest of the ceiling stays painted, which keeps the room bright.
10. Wood-Look Laminate Panels
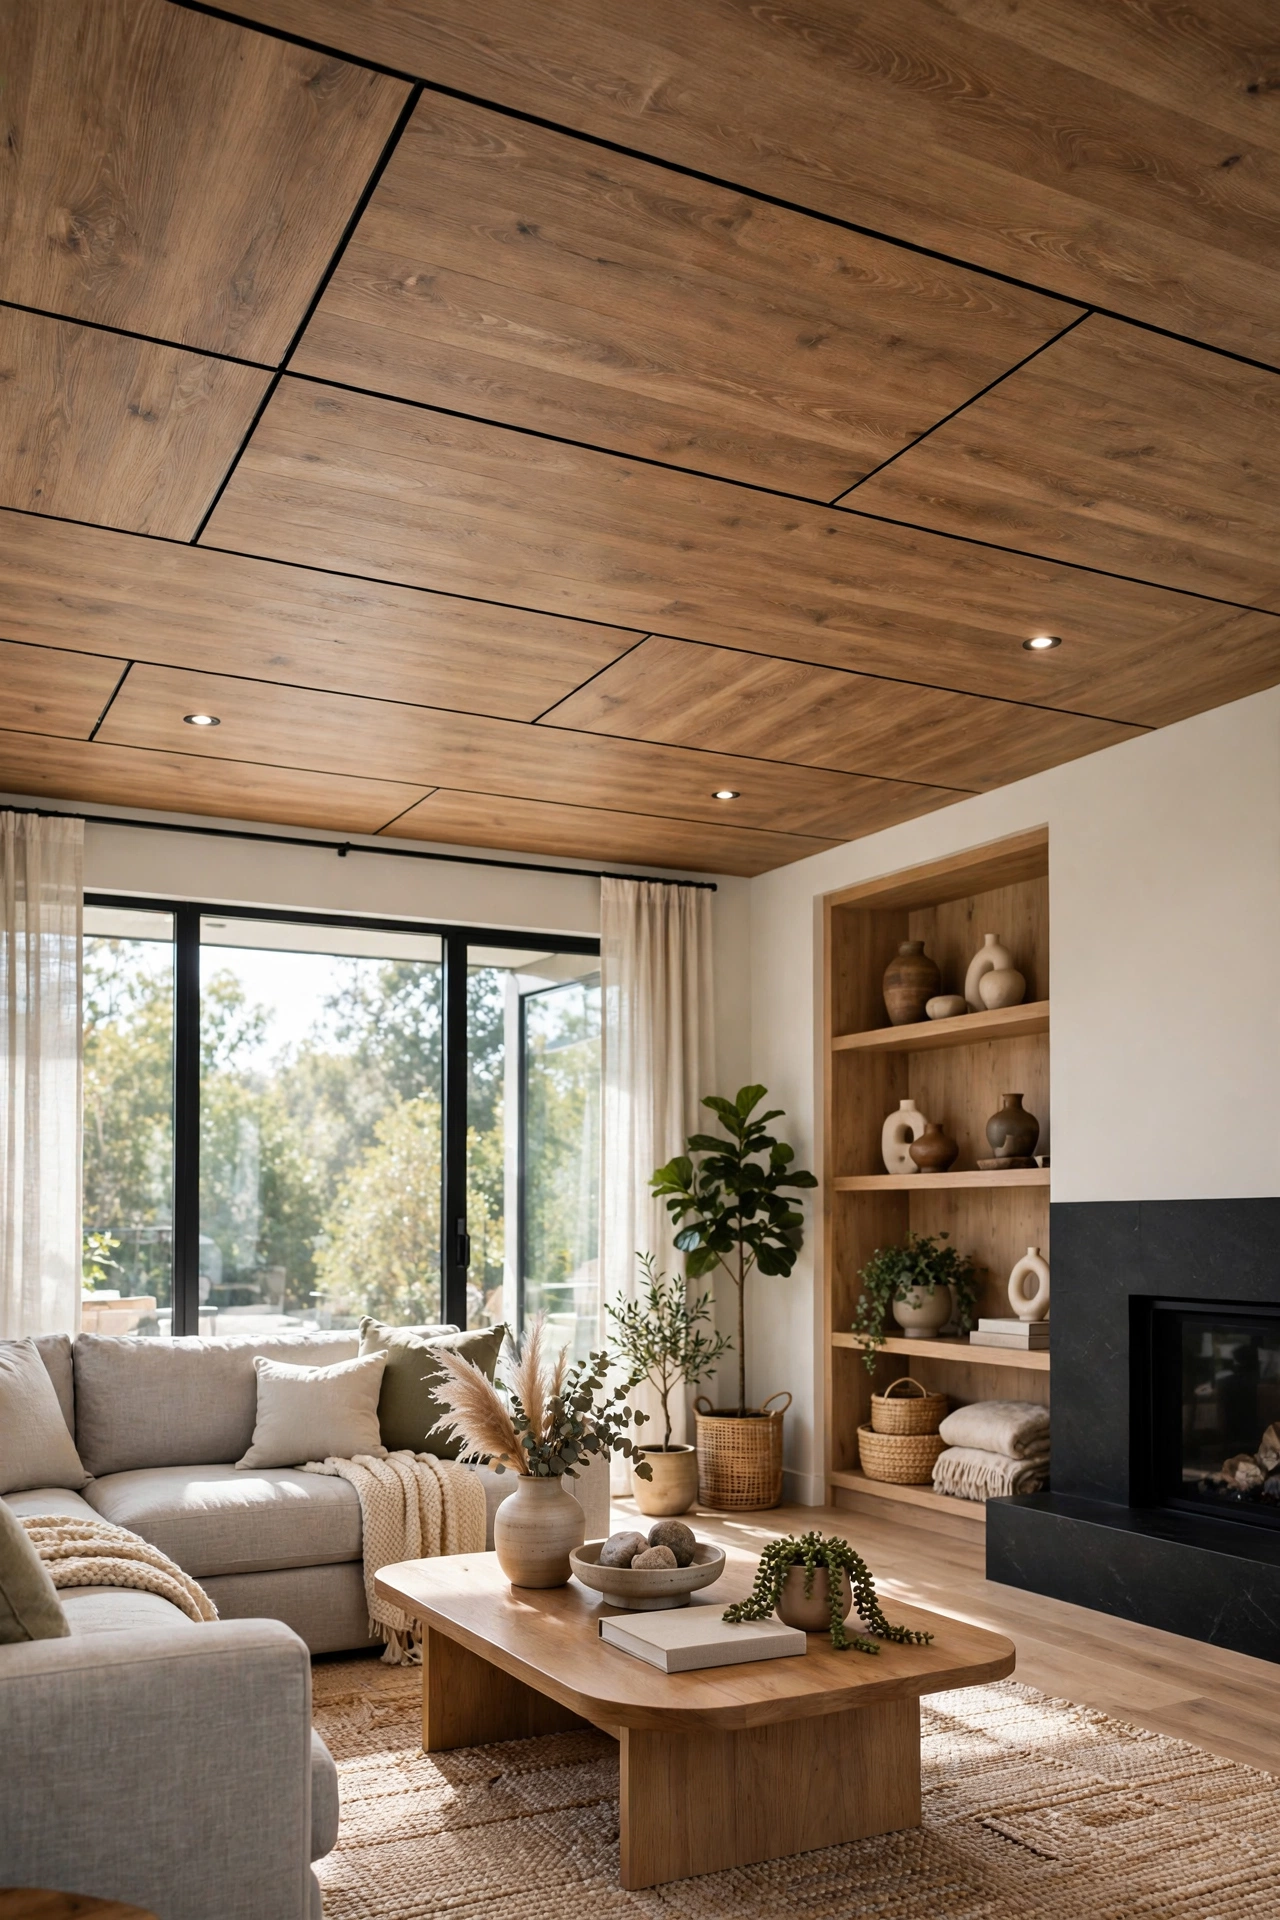
Wood-look laminate panels mimic oak, walnut, and other premium species at laminate prices, and they arrive pre-finished, so there is no staining, sealing, or drying time. Many panels click or glue directly over drywall, and a whole room can be done in a day. The key to a convincing result is choosing a panel with varied grain and matte finish — high-gloss, repeating patterns give the game away. Order samples first and view them overhead in your room’s light before committing. Laminate is also easy to clean and resists moisture better than raw wood, which makes it a practical pick for kitchens and basements.
11. A Mixed-Width Plank Layout
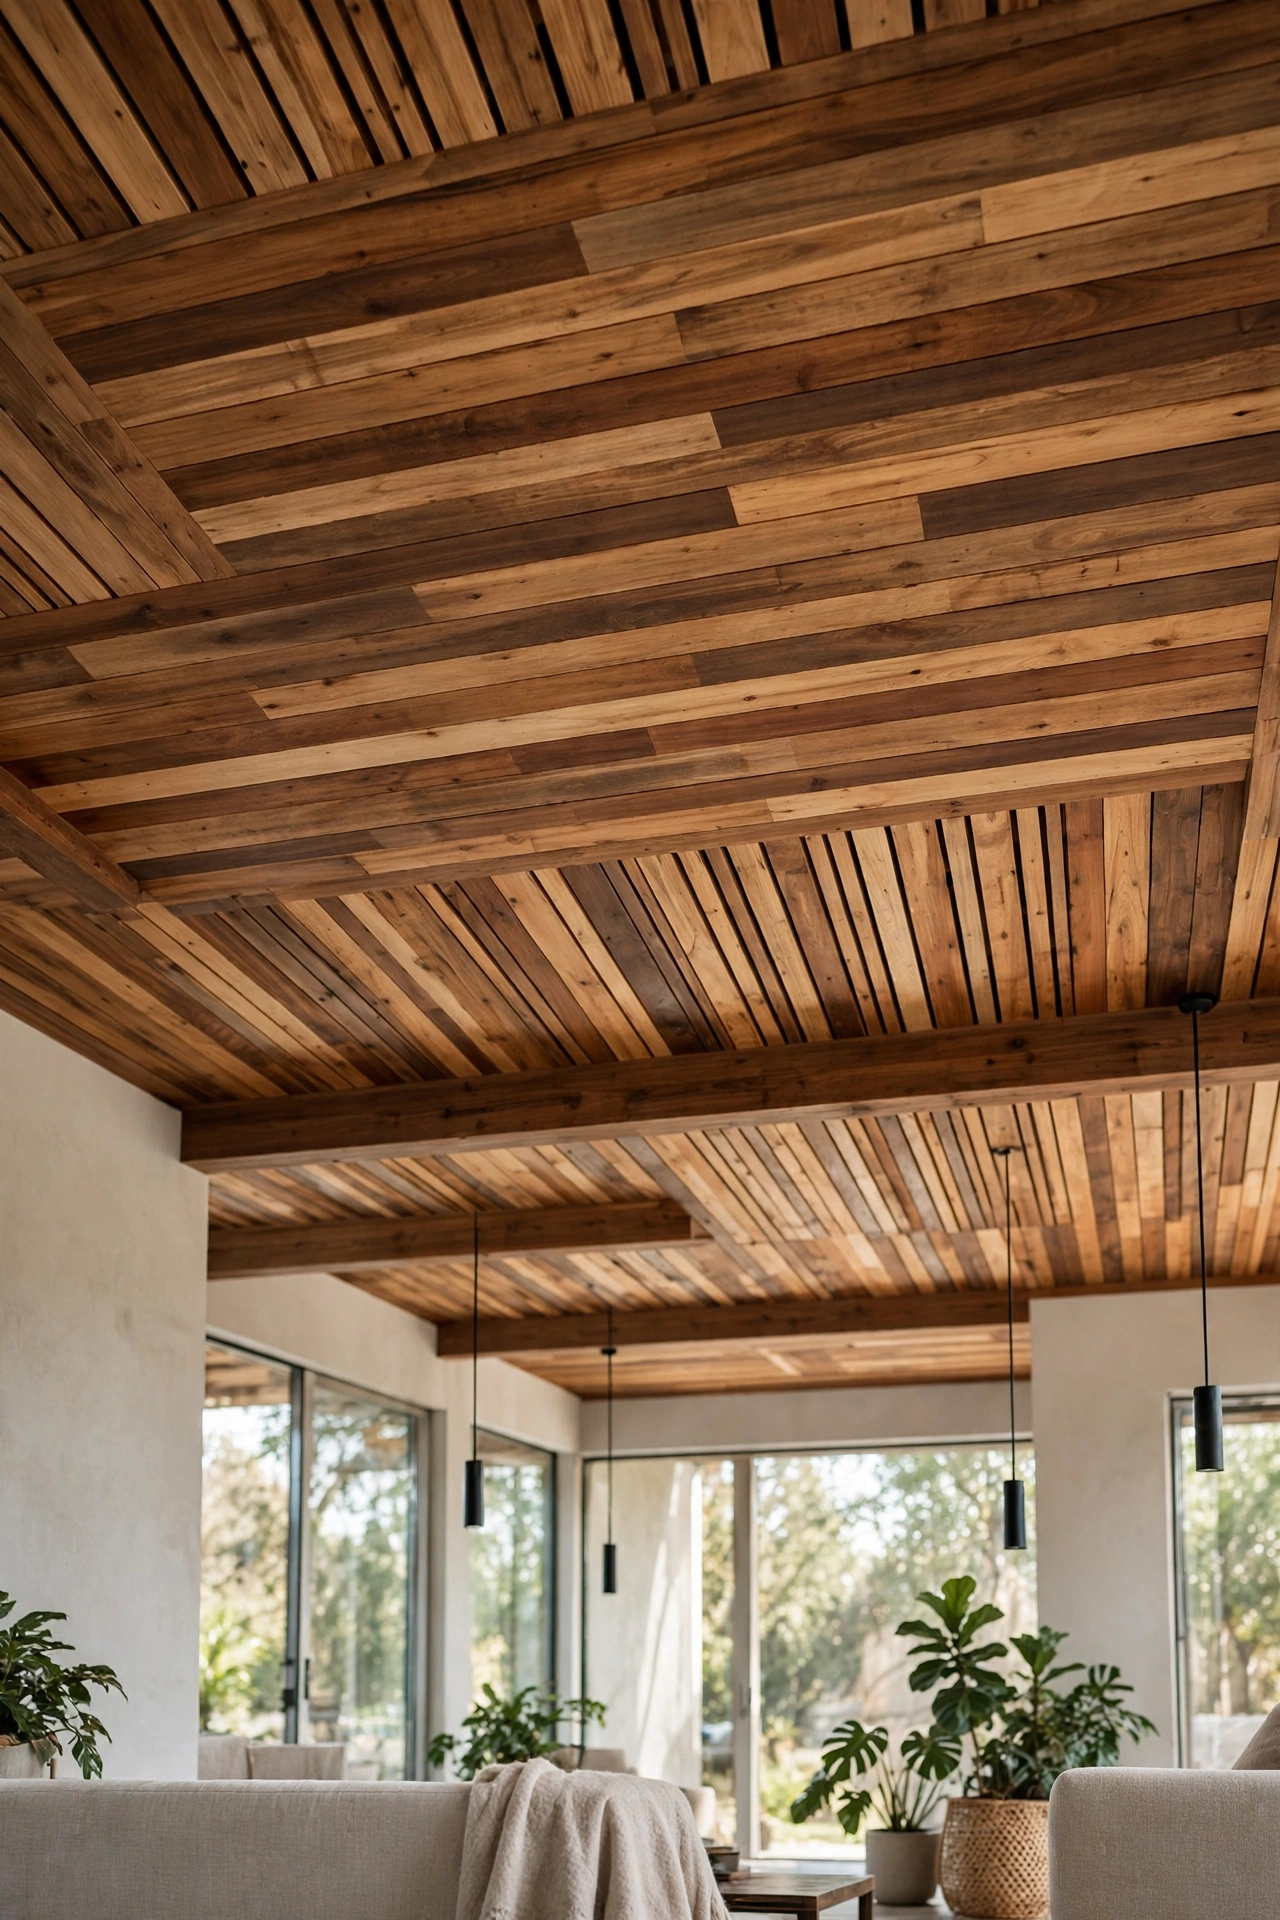
Mixing board widths — say 4-, 6-, and 8-inch planks in one ceiling — is a designer trick that costs nothing extra but makes budget lumber look custom-milled. The varied rhythm breaks up the monotony of uniform boards and mimics the look of high-end, hand-selected plank ceilings. Plan the pattern on paper first so the widths distribute evenly and no two identical widths sit side by side too often. Random looks best when it is actually planned. This layout works with fence pickets, plywood strips, or pine boards, and it pairs well with a single stain color so the width variation, not color variation, carries the design.
12. A Diagonal Plank Run
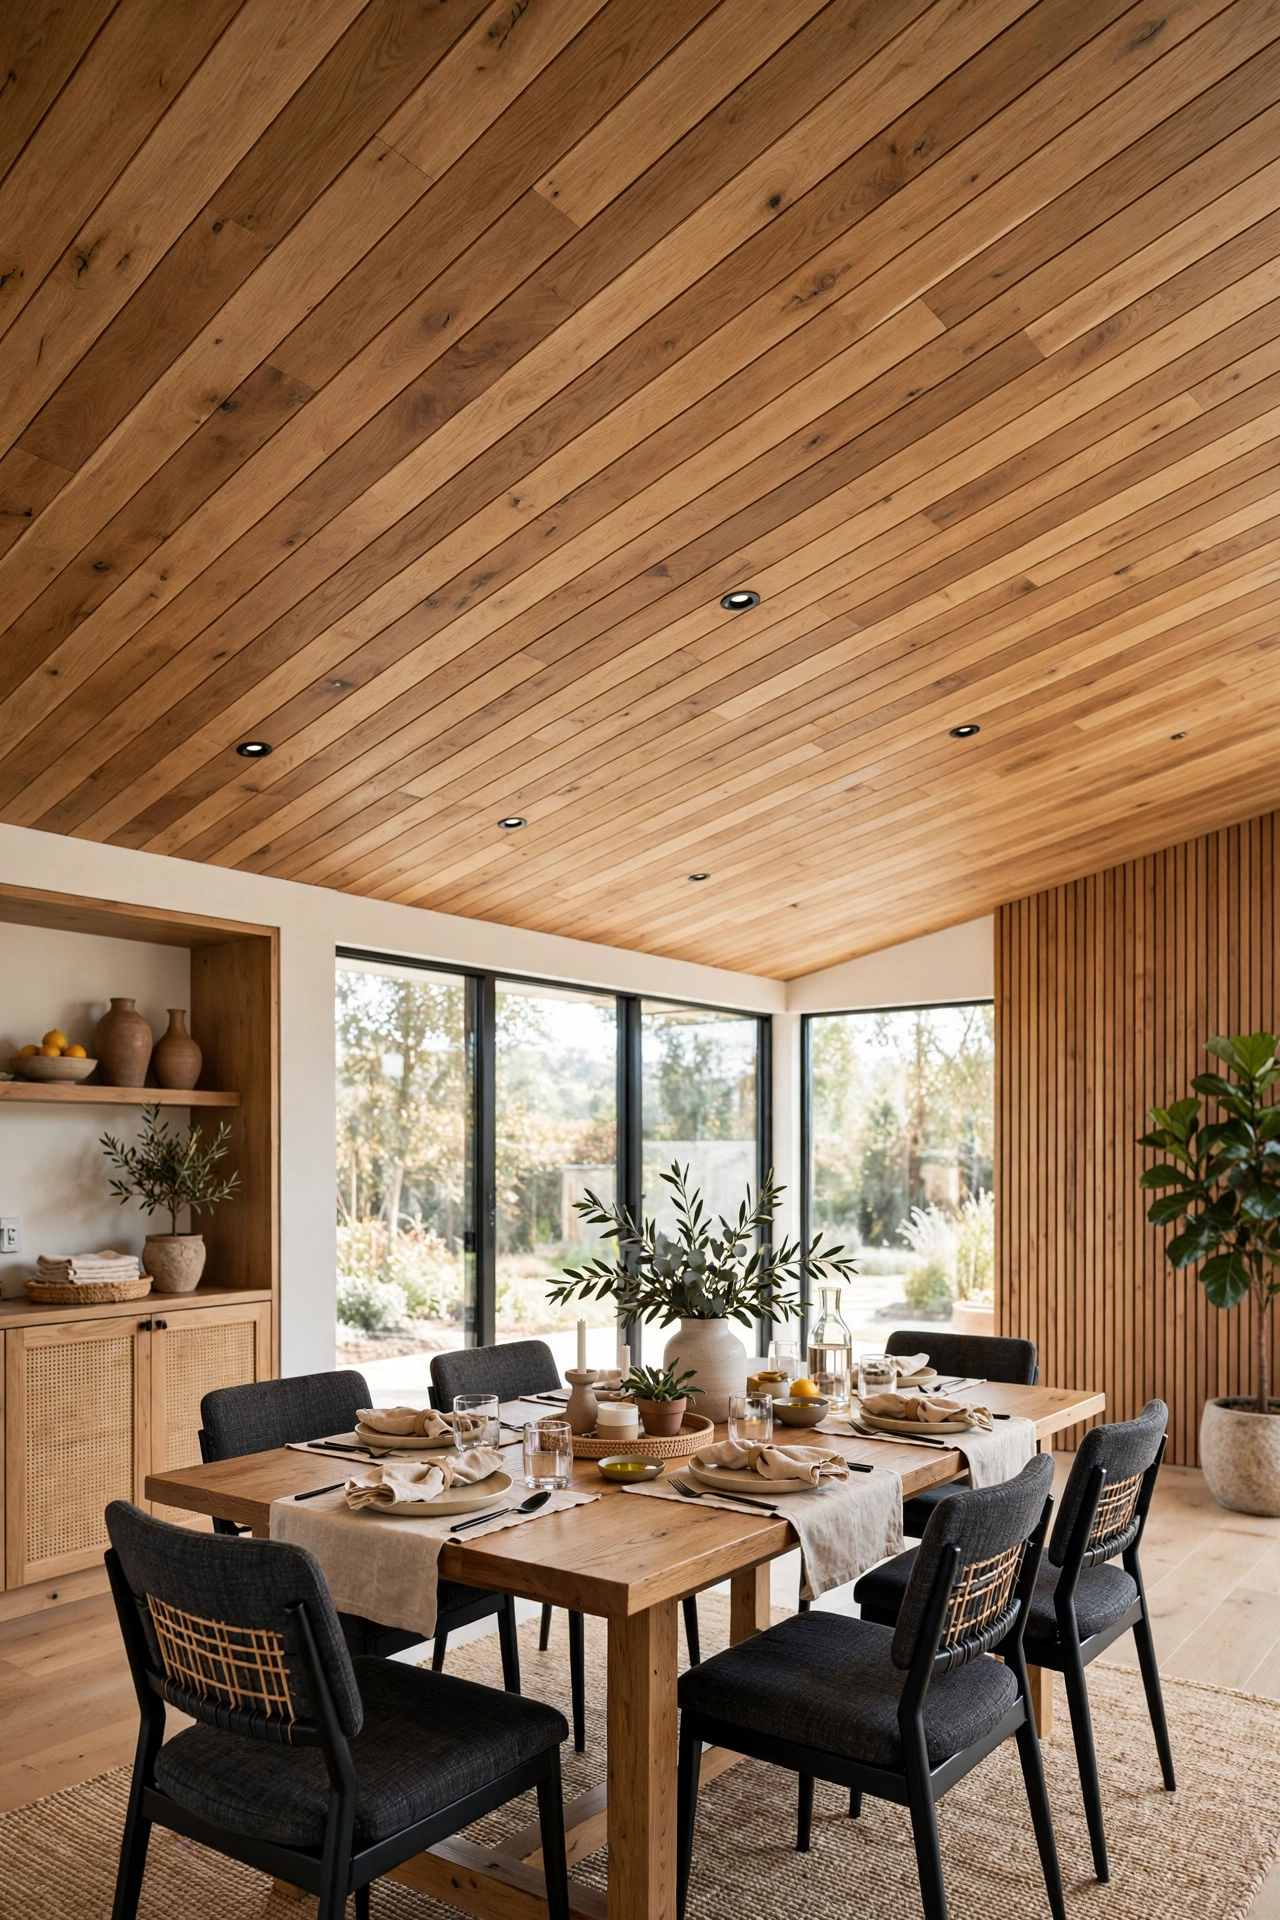
Running planks diagonally instead of straight across the room is a free upgrade: same boards, same cost, much more visual interest. Diagonal lines draw the eye across the ceiling and make a square or boxy room feel more dynamic and less predictable. The trade-off is more cutting — every board meets the wall at an angle — so measure carefully and keep a miter saw handy. Start from the center of the room and work outward so the pattern stays symmetrical, and save offcuts for the edges where short pieces are needed. Diagonal planks suit entryways, dining rooms, and any room where you want the ceiling itself to be a talking point.
13. A Faux Coffered Grid With Trim and Plywood
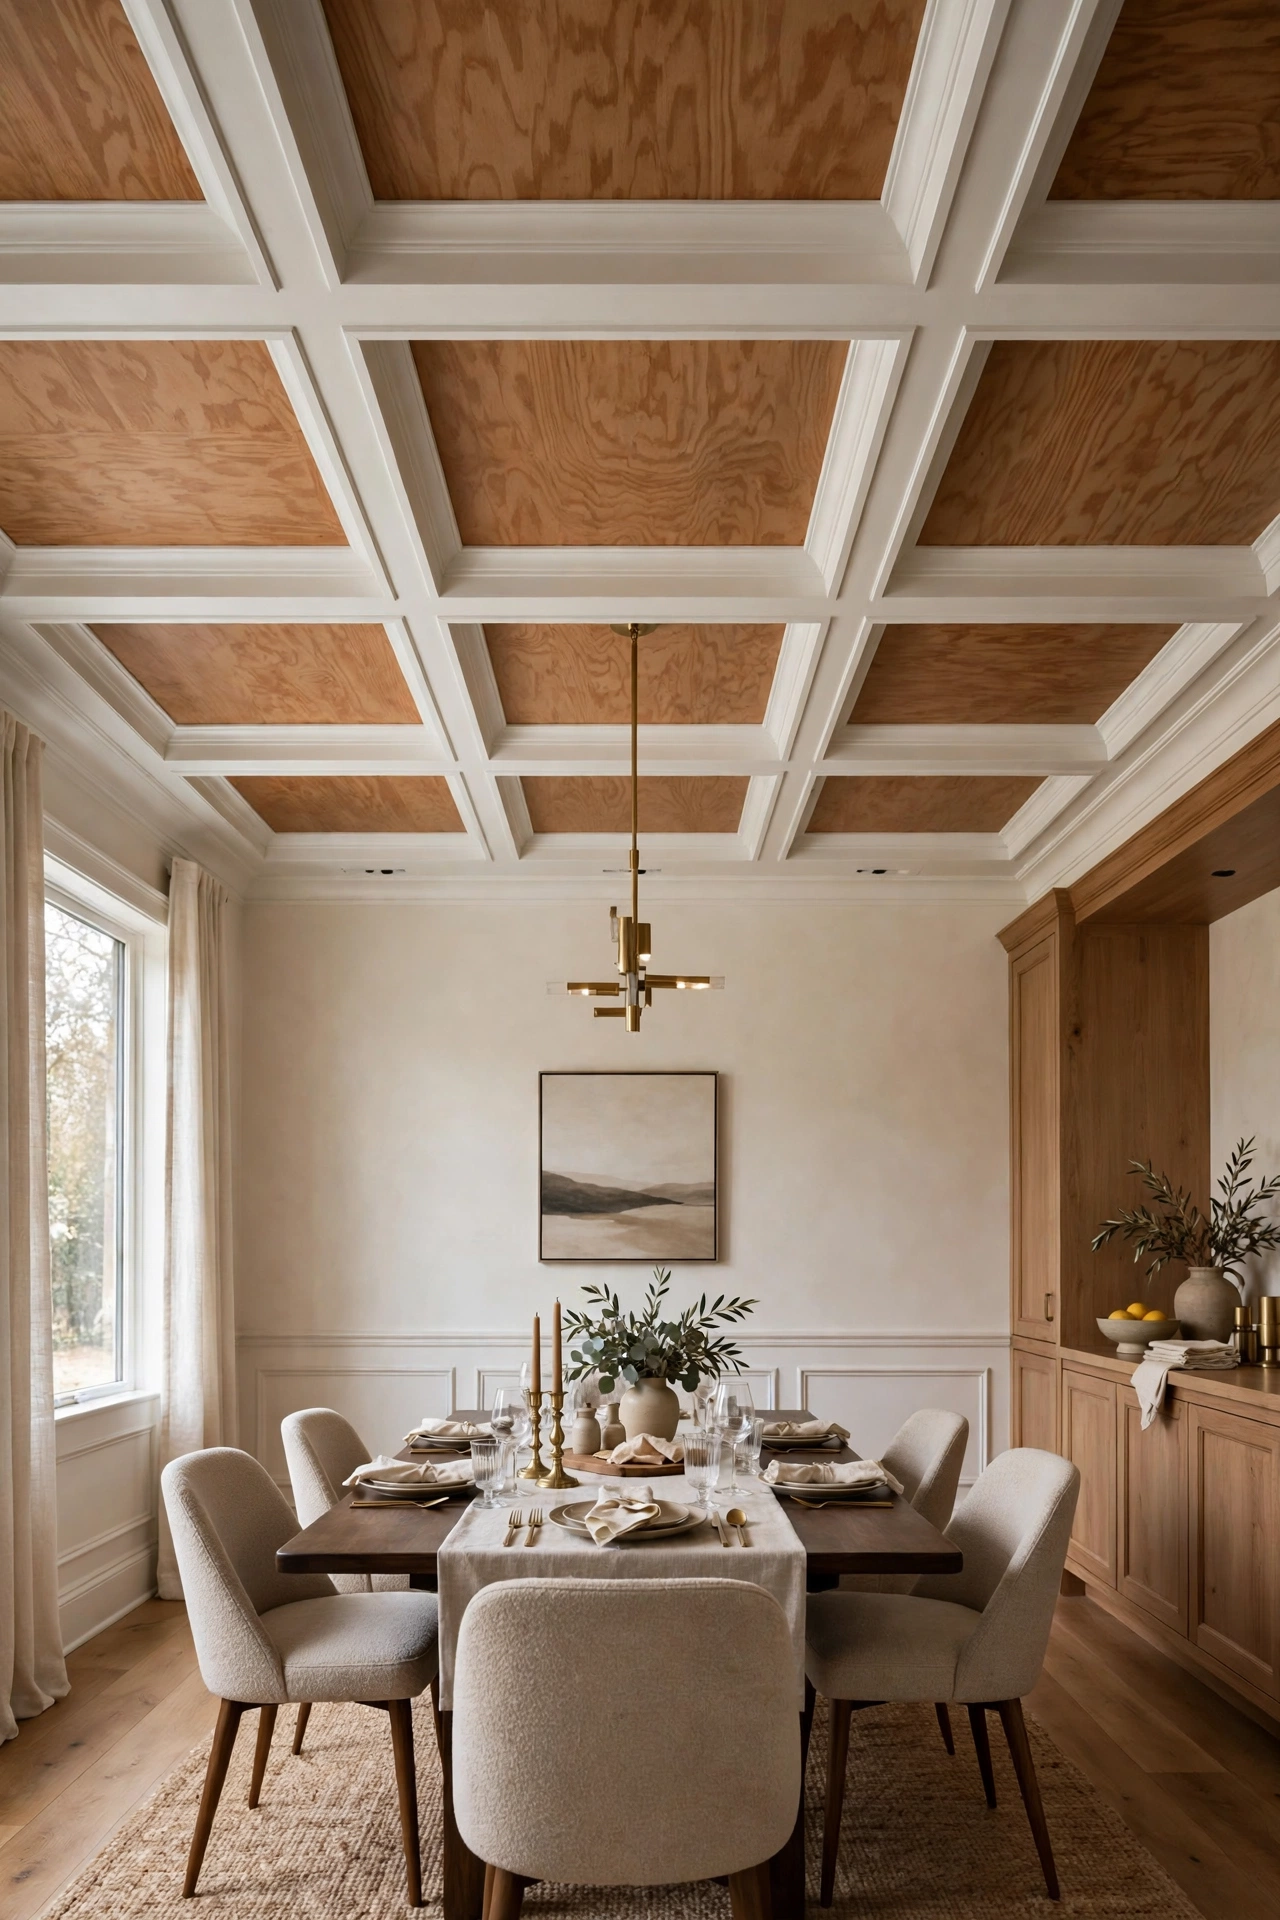
Coffered ceilings look like the most expensive option on this list, but a faux version built from plywood panels and trim molding costs a fraction of real coffers. Lay plywood panels as the ceiling field, then build a grid of shallow trim boxes on top to create the recessed-panel effect. Paint everything one color — white is classic — and the grid reads as genuine architectural millwork. Keep the grid boxes large and evenly spaced so the pattern feels calm rather than busy, and use lightweight trim so the whole assembly stays easy to mount. This ceiling transforms dining rooms and formal living rooms without a single solid beam.
14. Slatted Wood Strips With Shadow Gaps
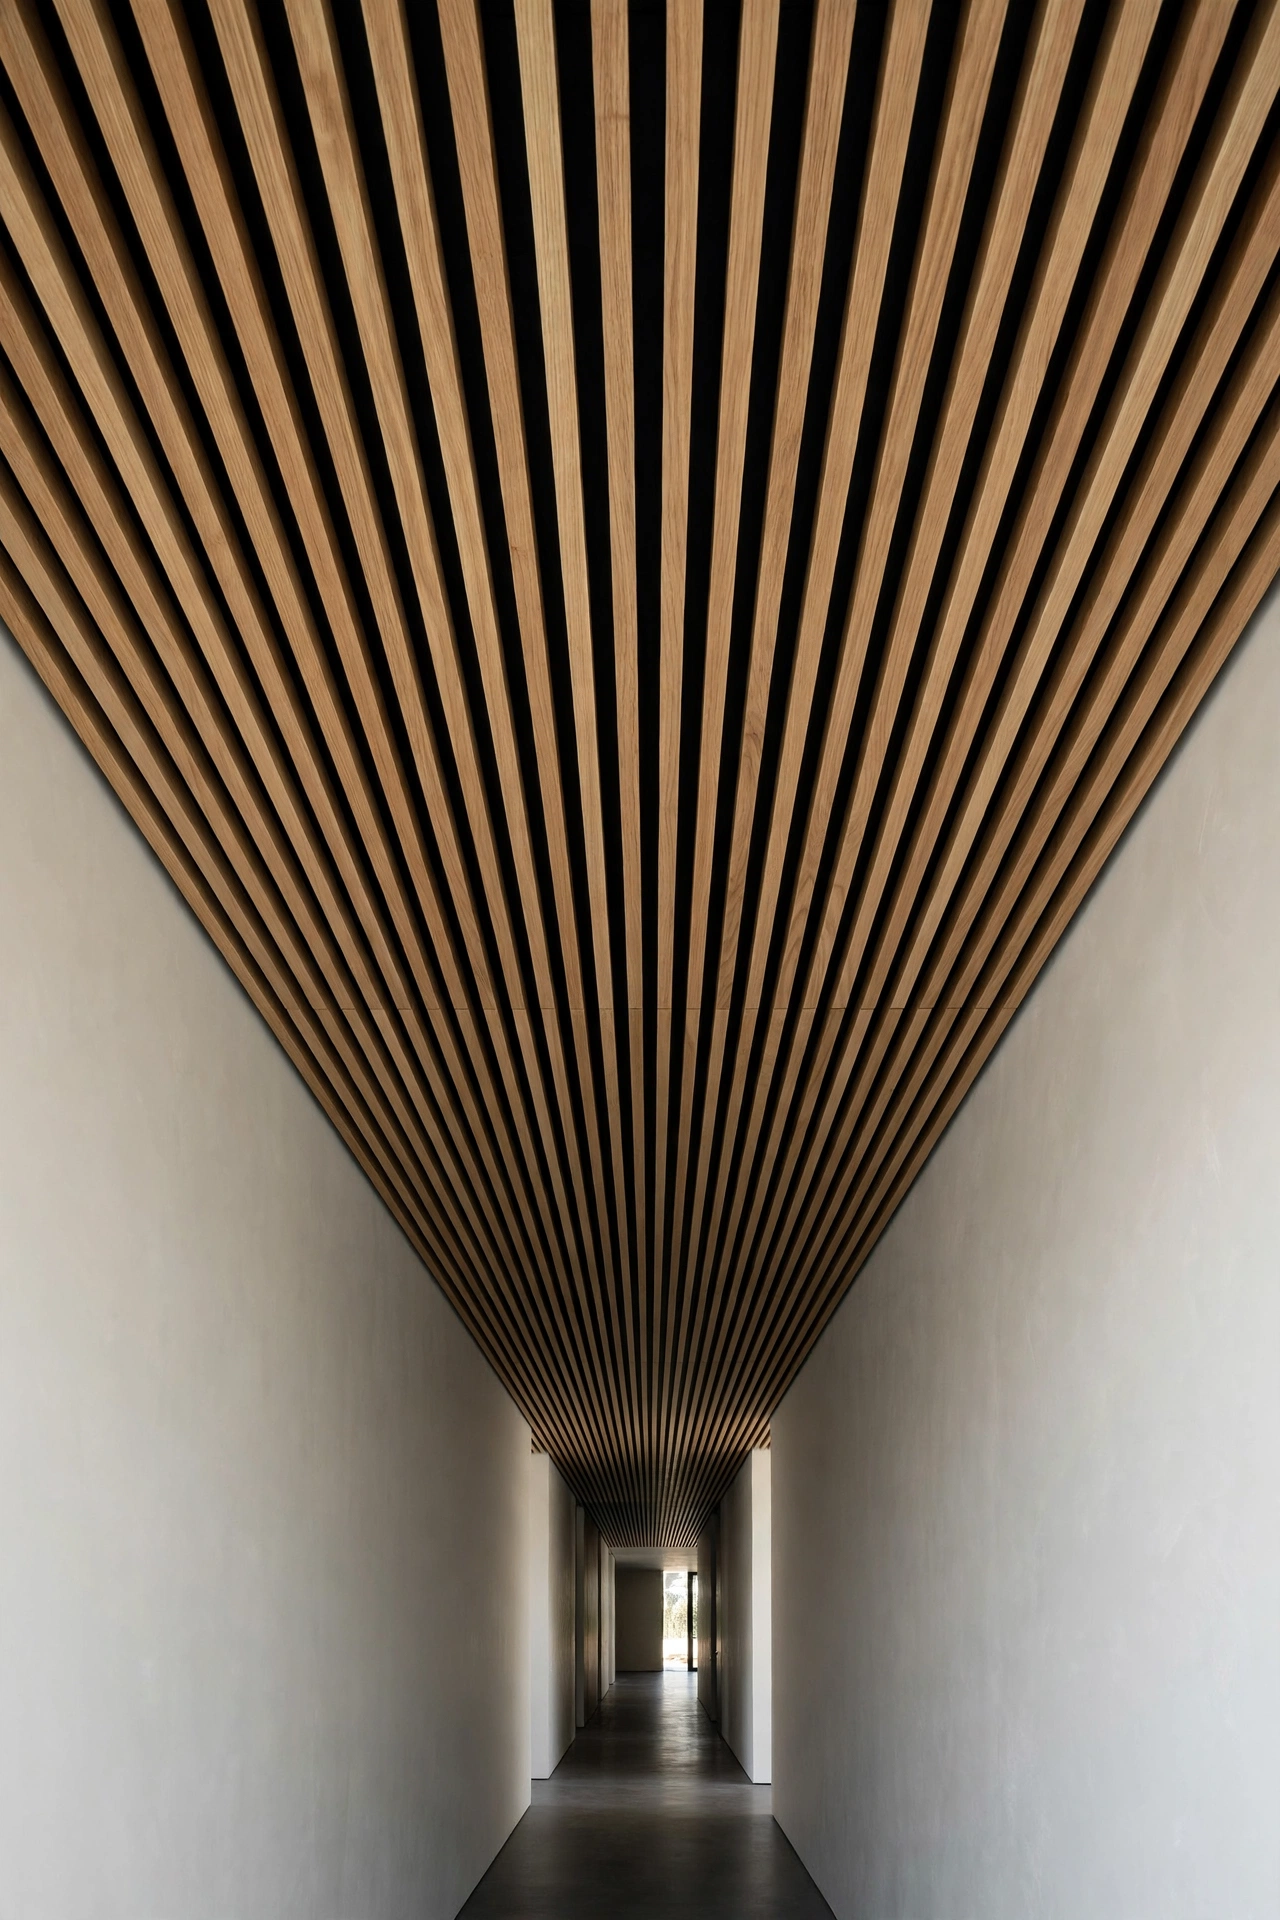
Thin wood slats spaced with even gaps over a dark-painted ceiling create a modern, architectural look that hides a multitude of sins — including an imperfect ceiling underneath. The dark backing makes each slat stand out, and the gaps add rhythm and depth that flat planks cannot match. Use inexpensive pine battens or ripped plywood strips, and space them with a simple spacer block so every gap is identical. This treatment works beautifully in hallways, home offices, and modern living rooms, and it uses surprisingly little wood because the gaps do most of the visual work. Paint the backing matte black or charcoal for the strongest effect.
15. A Zone-Only Plank Ceiling Over a Bed or Table
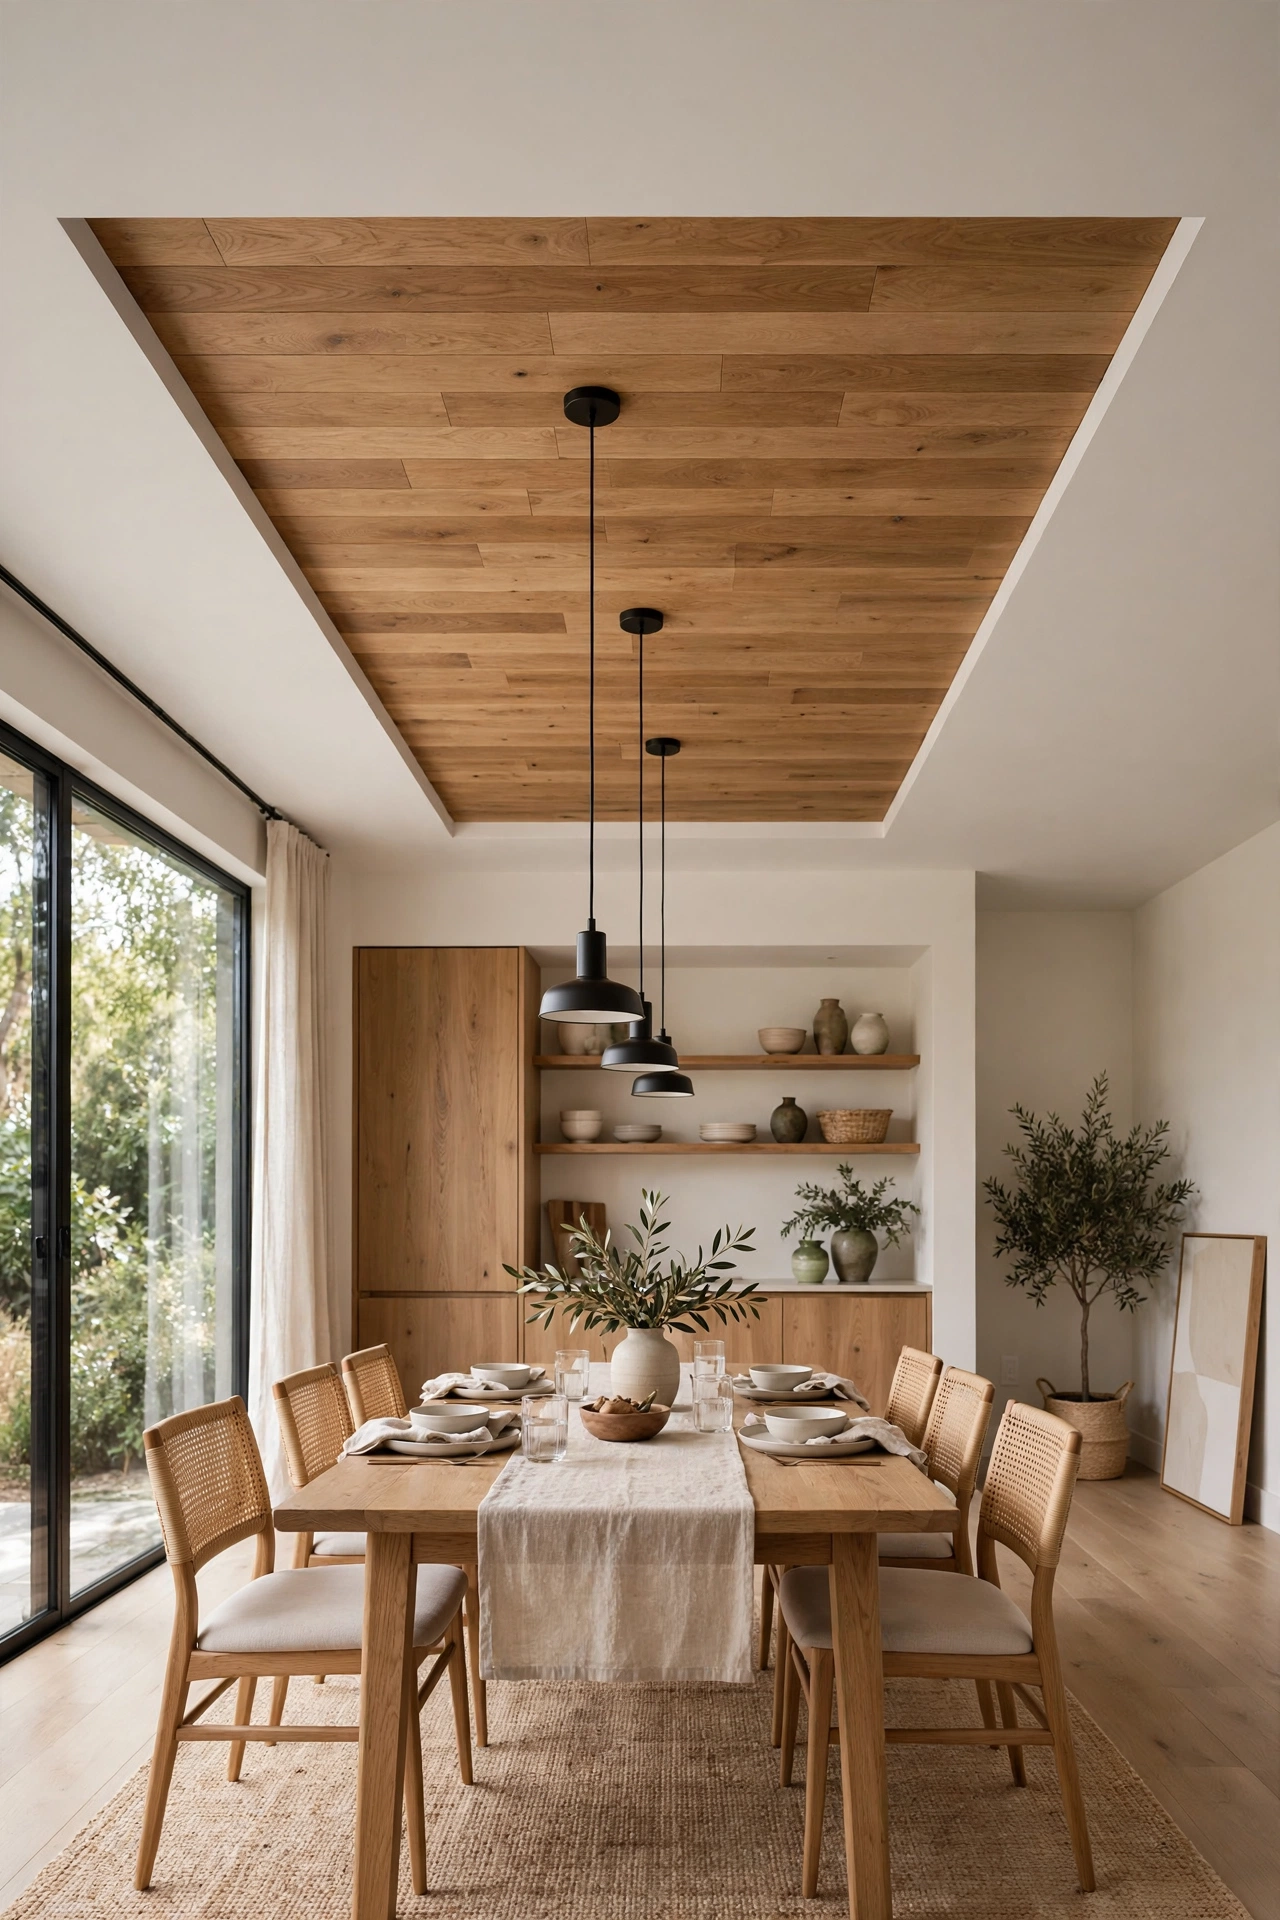
Like the accent section above but more deliberate, a zone-only plank ceiling frames exactly one area — the bed, the dining table, or a kitchen island — and leaves the rest of the ceiling painted. The defined zone acts like a rug overhead: it anchors the furniture below it and gives the room a focal point. Outline the zone with trim or a beam frame so the edge looks finished, and center it carefully over the furniture, not the room, so the alignment feels intentional. Because you are covering only a few square meters, you can use slightly better boards or a richer stain without blowing the budget.
16. Black-Backed Plank Ceiling for Instant Depth
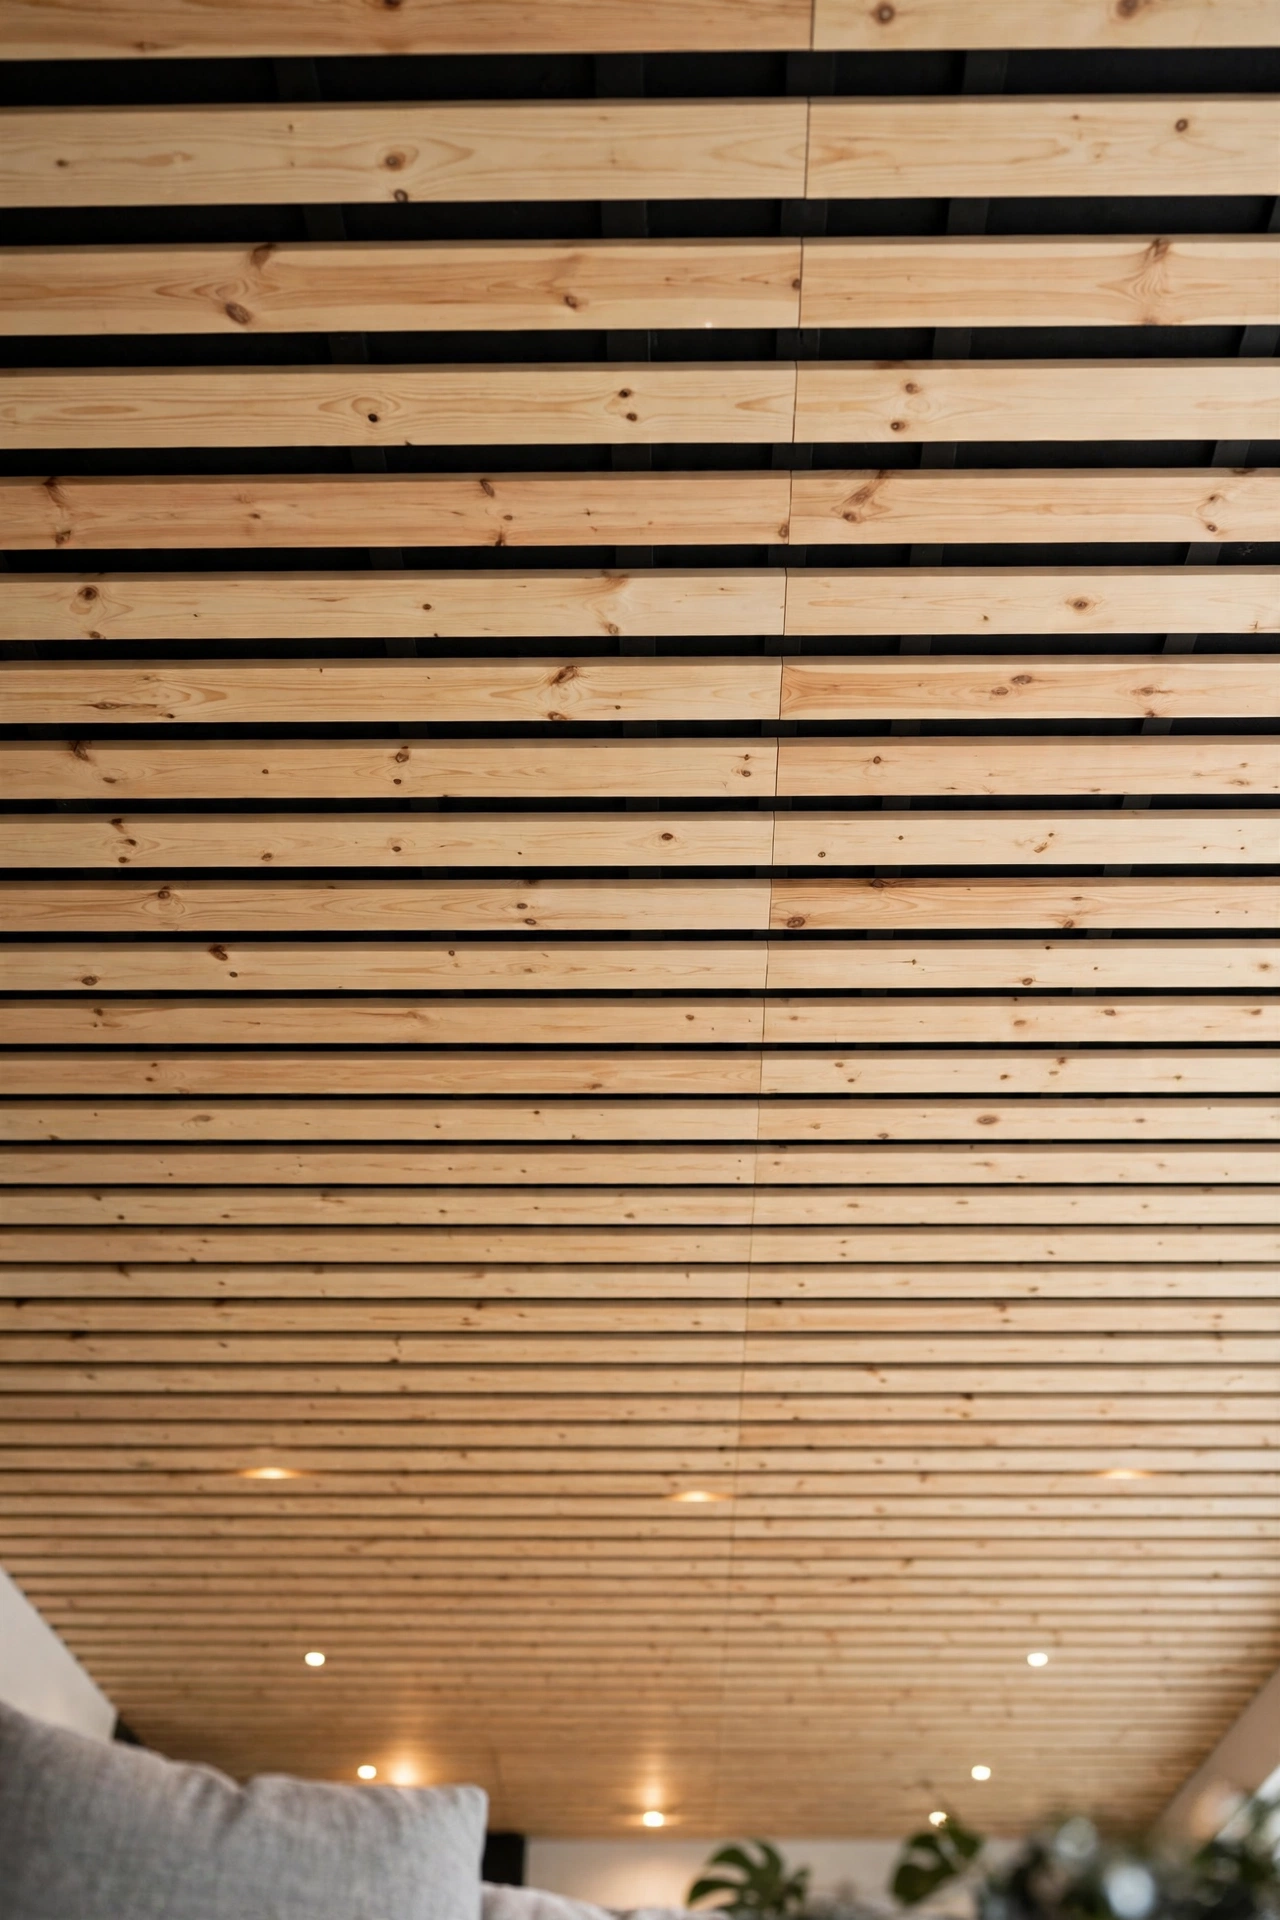
Painting the ceiling black — or laying black roofing felt beneath light planks — is a trick budget builders use to make cheap boards look premium. The dark backing hides gaps, knots, and uneven edges, and the contrast makes light wood pop with a shadow-line effect that mimics expensive shadow-gap paneling. Install furring strips over the dark surface, then nail light pine or fence picket planks over them with small, consistent gaps. The result has depth and intention that tight-butted budget boards often lack. This approach is forgiving for beginners, since the dark layer hides small mistakes.
17. Stained Plywood Panels With a Beam Grid
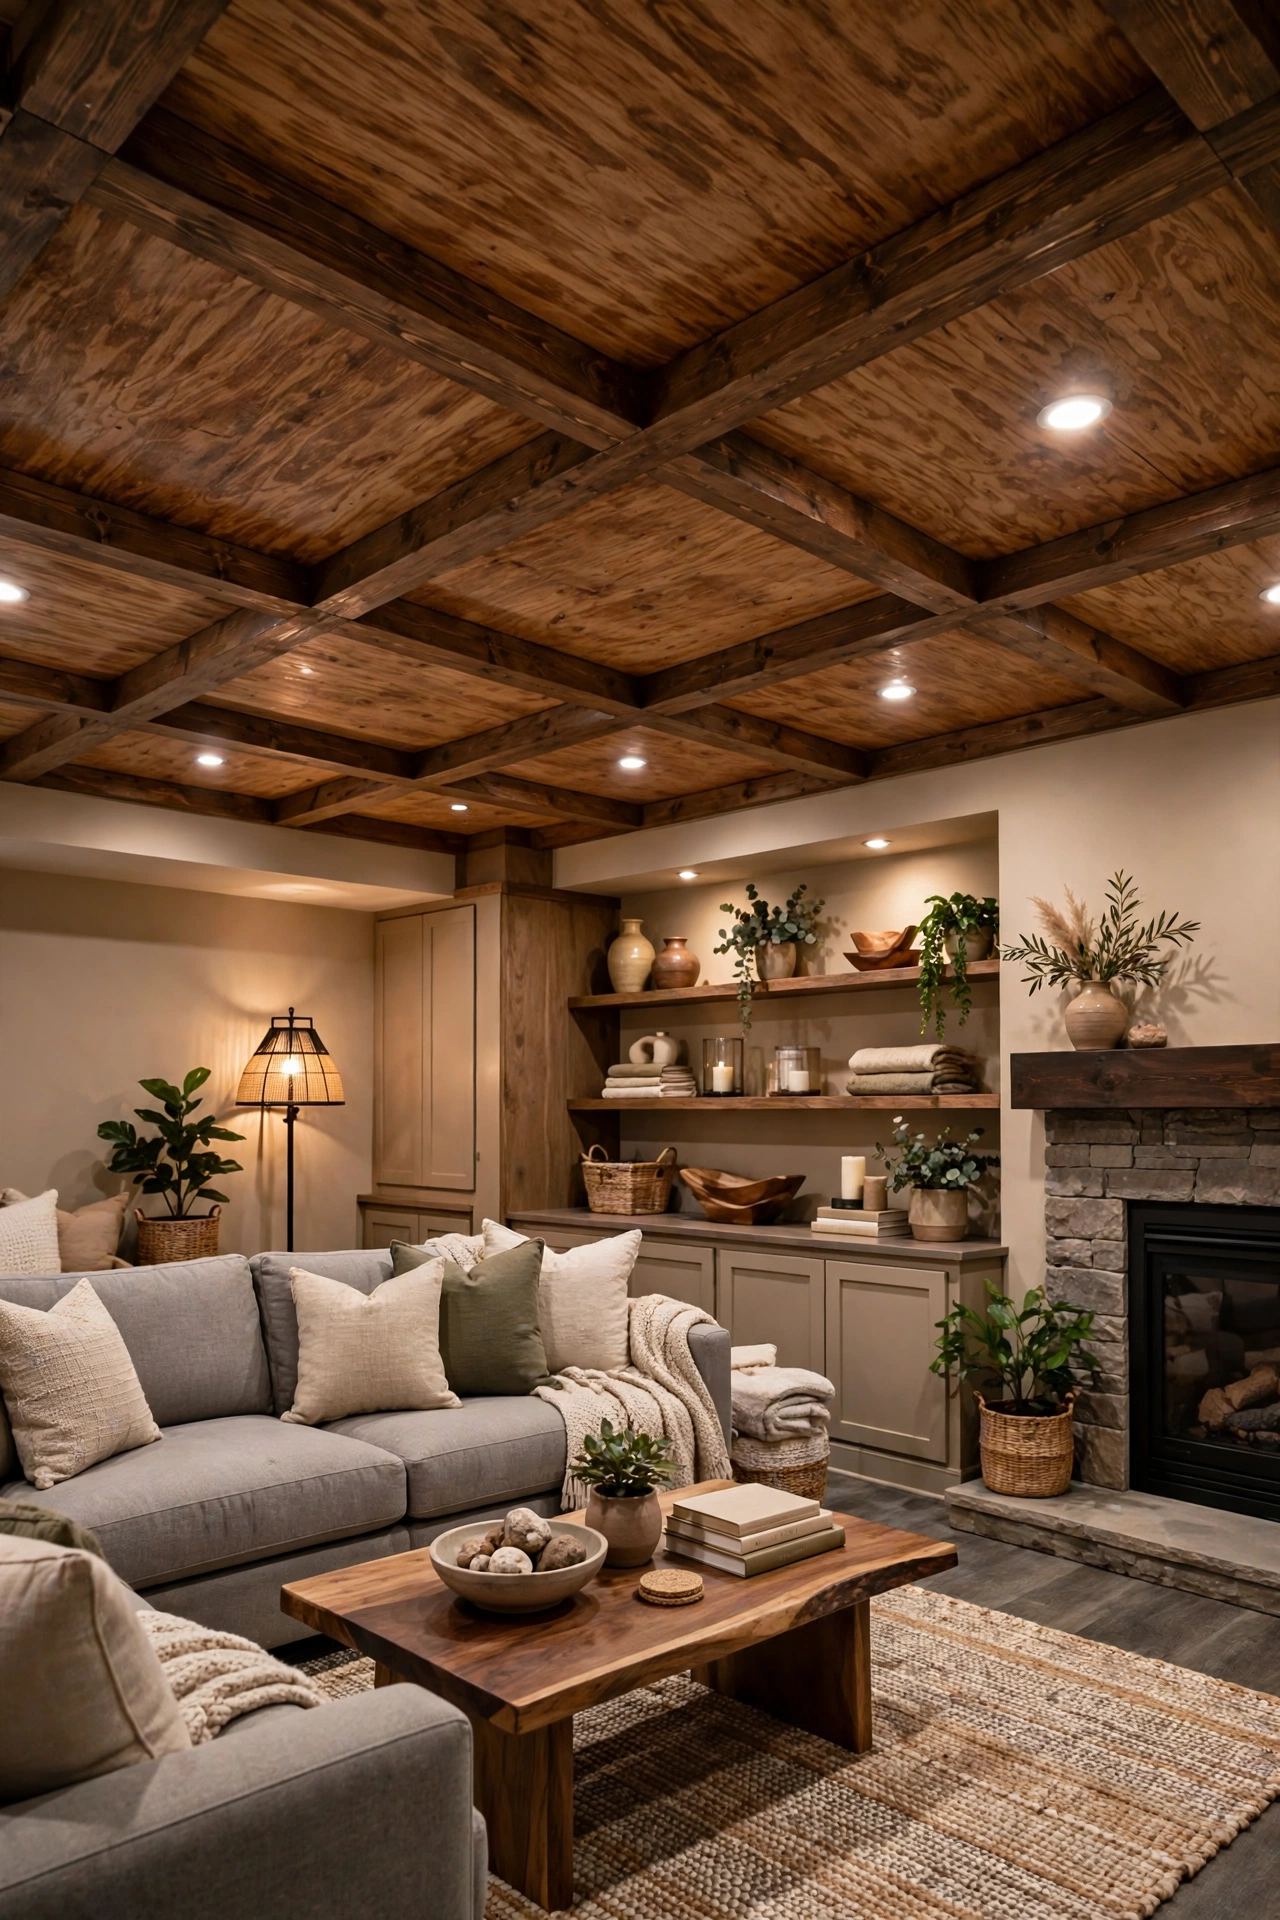
Combine two cheap techniques — stained plywood panels and a simple beam grid — and you get a ceiling that looks like a craftsman built it. Stain plywood sheets in a warm wood tone, mount them as the field, then add a grid of hollow faux beams or flat trim boards over the seams. The beams hide every panel joint, so the ceiling reads as one continuous wood surface with real structure. Keep the beam spacing generous, around 4 feet, so the grid feels architectural rather than cluttered. This is an excellent basement or family-room ceiling, where it covers old drywall and adds warmth in one project.
18. Wood Ceiling With Recessed LED Strip Lighting
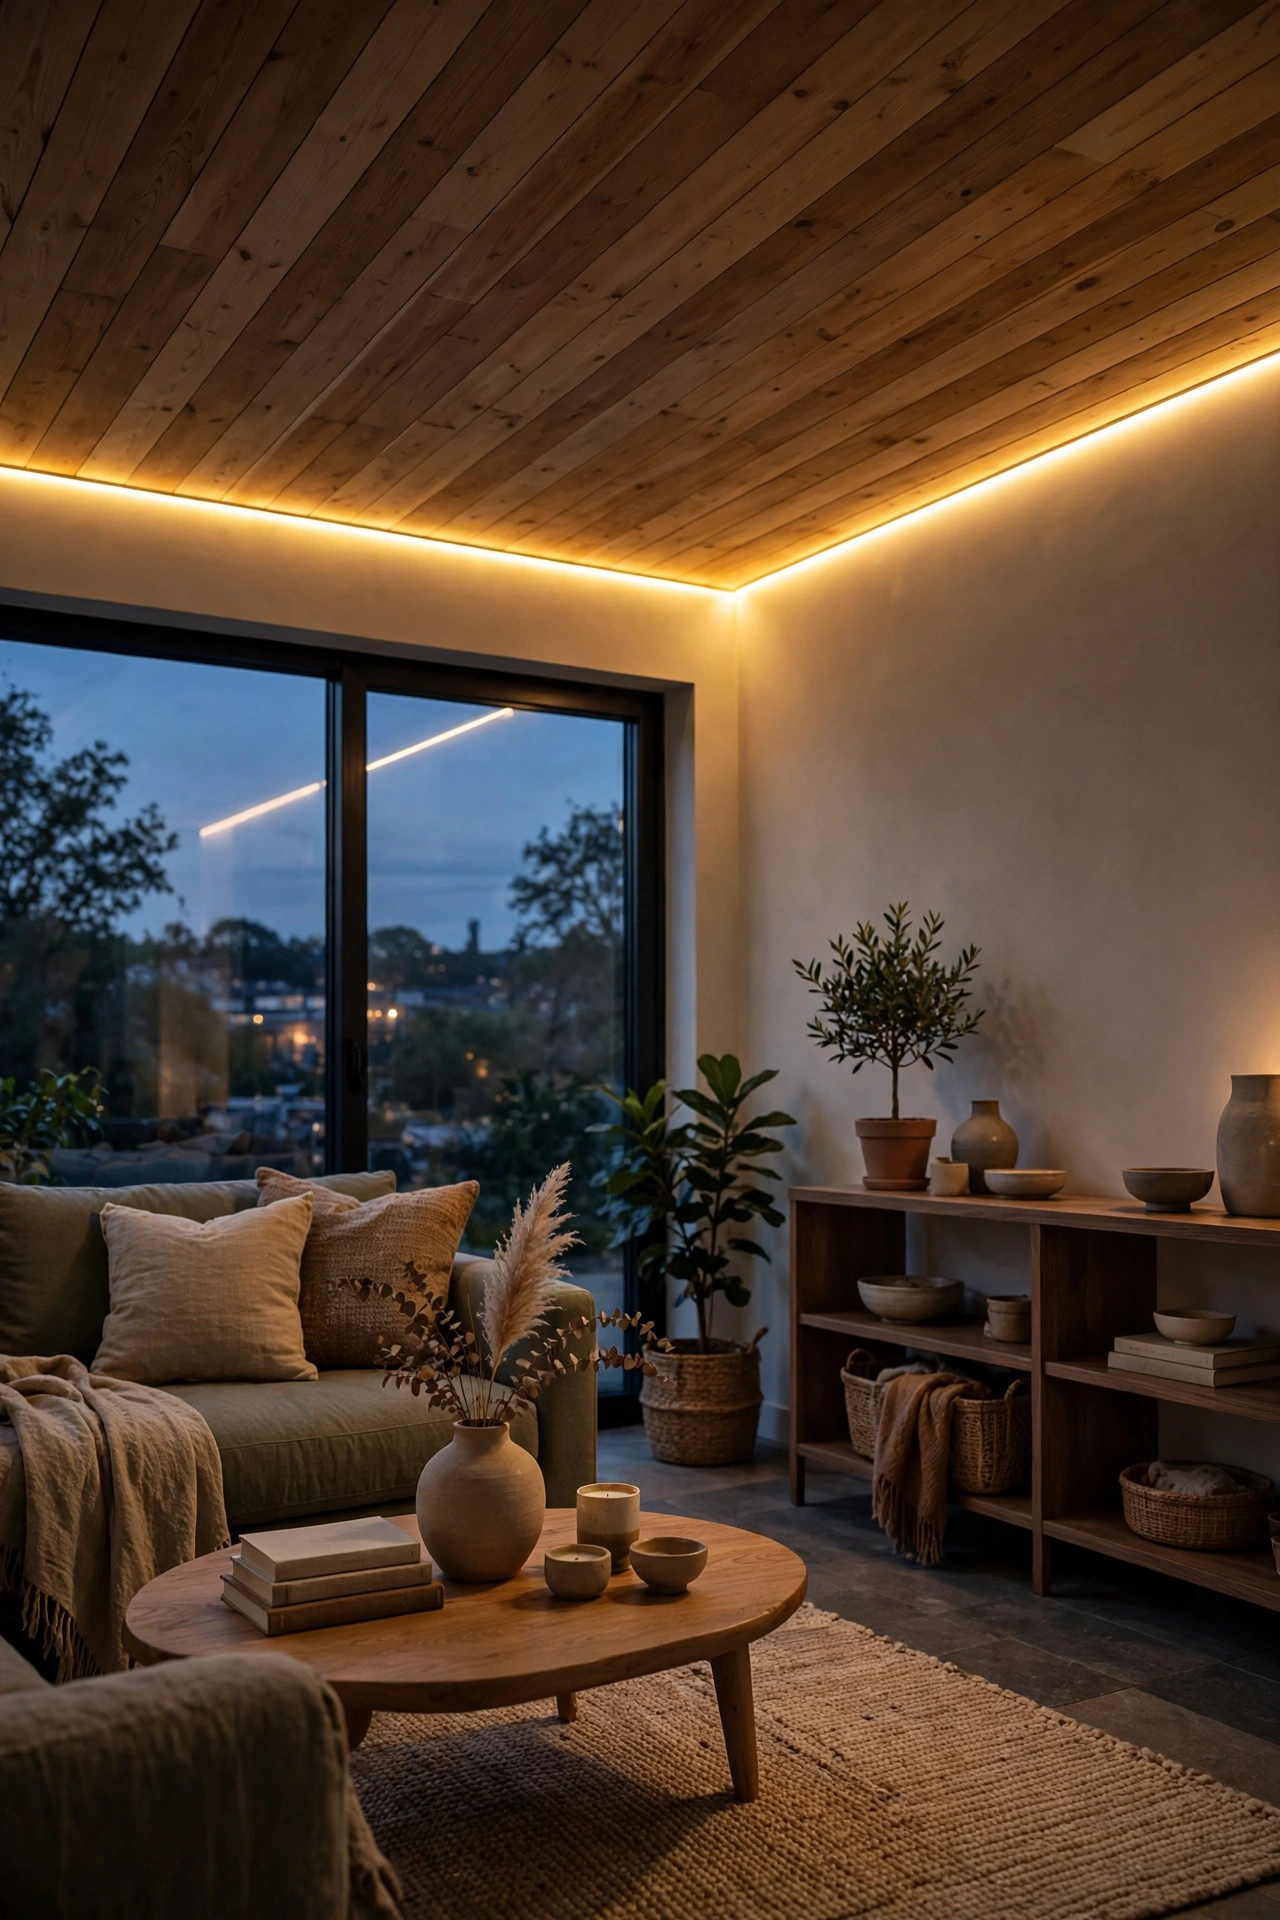
Lighting is what separates a good wood ceiling from a great one. Tucking warm-white LED strips into the gap between a wood ceiling and the wall, or behind a faux beam, washes the wood with a soft glow that highlights the grain and makes the whole ceiling feel designed. LED strips are cheap, use little power, and install with adhesive backing or simple clips. Choose warm white (around 2700K) so the wood looks rich rather than washed out, and put the strips on a dimmer so you can tune the mood. The glow also hides any rough edges where the ceiling meets the wall, which is a welcome bonus on a budget build.
19. A Wood Border Frame With a Painted Center
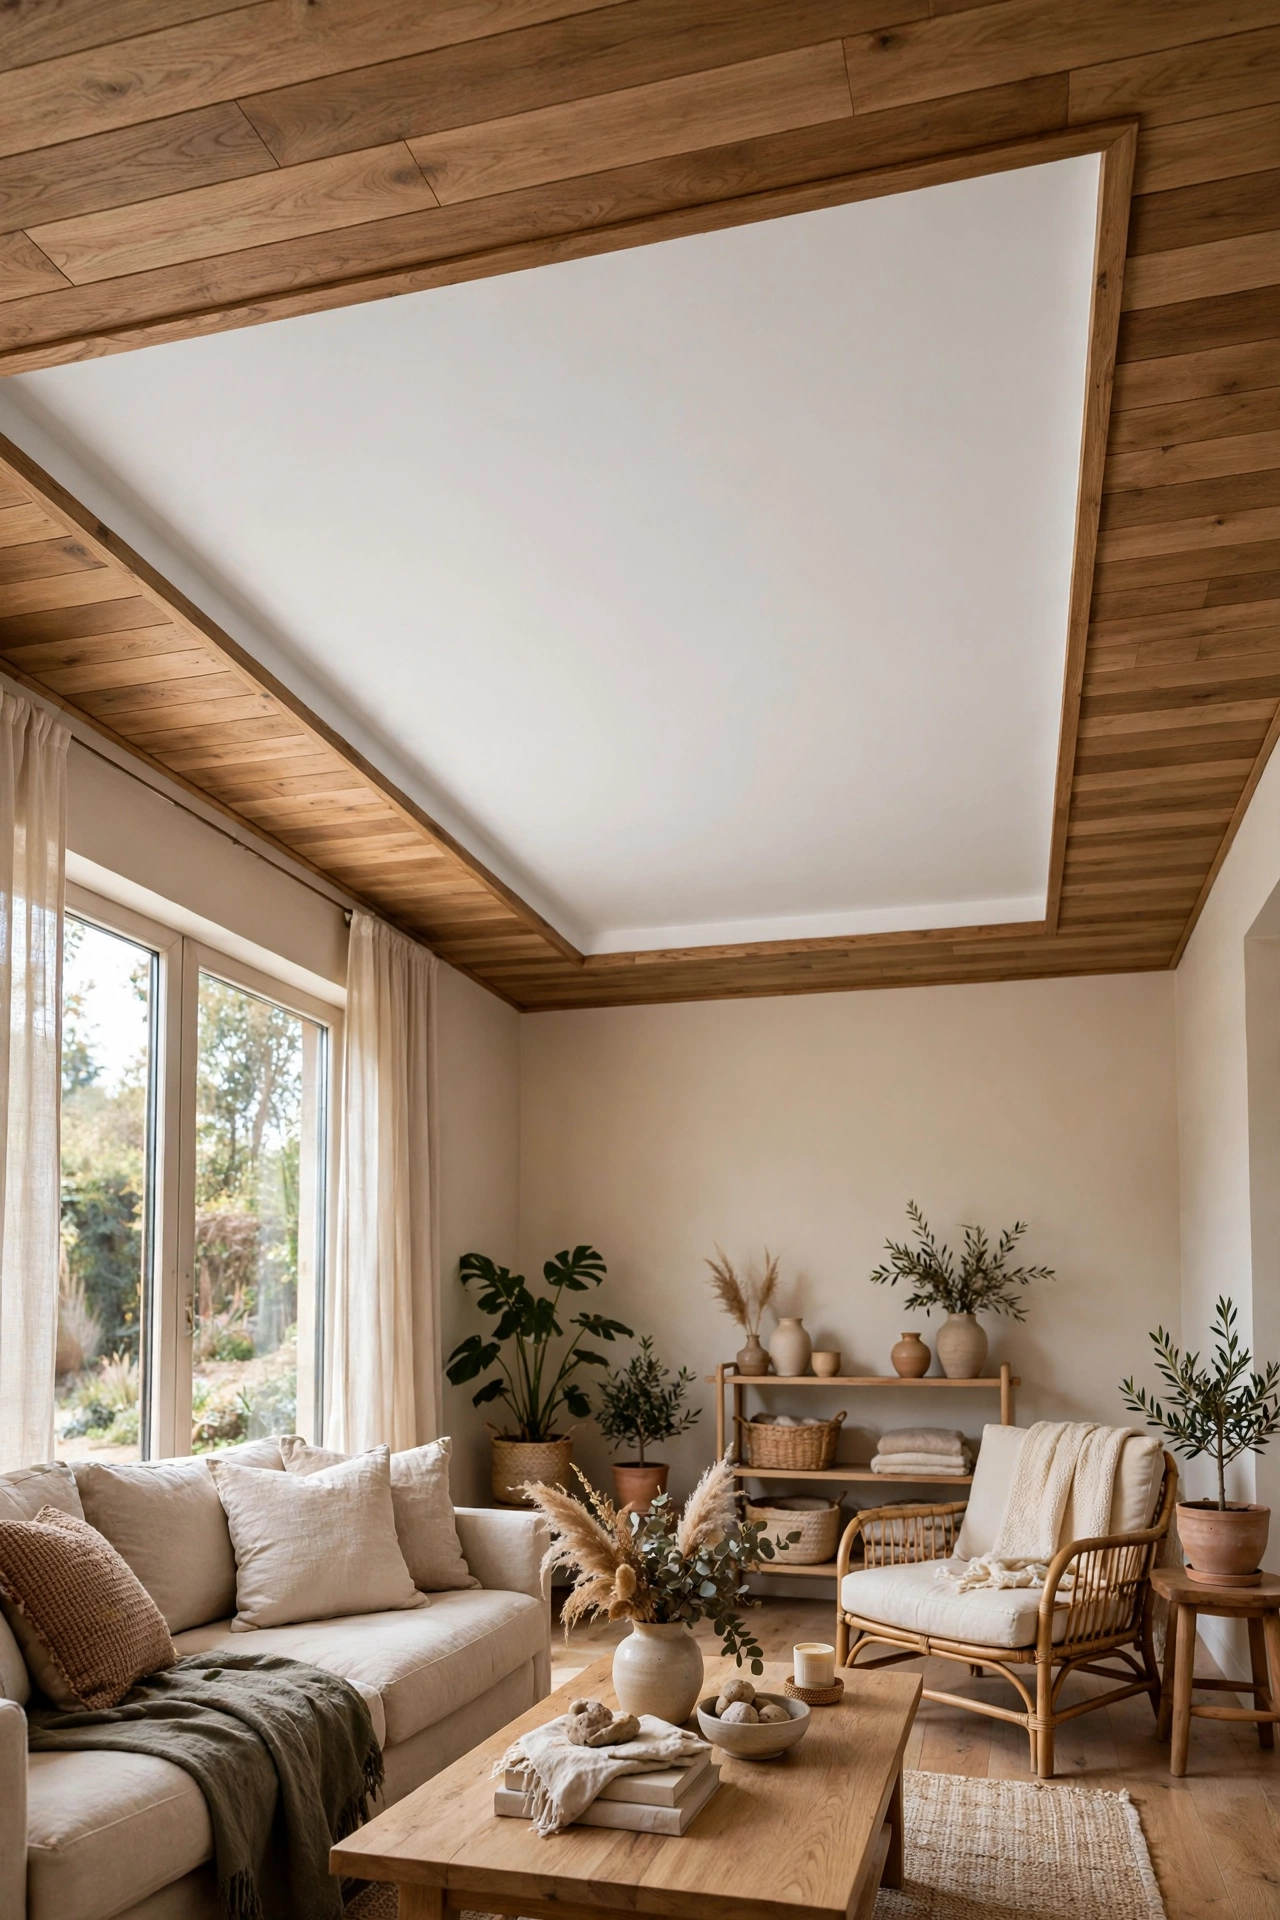
If covering the whole ceiling feels like too much wood, frame it instead: run a wide wood border around the perimeter of the ceiling and leave the center painted. The border — planks or trim boards in a warm stain — gives the room the wood accent it needs while the painted center keeps things bright and airy. This treatment is cheap because the border uses a fraction of the lumber a full ceiling needs, and it is forgiving to install since only the outer band needs precise cuts. Add a simple ceiling medallion or a pendant light in the painted center, and the border frames it like a picture. It suits living rooms, bedrooms, and dining rooms equally well.
Frequently Asked Questions
What is the cheapest way to do a wood ceiling?
Fence picket planks and plywood ripped into strips are usually the cheapest real-wood options, often costing just a few dollars per square foot in materials. Peel-and-stick wood-look planks can be cheaper still for small rooms, since they need no tools beyond a utility knife. Always compare the price per square foot for your room size before choosing.
Can I install a wood ceiling over drywall?
Yes, in most cases. Attach furring strips to the ceiling joists through the drywall, then nail or glue your planks to the strips. This avoids demolition, gives you a level surface to work on, and lets you run wiring or LED strips behind the wood if needed.
Do I need to remove a popcorn ceiling first?
Not necessarily. Planks, panels, and furring strips can usually go straight over a popcorn ceiling, which is one of the reasons wood ceilings are popular for covering dated finishes. If the popcorn is loose or flaking, scrape the loose sections and seal the surface first so the new ceiling has a sound base.
What wood is best for a budget ceiling?
Pine is the best all-rounder: affordable, easy to cut and stain, and widely available. Cedar fence pickets suit rustic looks, plywood suits modern plank ceilings, and beadboard panels suit cottage styles. Avoid expensive hardwoods unless the area is very small.
How do I keep a cheap wood ceiling from looking cheap?
Consistency is everything: stain boards before installation, keep gaps even, paint the backing dark if gaps will show, and finish edges with trim. Mixed widths, diagonal runs, and good lighting also lift budget materials into a custom look.
Is a wood ceiling safe in a kitchen or bathroom?
Yes, with the right finish. Seal the wood with a moisture-resistant clear coat, keep it away from direct steam and splashes, and choose laminate or sealed panels for the most humid spots. Avoid untreated raw wood in bathrooms, where moisture can warp boards over time.
Conclusion
A wood ceiling does not need a luxury budget — it needs the right material and a little planning. Whether you choose fence picket planks, plywood strips, a faux beam grid, or a simple whitewashed pine ceiling, the warmth and character of real wood will transform the room for far less than custom millwork. Start with your room’s size and style, pick the idea that fits your skill level, and finish the edges properly: that is what makes a cheap ceiling look expensive. For more home ideas, explore our garage makeover ideas, staggered floating shelves ideas, backyard ideas, tree bookshelf ideas, glass coffee table decor ideas, and white oak bathroom vanity ideas.