25 Staggered Floating Shelves Ideas to Turn Blank Walls Into Art
Blank walls are wasted potential. Perfectly aligned shelves can look predictable, but staggered floating shelves break the grid and instantly add movement, rhythm, and personality to a room. By mounting shelves at different heights, lengths, and positions, you create a composition that feels intentional rather than installed — a wall that looks curated, not just furnished. Staggered shelves also solve real problems: they fit awkward corners, frame a TV or fireplace, give plants better light, and add storage without bulky cabinets eating up floor space. The trick is balance. Vary the heights enough to feel dynamic, but keep the spacing, materials, and styling consistent enough that the wall reads as one design, not a random collection of boards. In this guide, you will find 25 genuinely distinct staggered floating shelves ideas for every room in the house — from minimalist living-room trios to LED-lit display walls, kitchen spice ledges, and bathroom spa shelves — plus practical tips on spacing, weight limits, and styling so your shelves look designer-finished from day one.
1. Minimalist White Oak Trio Above the Sofa
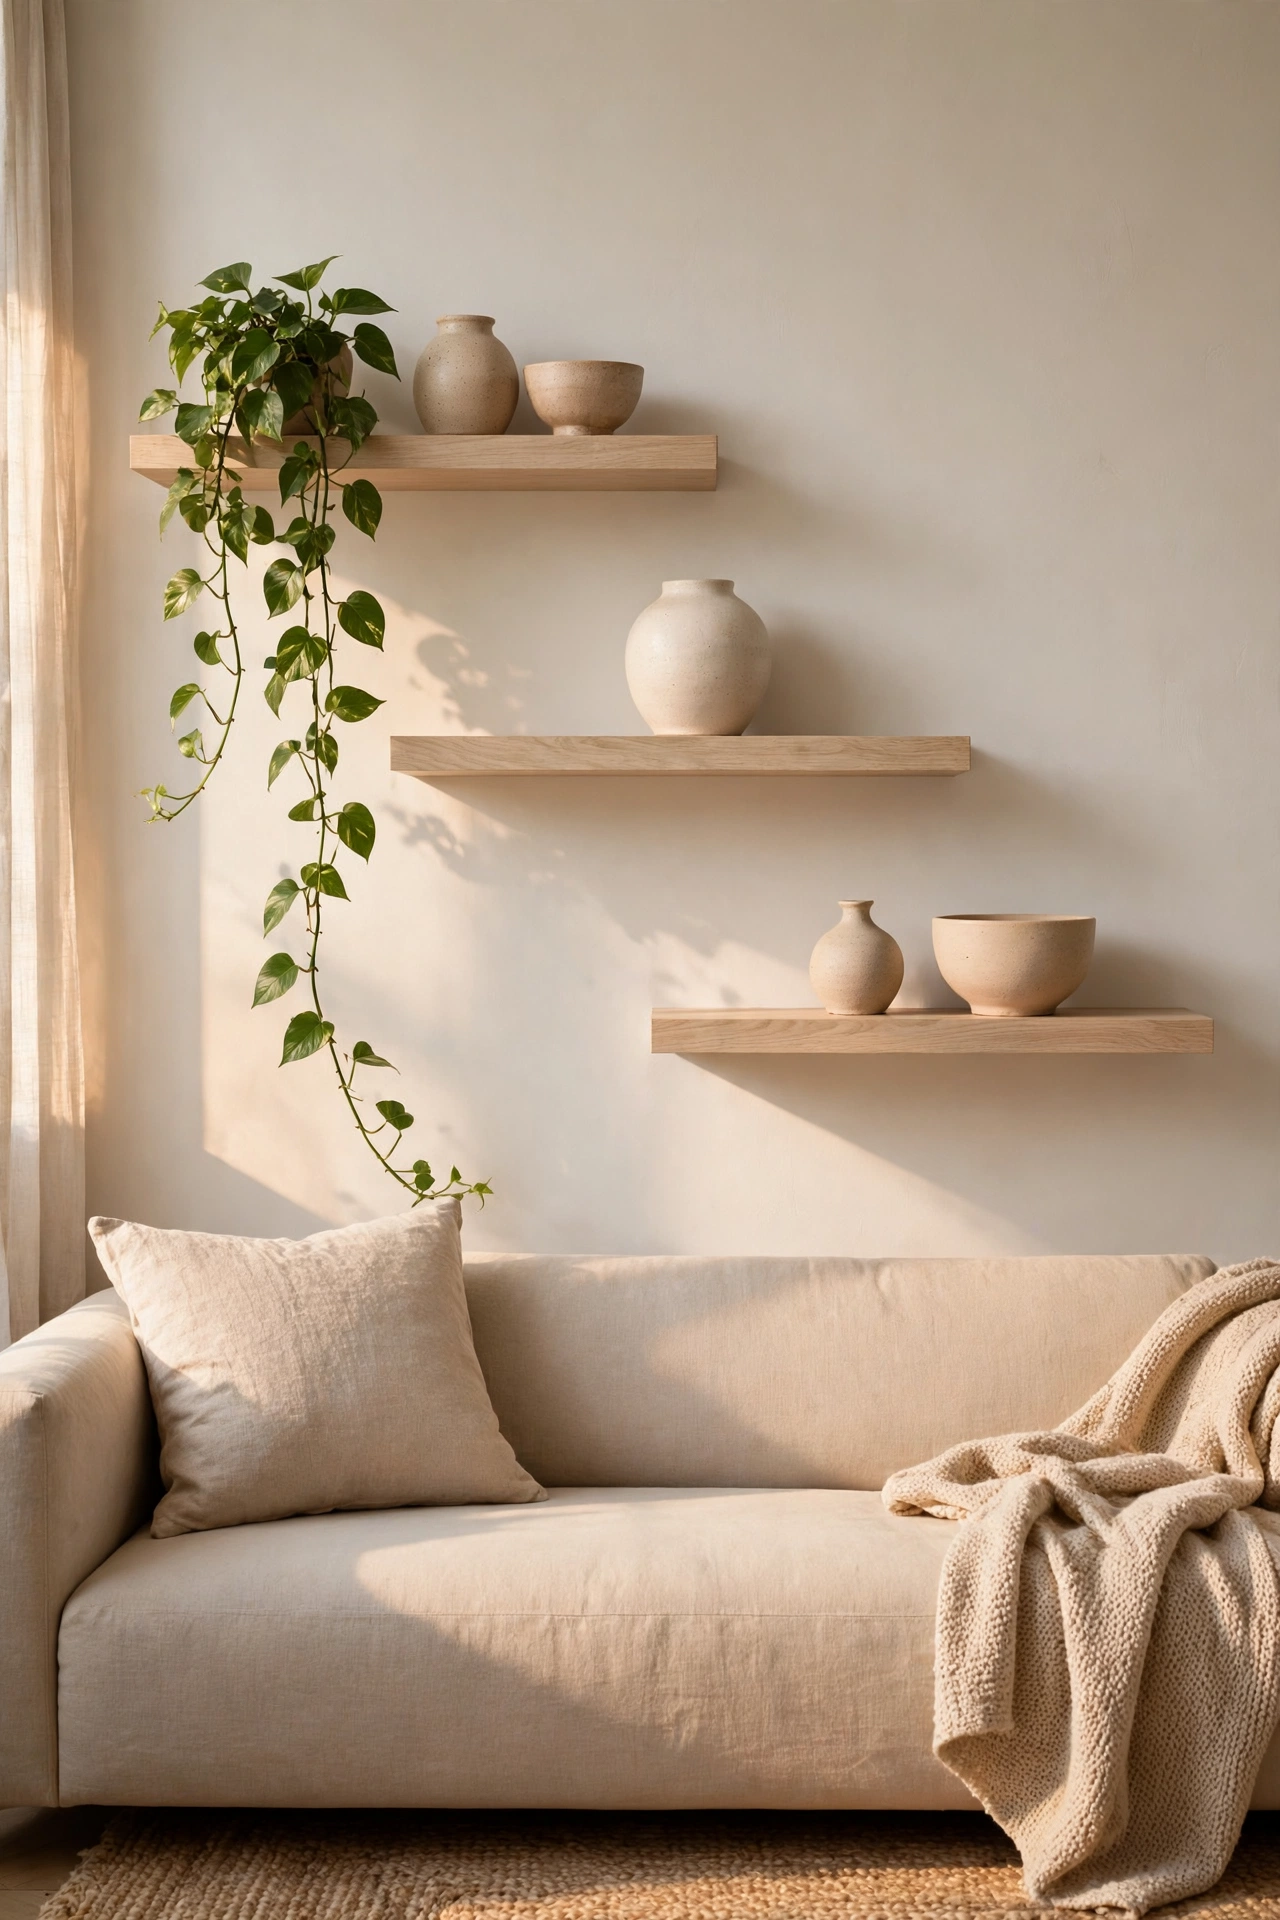
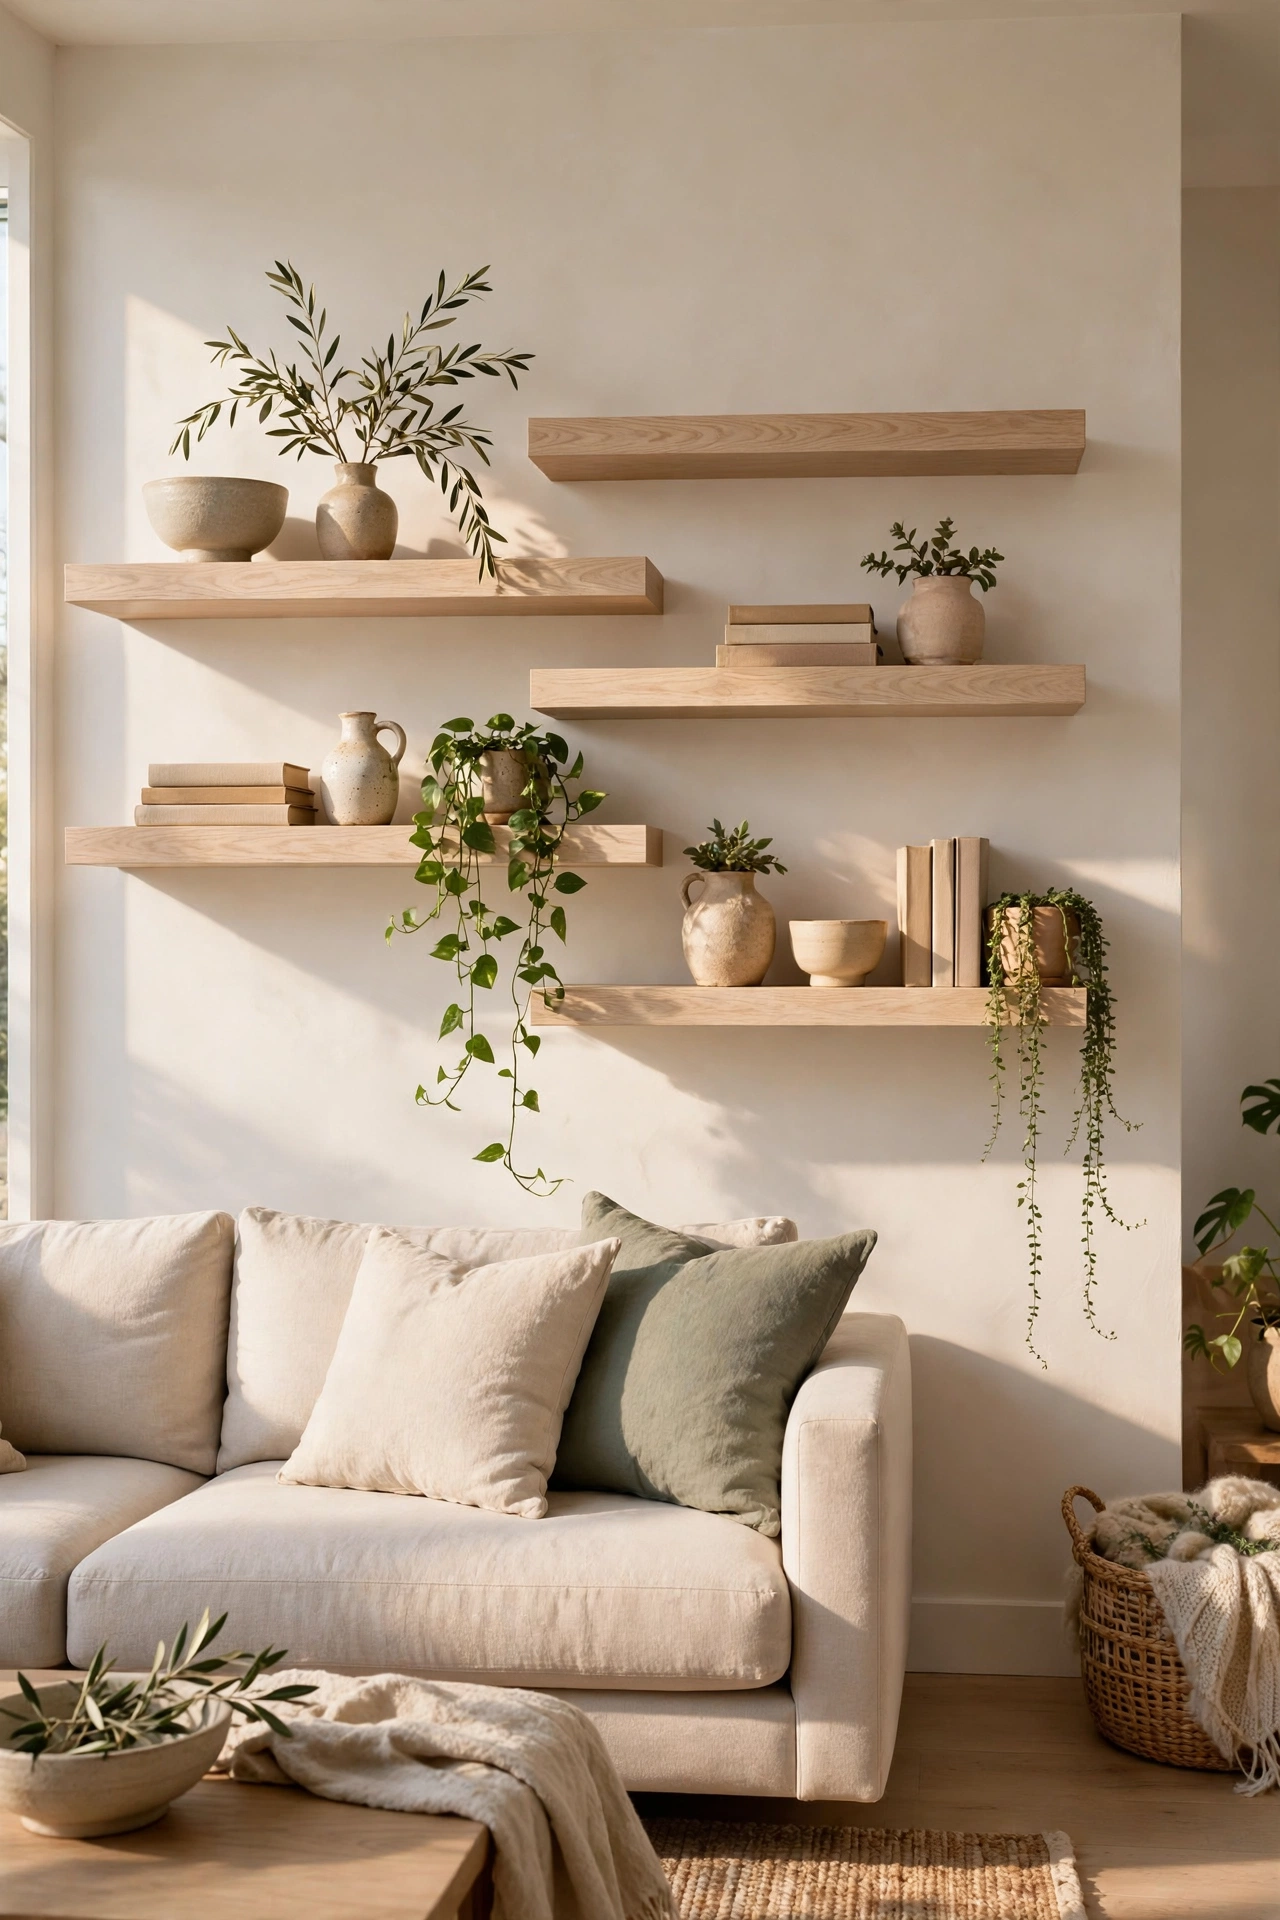
Start with the classic that never fails: three white oak shelves mounted above the sofa at staggered heights. Place the longest shelf at eye level, then step the two shorter shelves up and to either side so the arrangement feels like it is climbing the wall. The beauty of this look is restraint — pale wood against a light wall, a few ceramics, one trailing plant, and plenty of breathing room. Keep the gaps between shelves at 12 to 18 inches so taller objects fit without crowding. Anchor every shelf into wall studs, since even a minimalist trio carries books and pottery. Style with the rule of threes: one tall item, one medium, one low on each shelf, and leave at least a third of every shelf empty. The result is calm, airy, and expensive-looking, and it works in almost any living room, whether your style leans Scandinavian, modern, or transitional.
2. Corner Cascade That Wraps Two Walls
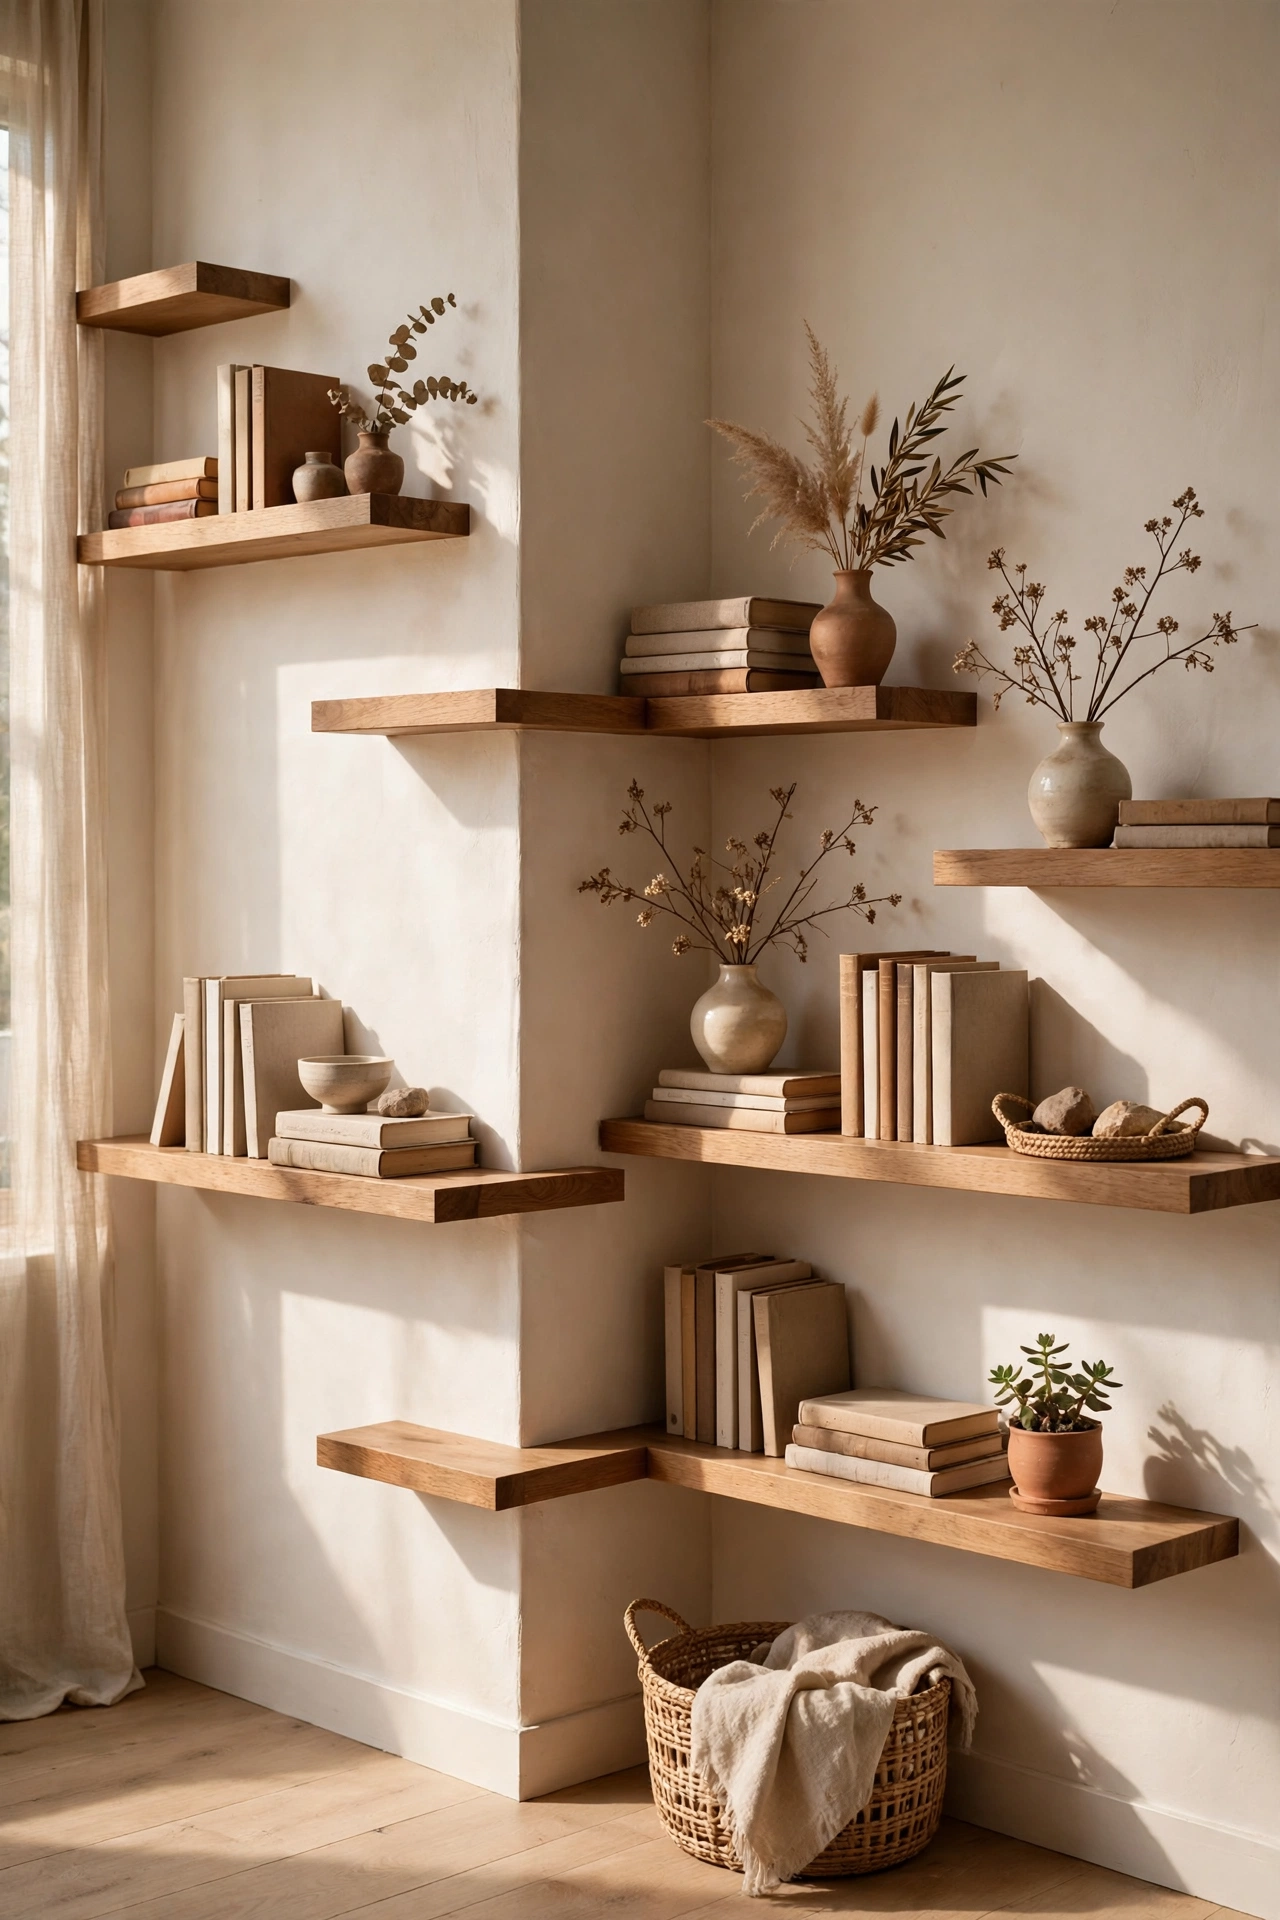
Corners are the most underused real estate in a home, and a staggered cascade turns them into a feature. Run short shelves around the corner at alternating heights so the display flows from one wall onto the next, drawing the eye upward and around. This works beautifully in reading nooks, entryways, and small living rooms where a flat wall is not available. Use shelves of the same wood and depth on both walls so the wrap feels continuous, and keep the corner joint tight — a small gap there breaks the illusion. Style the cascade with a mix of heights: a tall vase at the top, books in the middle, and a small plant near the bottom. Because corner shelves hold less weight per bracket, keep heavy items near the wall studs and reserve the outer ends for lighter decor. The payoff is a sculptural wall that makes an awkward corner feel deliberately designed.
3. Staircase Wall Stepping Shelves
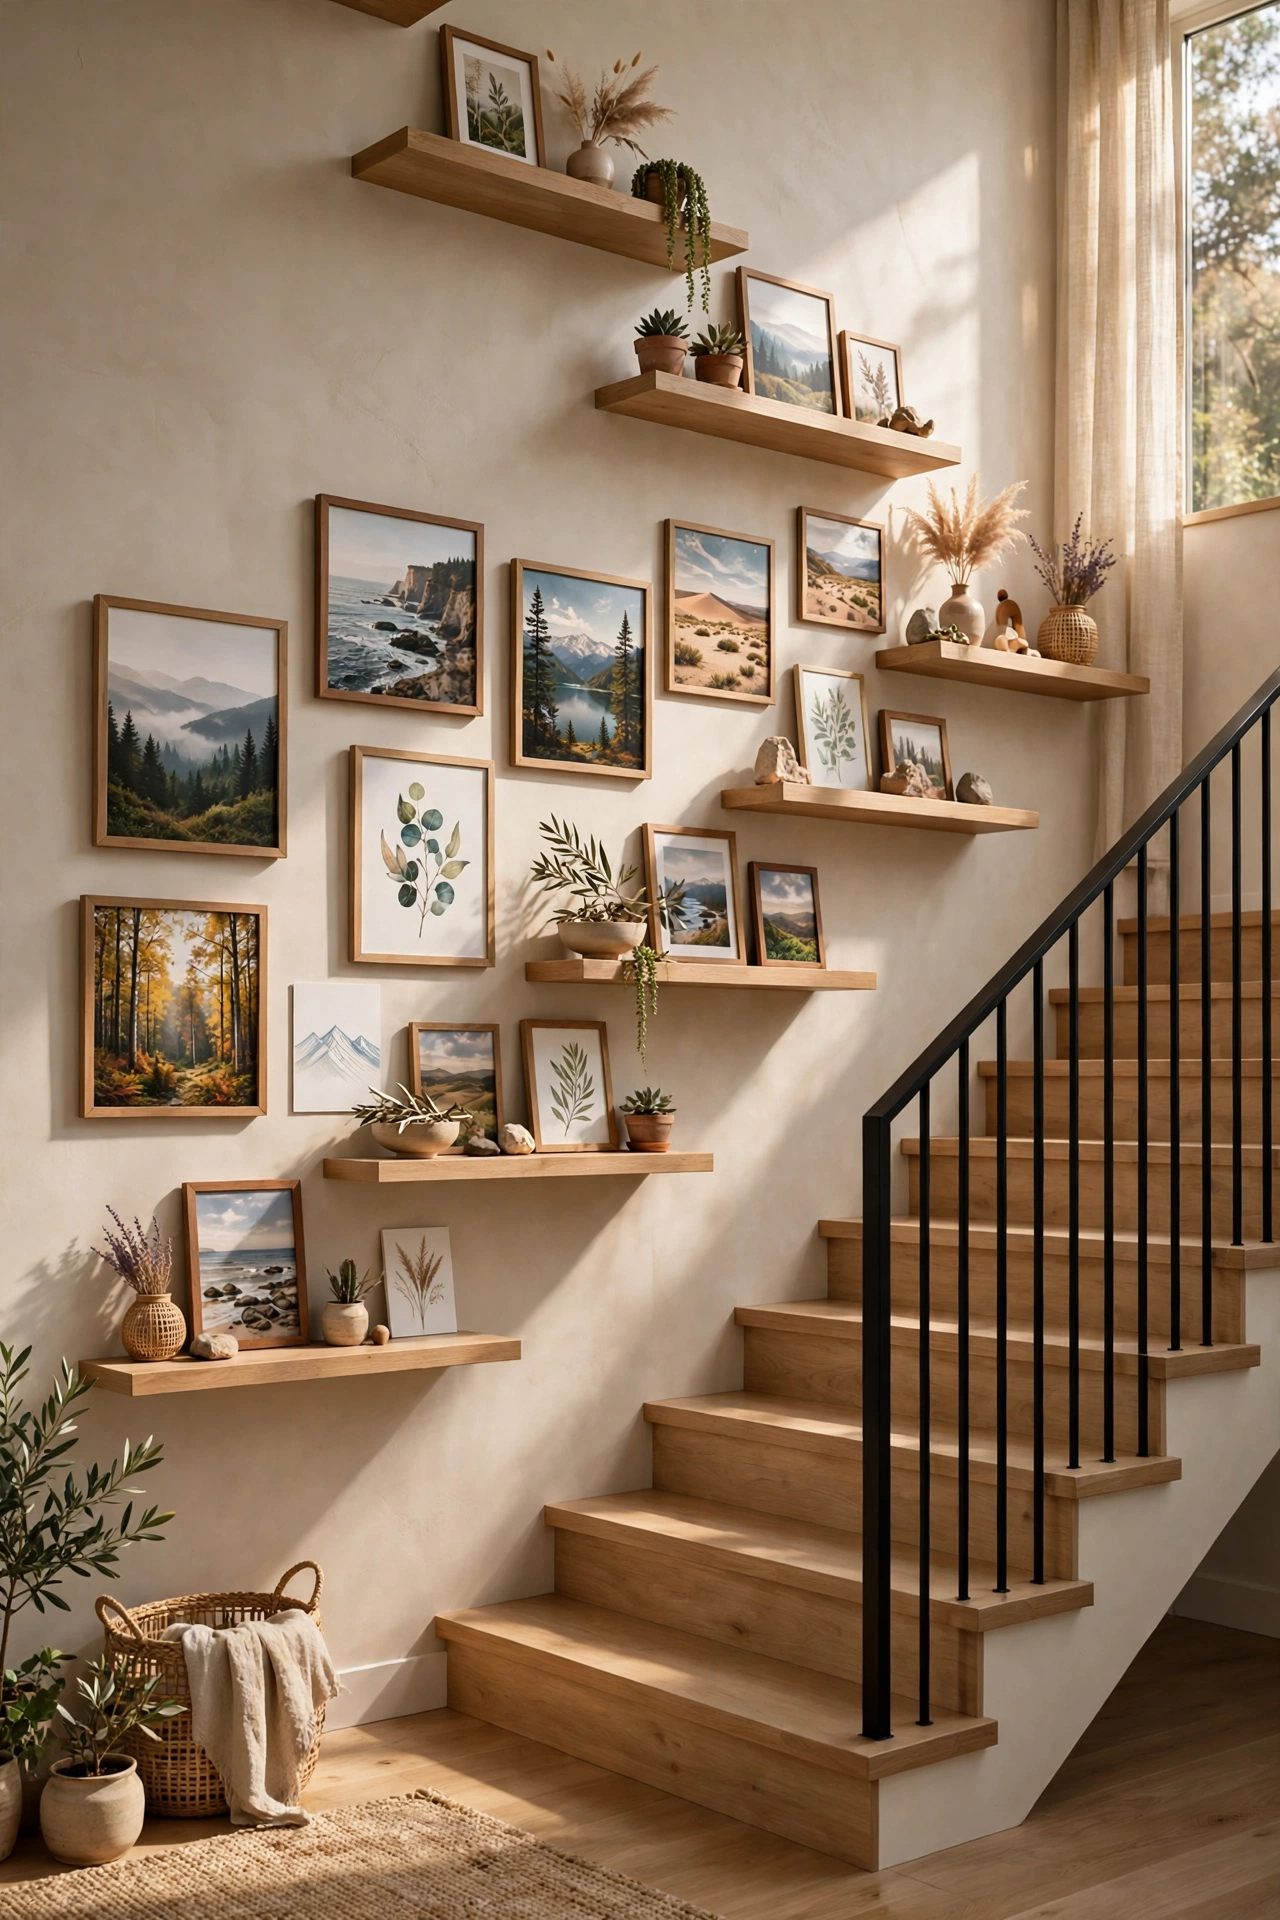
A staircase wall is begging for staggered shelves — the steps already set the rhythm. Mount shelves that climb alongside the stairs, following the angle of the stair run, so each shelf sits a little higher than the last. This turns a pass-through space into a gallery, perfect for family photos, small art prints, and travel souvenirs. Keep shelf depths shallow, around 6 to 8 inches, so nobody brushes against them on the way up. Use consistent spacing measured from the stair nosing rather than from the floor, which keeps the line parallel to the slope. For safety, mount into studs and avoid placing anything fragile at hand height where it could be knocked. The staircase stagger is one of the most dramatic floating shelf ideas because it uses a wall most people ignore, and guests notice it immediately.
4. Trailing Plant Living Wall
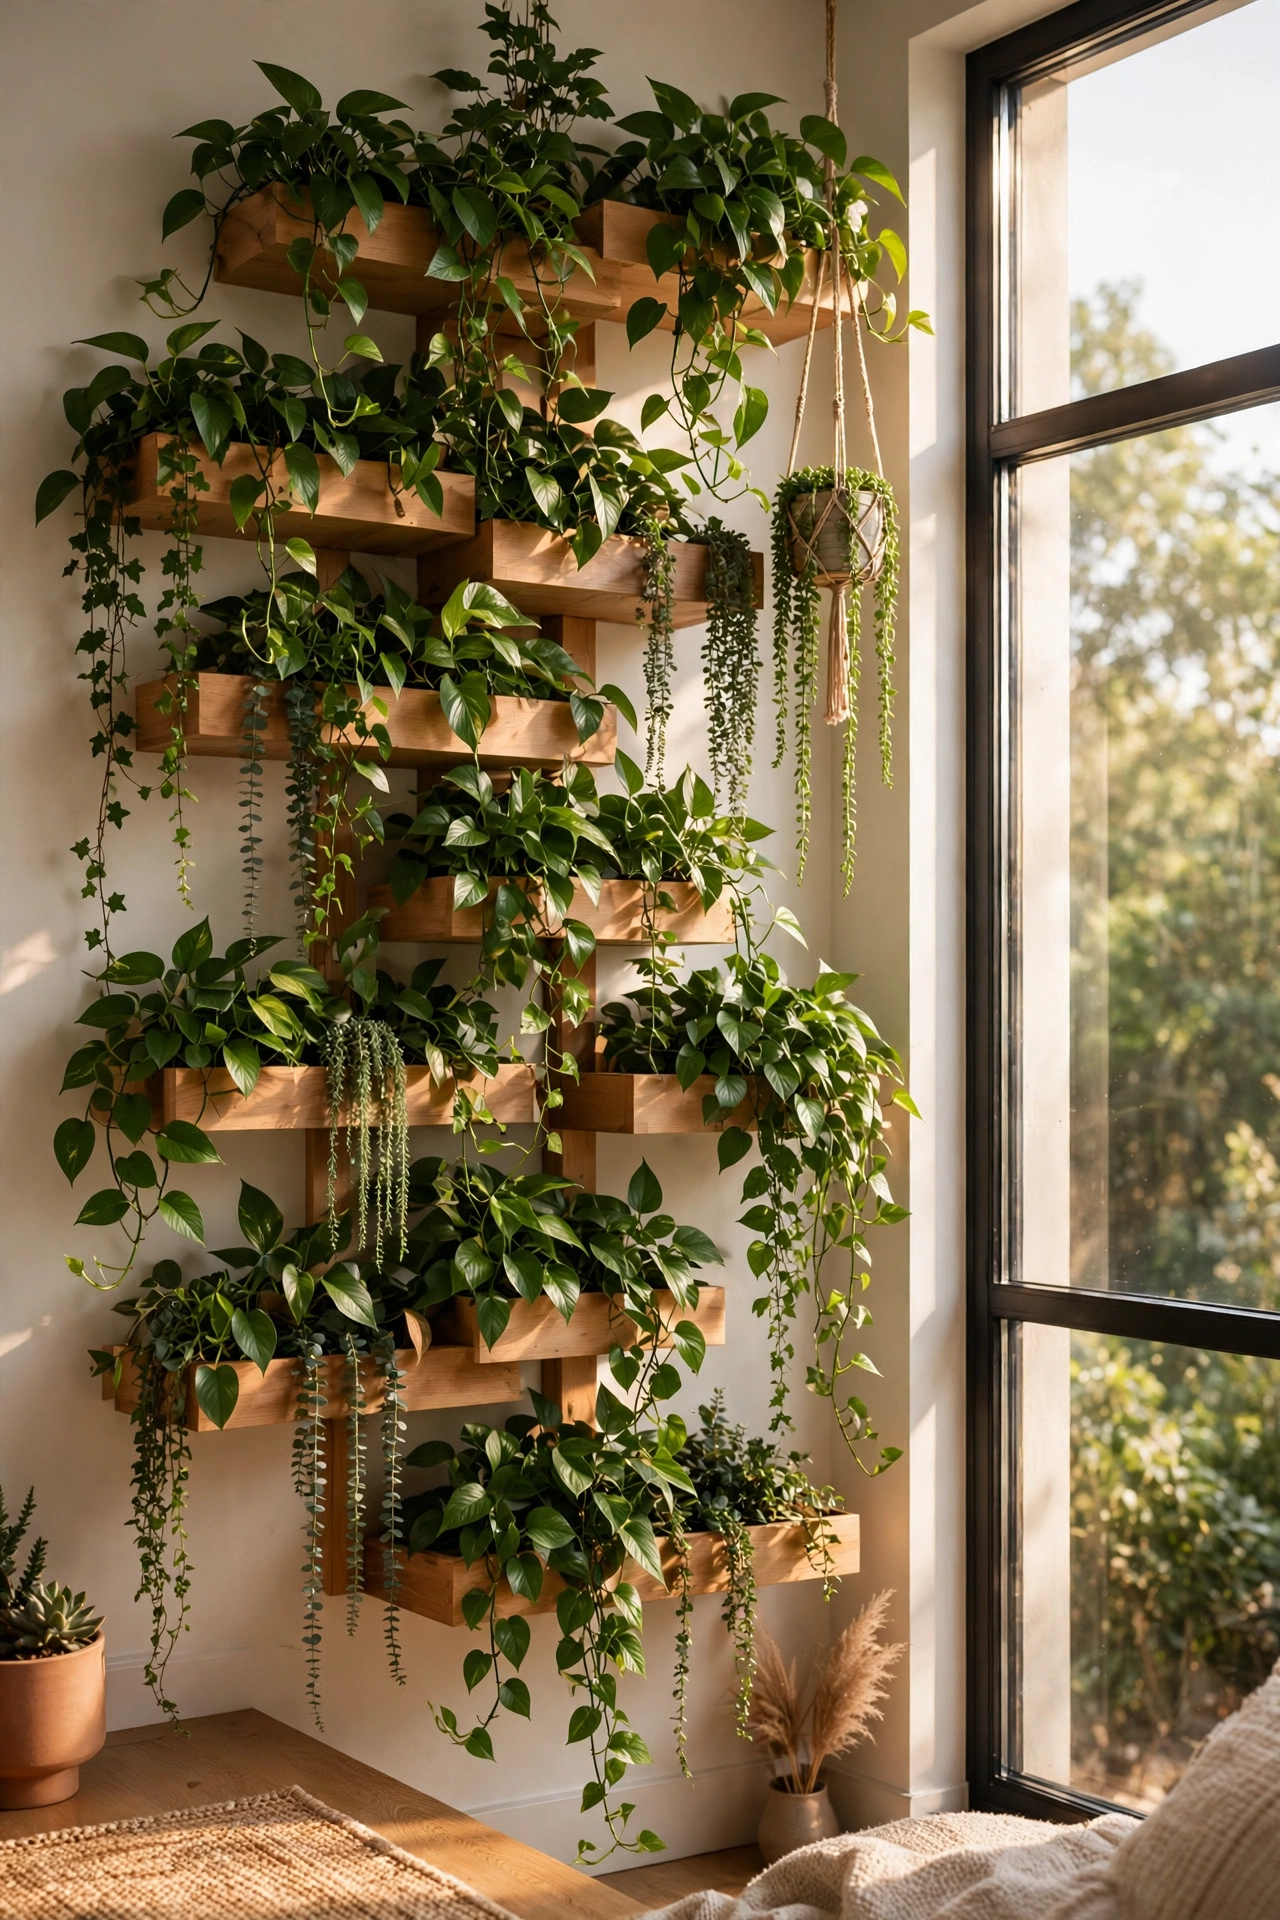
If you love plants, staggered shelves are the easiest way to build a living wall without a complicated vertical garden system. Mount shelves at different heights near a bright window and let trailing plants like pothos, string of pearls, and ivy cascade from the upper shelves down past the lower ones. The stagger matters for plant health, not just looks: offset shelves mean lower plants are not shaded out by the ones above, so everyone gets light. Choose shelves with a small lip or use lightweight pots with saucers to protect the wood from watering drips. Mix trailing plants with one or two upright plants, like a snake plant or fiddle-leaf cutting, for contrast. Keep the styling simple — plants are the decor here — and leave room for vines to grow. Within a few months, the shelves nearly disappear behind green, and the wall becomes the room’s focal point.
5. Kitchen Spice and Herb Staggered Ledges
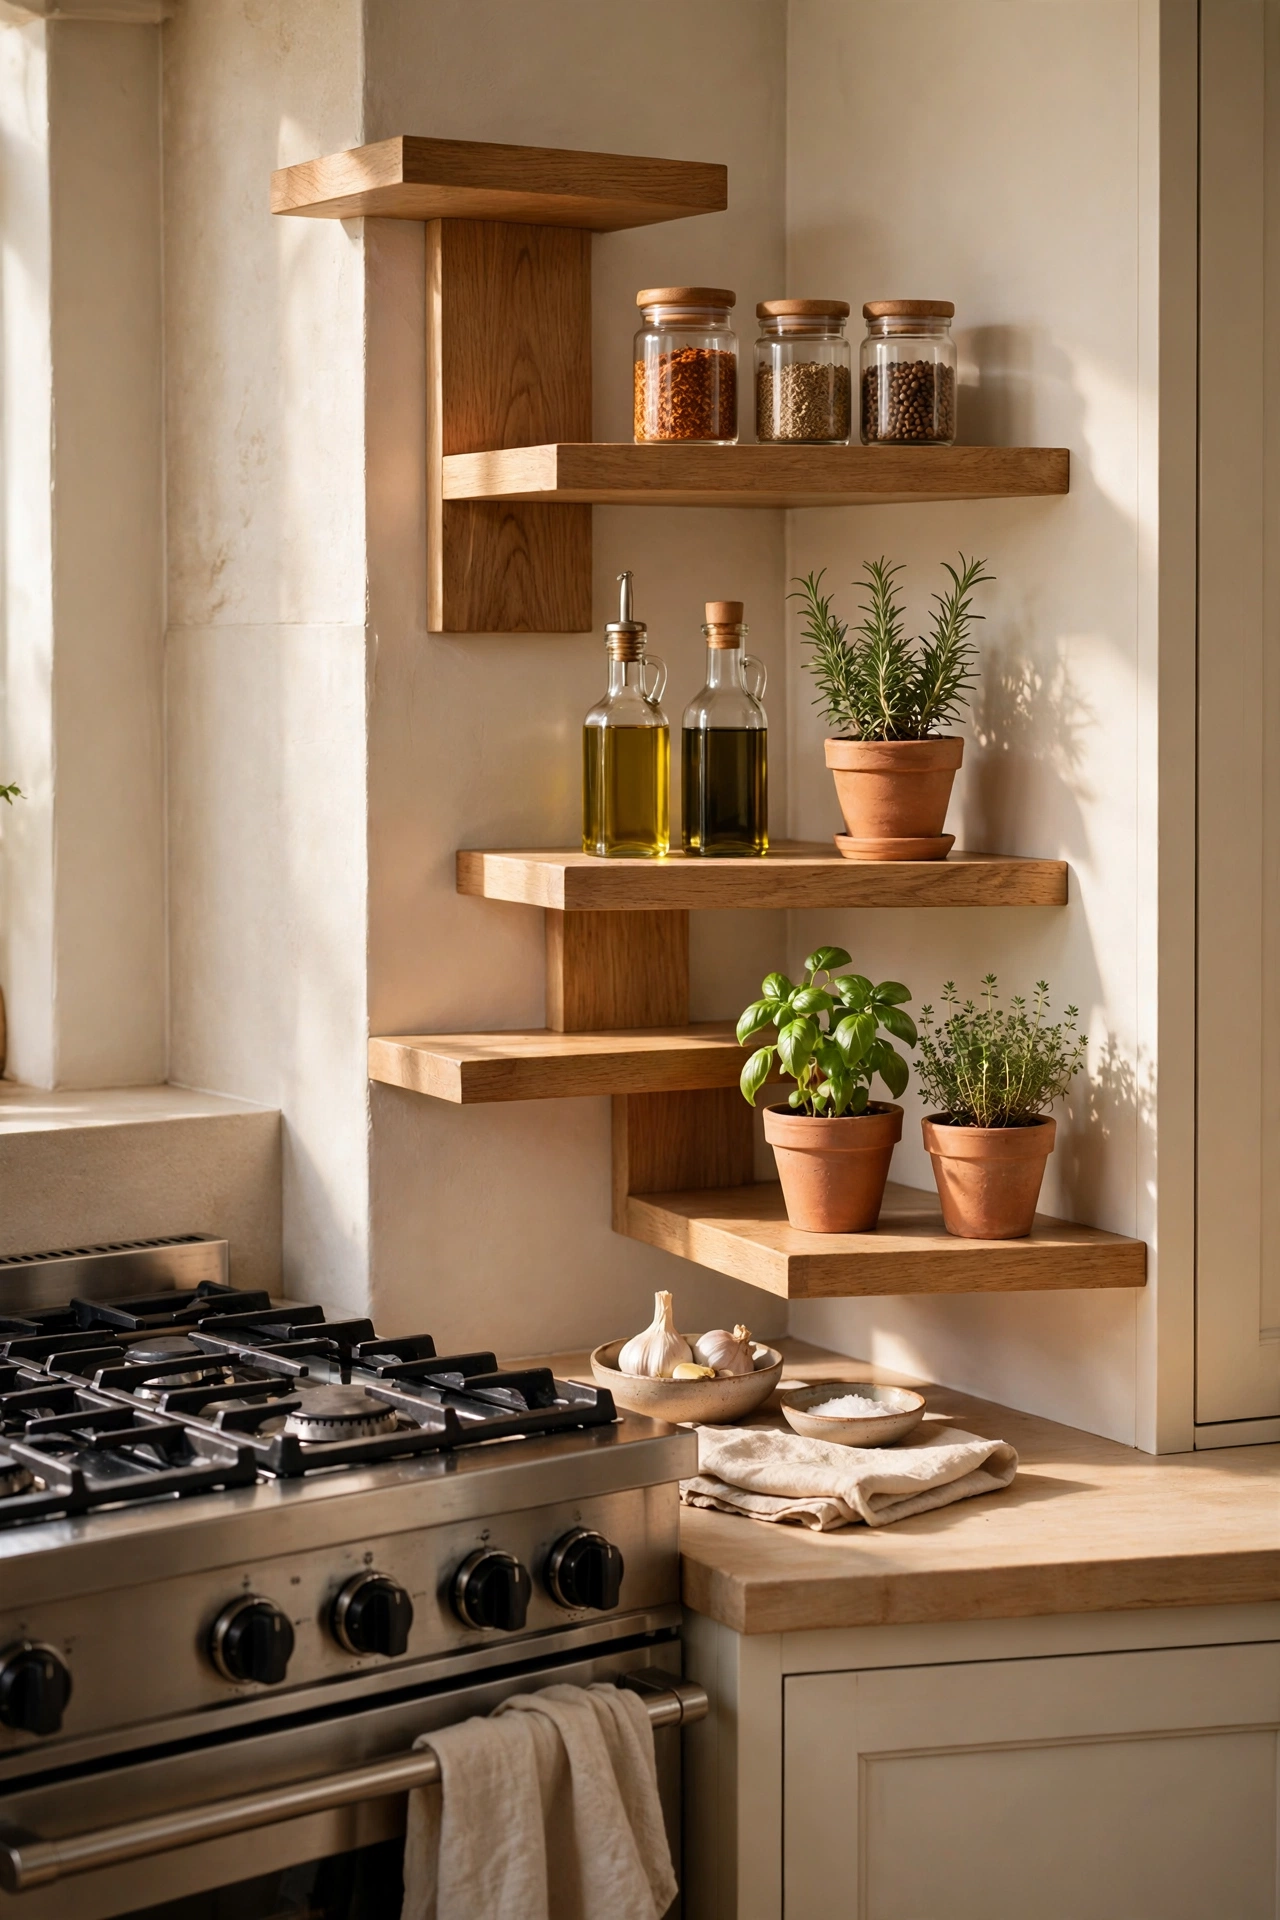
In the kitchen, staggered shelves beat a spice rack because you can see every jar at a glance. Mount two or three short shelves beside the stove or prep area at staggered heights, sized to your most-used spices, oils, and small herb pots. Keep everyday cooking items on the lowest shelf within easy reach and display prettier jars — infused oils, ceramic crocks, colorful spice blends — higher up. A depth of 4 to 6 inches is plenty for spice jars and keeps the shelves from crowding the counter. Wipe-friendly finishes matter here: sealed wood, metal, or painted shelves handle steam and splashes better than raw timber. Label jars on the front or use matching containers so the stagger looks tidy rather than chaotic. This small project frees a whole cabinet and makes cooking faster, since the ingredients you reach for daily are always in sight.
6. Bathroom Over-the-Toilet Spa Ledges
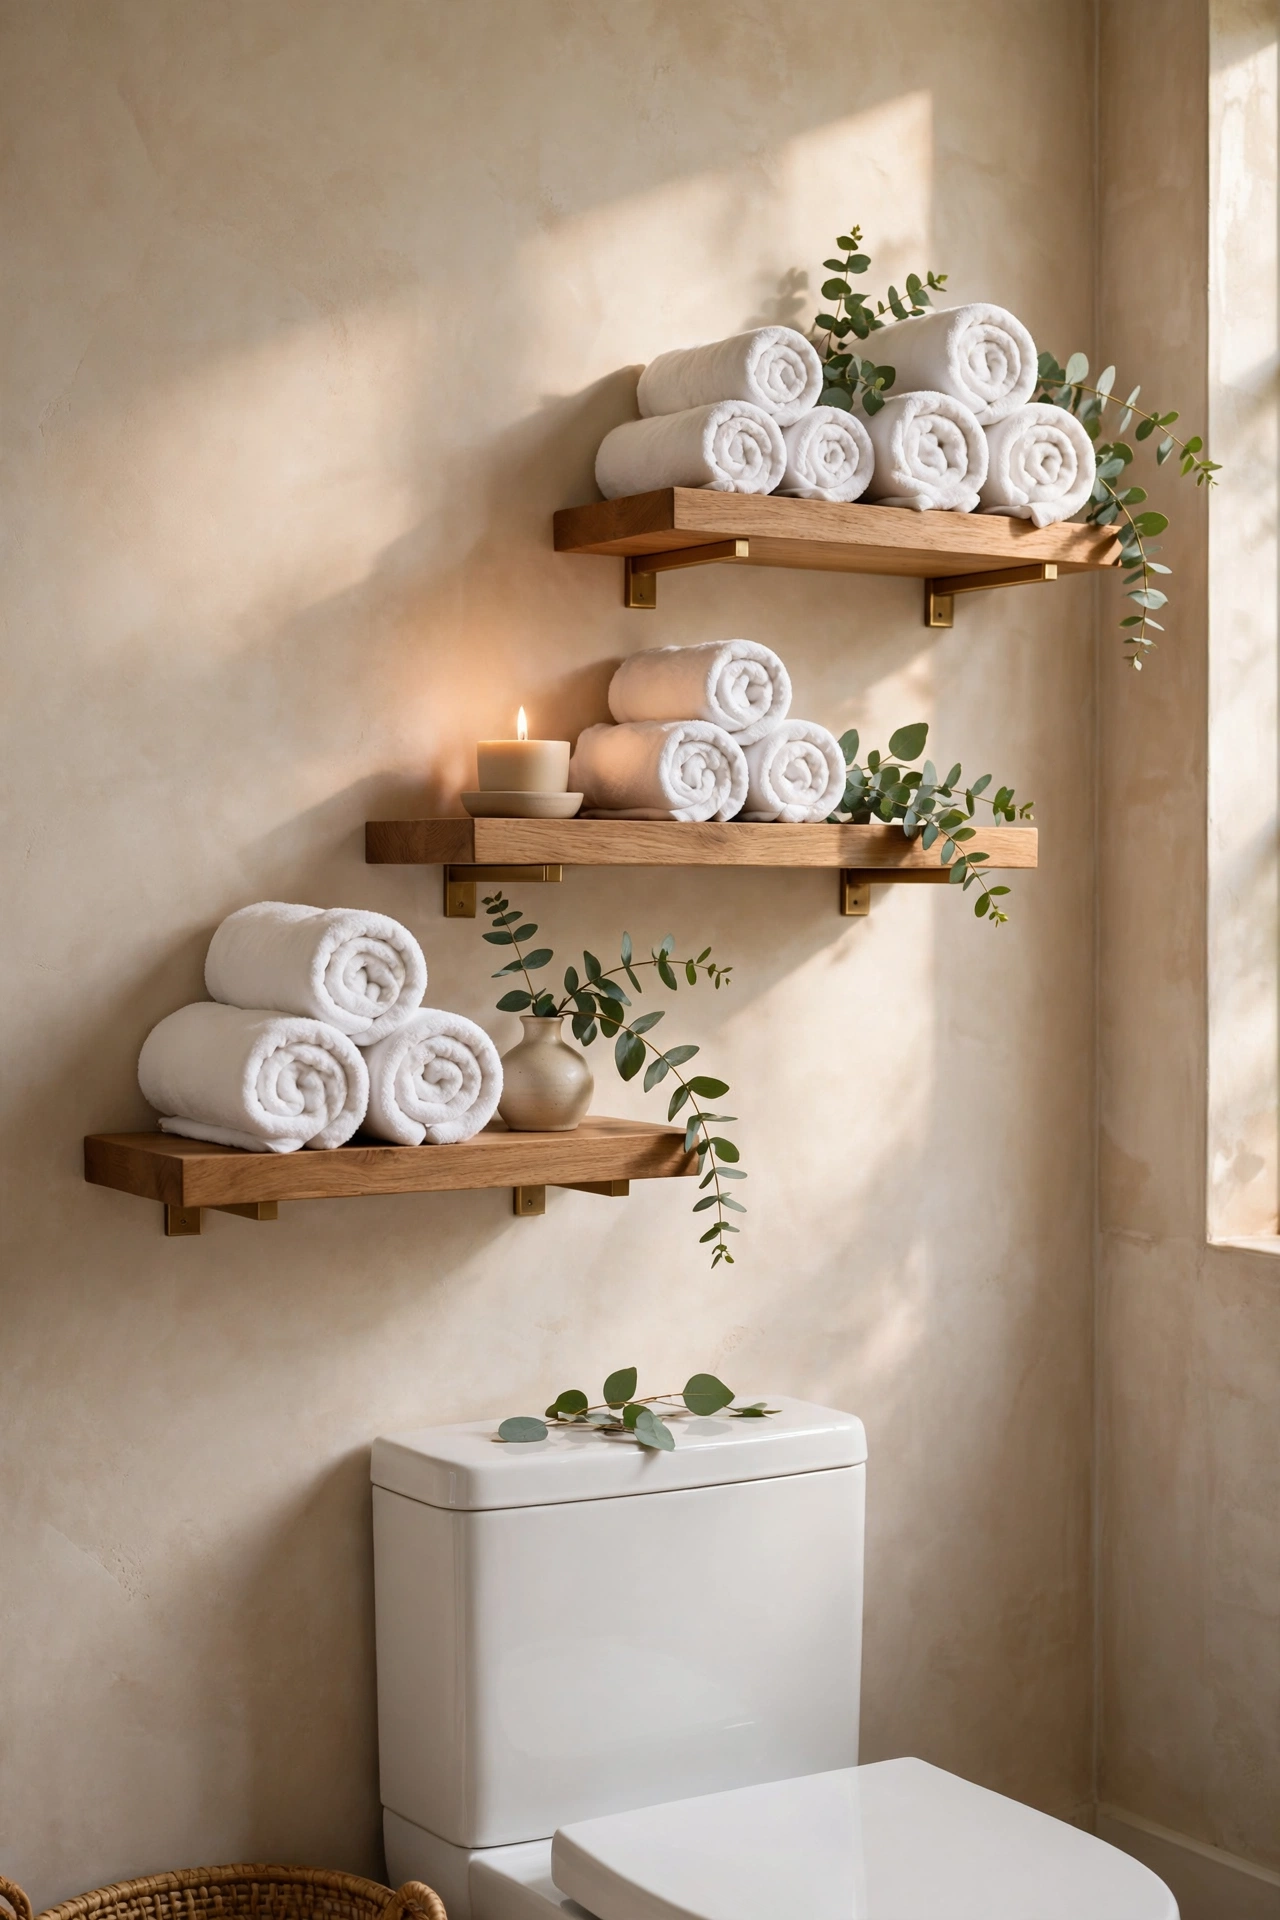
The wall above the toilet is prime real estate that most bathrooms waste. Two or three staggered floating shelves instantly turn it into a spa-style display: rolled white towels on the lowest shelf, a small eucalyptus bundle and a candle in the middle, and a framed print up top. Keep the lowest shelf about 24 inches above the tank so there is clearance and the display never feels cramped. In a humid bathroom, choose sealed wood, teak, or powder-coated metal shelves that resist moisture, and avoid placing anything that warps, like raw MDF. Balance is key — mix soft towels with one hard accent, like a glass jar or ceramic dish, so the shelves feel layered rather than flat. Leave breathing room between objects; spa styling is defined by what you leave out. For a cohesive look, match the shelf finish to your vanity hardware or mirror frame.
7. Entryway Drop-Zone Staggered Shelves
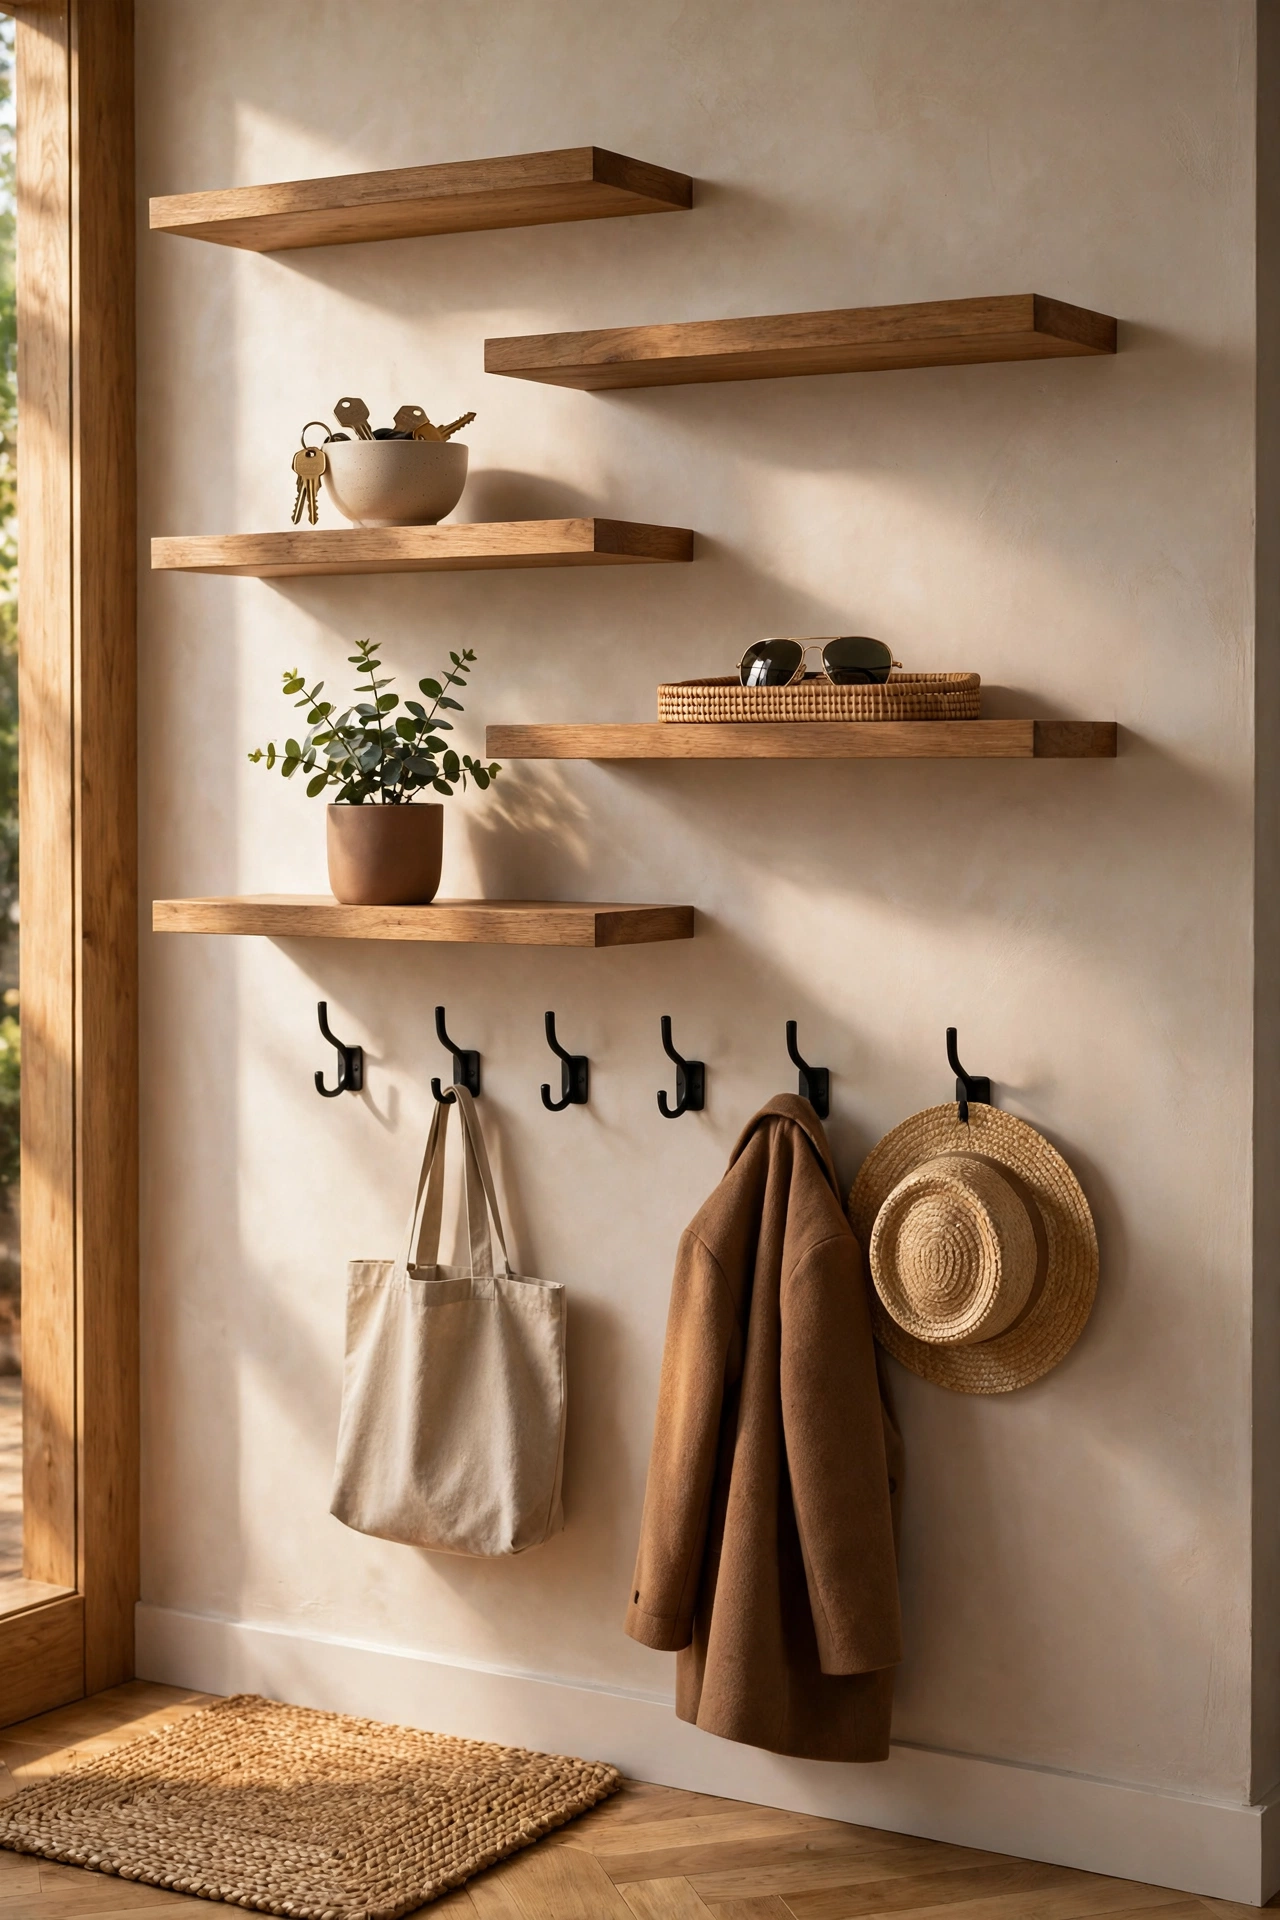
An entryway drop zone works best when everything has a landing spot, and staggered shelves give each item its own level. Mount a longer shelf at key height for keys and sunglasses, a shorter one above for a small plant or art print, and a third offset shelf for mail or a catch-all tray. Pair the shelves with hooks below for coats and bags, and the whole wall becomes a functional station that still looks like decor. Keep the shelves shallow — 6 inches is enough — so the entryway stays walkable. A small bowl or tray on the main shelf corrals keys so they never migrate. Choose a durable finish that handles daily bumps, and mount into studs since entryway shelves get leaned on. The stagger keeps the arrangement from looking like a utilitarian row of boards, which is exactly why guests will think it was styled by a designer rather than assembled out of necessity.
8. Reading Nook Vertical Column
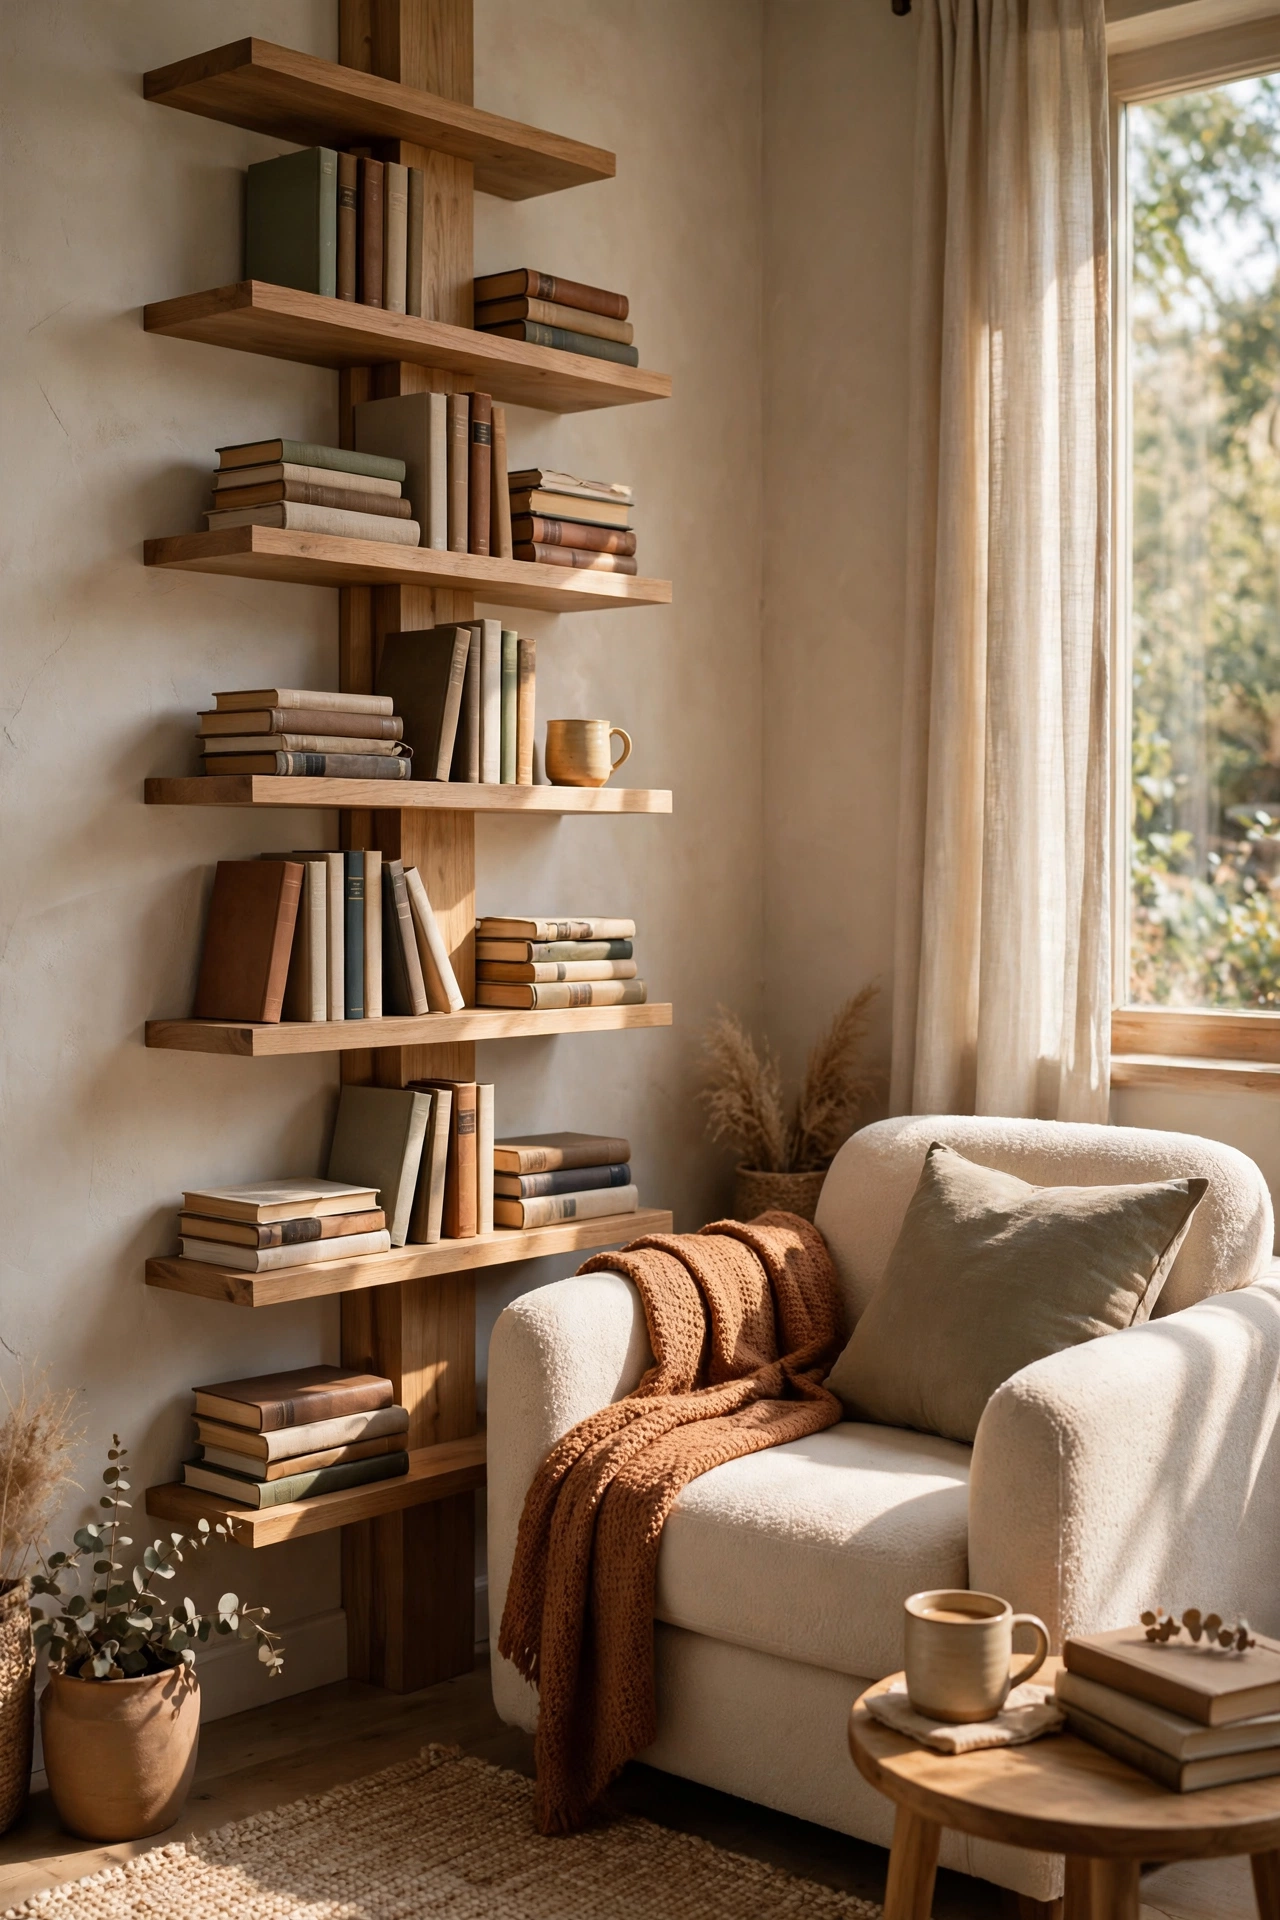
Beside a favorite chair, a vertical column of staggered shelves turns a dead corner into a reading nook. Stack three to five short shelves in a loose column, offsetting each one slightly left or right of the one below, so the arrangement feels organic rather than ladder-straight. The lowest shelf sits within arm’s reach for your current book, reading glasses, and a mug; higher shelves hold the books you love to look at and a small lamp or candle. Because the column is narrow, use slim shelves — 8 inches deep is plenty — and keep the color consistent so the column reads as one piece. Add a cozy throw and a floor lamp beside the chair, and the corner stops being empty space and starts being the spot everyone fights over. This idea works in bedrooms, living rooms, and even wide hallways.
9. Gallery Wall Mixed With Framed Art
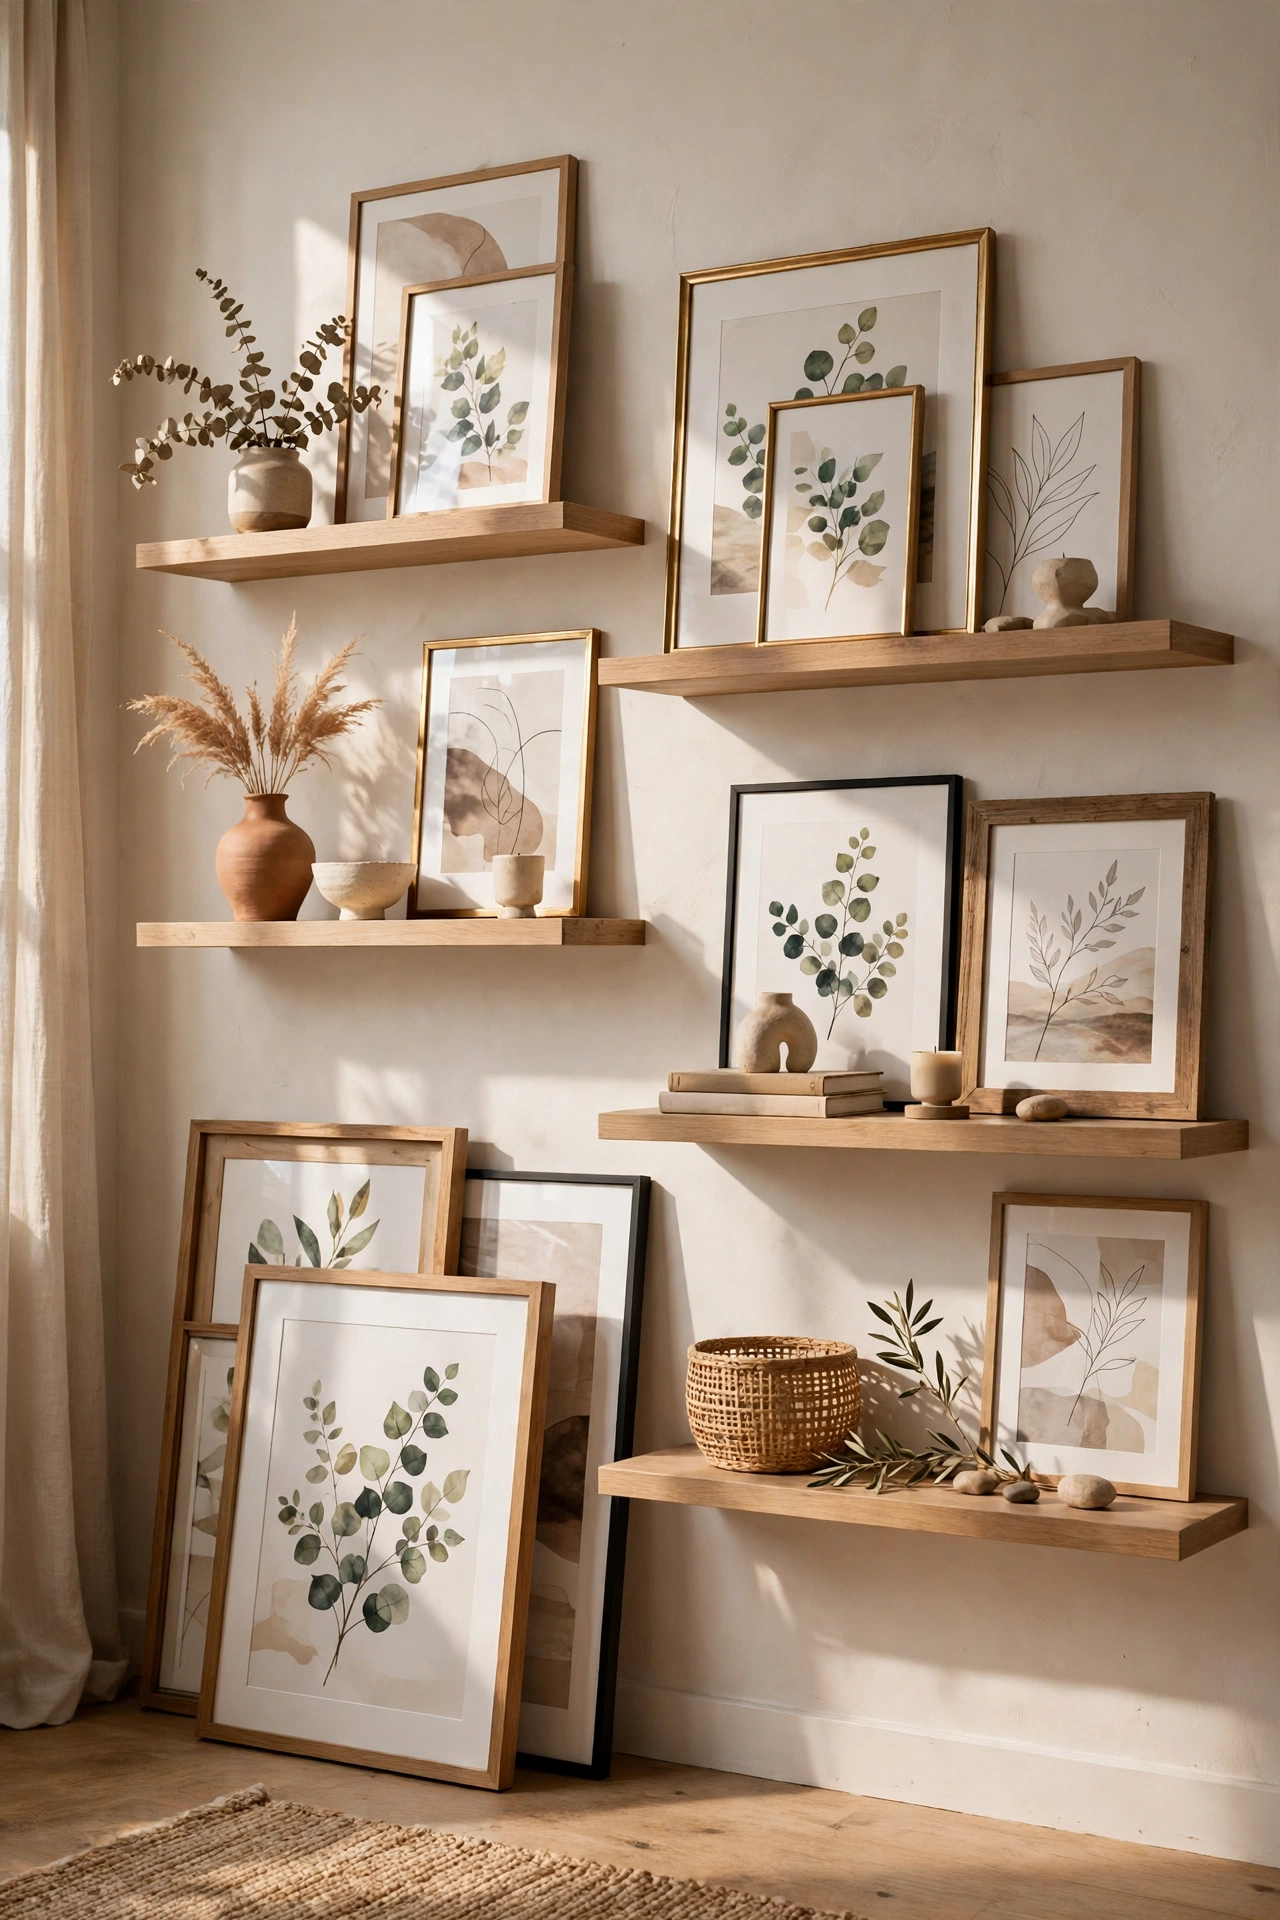
Floating shelves and framed art are better together than either is alone. Instead of hanging every frame, mount two or three staggered shelves and lean larger art prints on them, layering smaller frames in front. The stagger lets you vary the heights so tall prints sit high and small pieces tuck low, creating a gallery that feels collected over time rather than hung in an afternoon. The big advantage is flexibility: swap art seasonally without new nail holes, and lean pieces at a slight angle for depth. Keep the shelf color neutral — white, black, or natural wood — so the art stays the star. Anchor shelves into studs, since leaning art adds weight, and leave a few inches of clearance above the top shelf so tall frames never touch the ceiling. This is the easiest way to get a gallery wall that looks expensive and stays changeable.
10. TV Wall Offset Balance Shelves
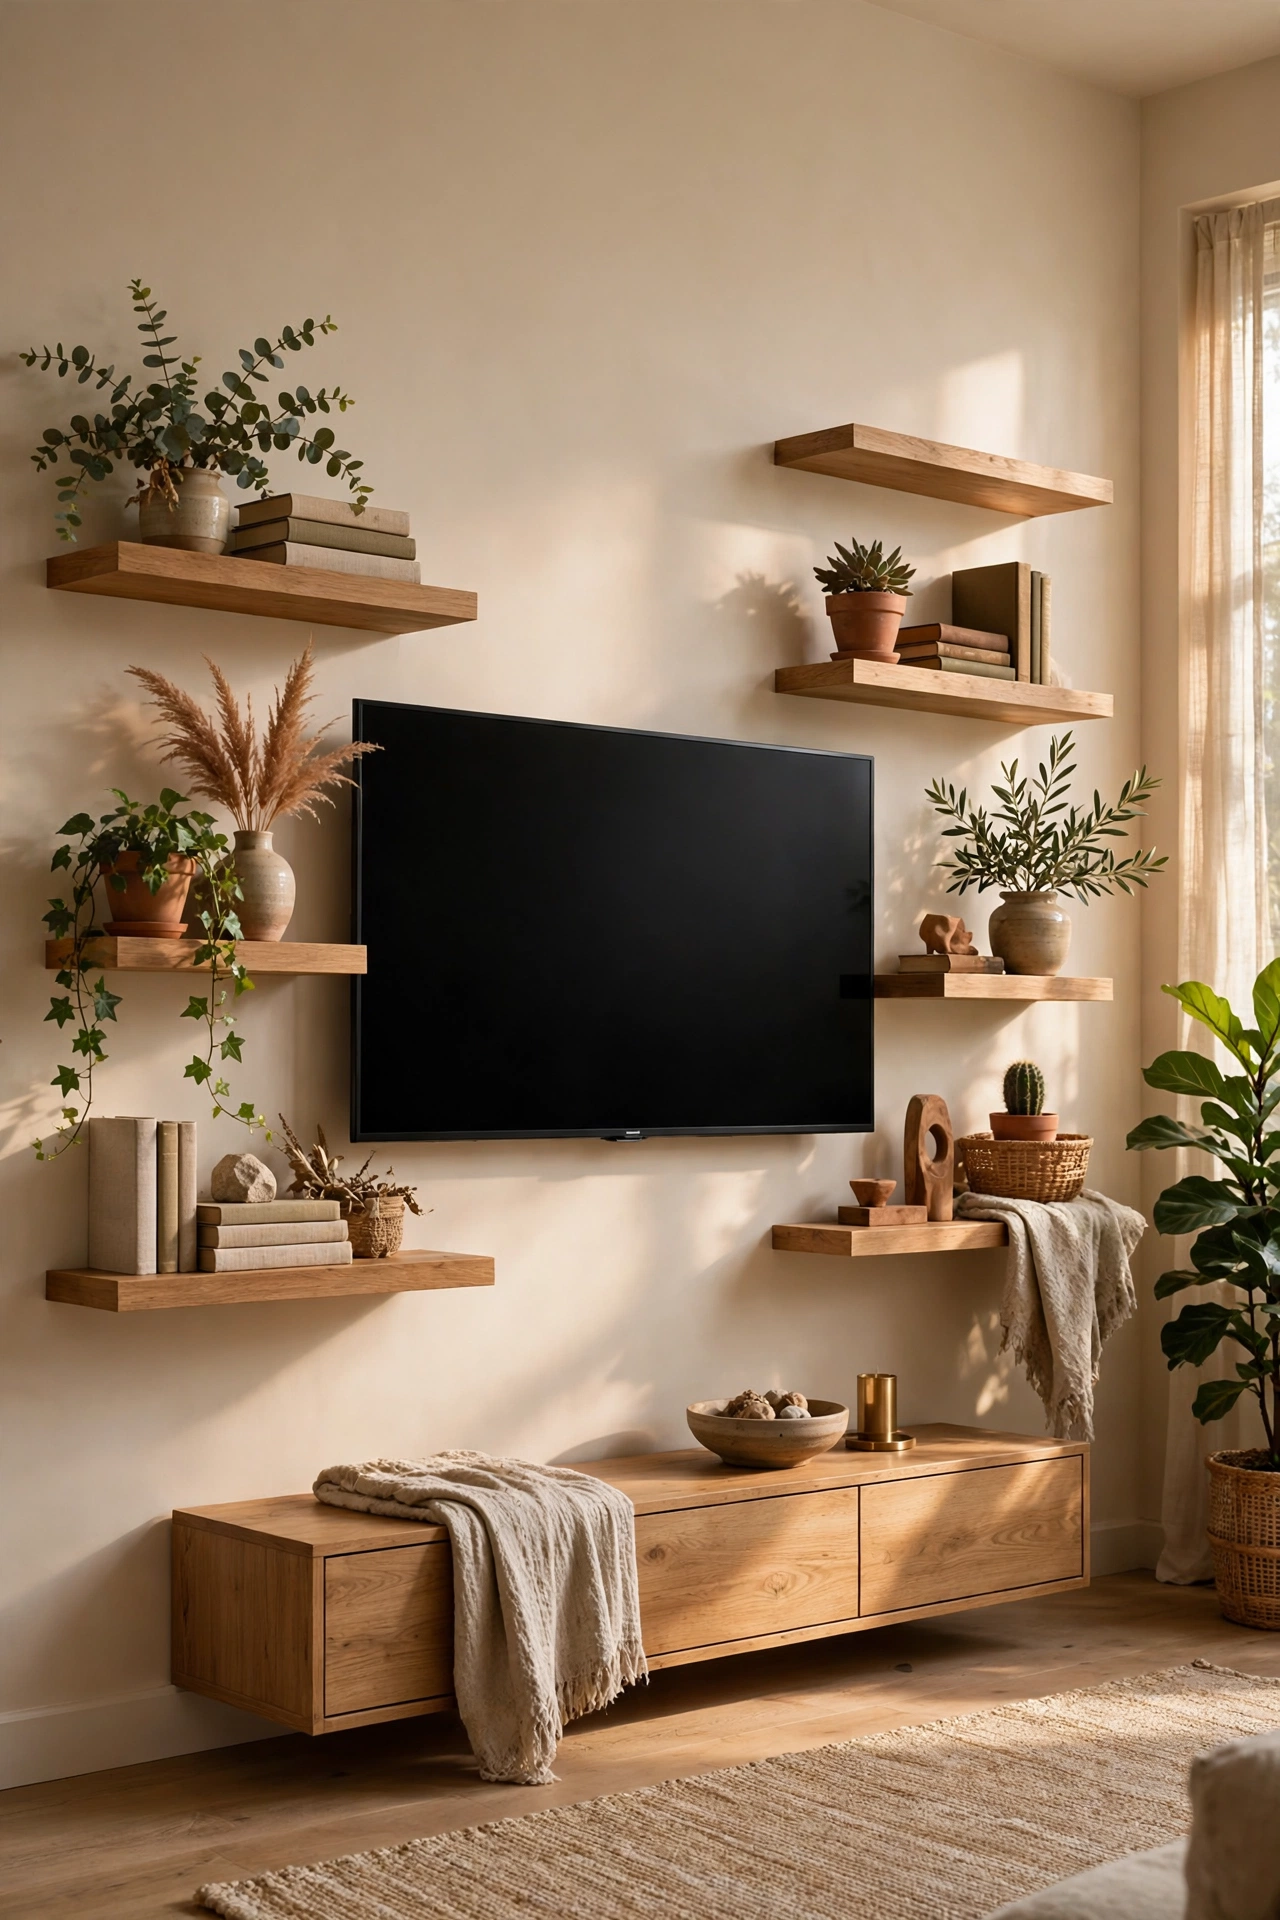
A TV dominates a wall, and staggered shelves on either side restore balance. Mount two shelves on one side of the screen at different heights and one on the other, offset so the arrangement feels intentional rather than symmetrical. The shelves soften the black rectangle with books, plants, and art, and they give media accessories — remotes, small speakers, game controllers — a home that is not the coffee table. Keep shelves at least 6 inches from the TV edge so heat vents are clear and nothing blocks the screen from side angles. Cable management matters here: run a small cord channel painted to match the wall from the TV down behind the lowest shelf. Style lightly, since the TV is already the visual anchor — a plant, a stack of books, and one sculptural object per shelf is plenty. The result is an entertainment wall that looks designed, not just mounted.
11. Kids’ Book Ledges at Staggered Heights
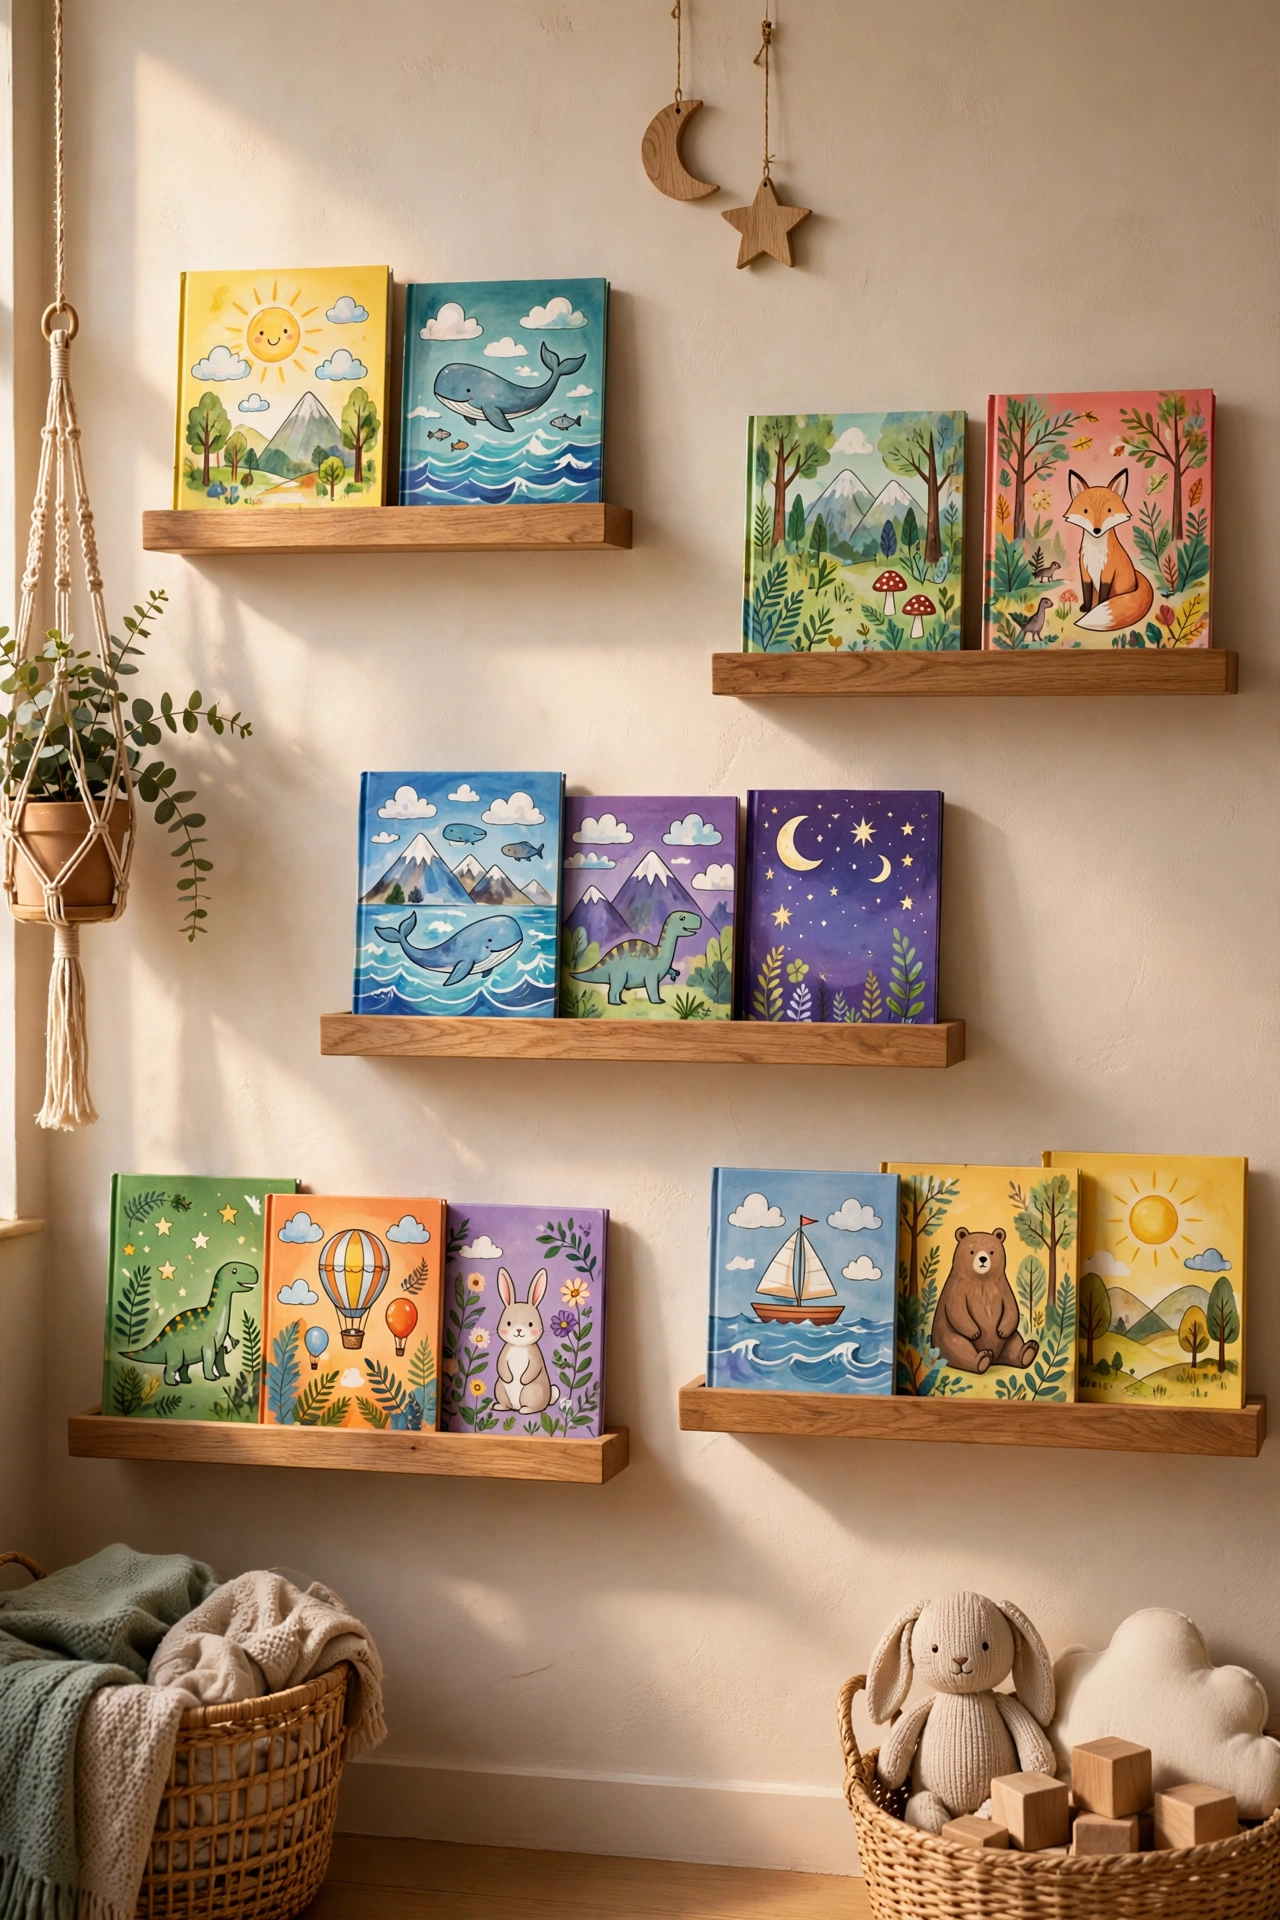
For kids’ rooms, staggered book ledges are more practical than a bookcase: covers face outward, so children pick books by their pictures, and shelves grow with the child. Mount the lowest ledge at toddler height for board books, the next higher for picture books, and the topmost for chapter books and keepsakes. A small front lip keeps books from sliding off, which matters when little hands browse. Keep the stagger playful — alternate shelf lengths and colors, or paint them the room’s accent color — but mount every shelf into studs with screws rated for the load, since kids will lean on them. Rotate the books every few weeks to keep the display fresh; the stagger makes rotation easy because each ledge is its own little gallery. Parents love this idea because it encourages reading, and kids love it because their books look like a shop display.
12. Rustic Reclaimed Wood Farmhouse Stagger
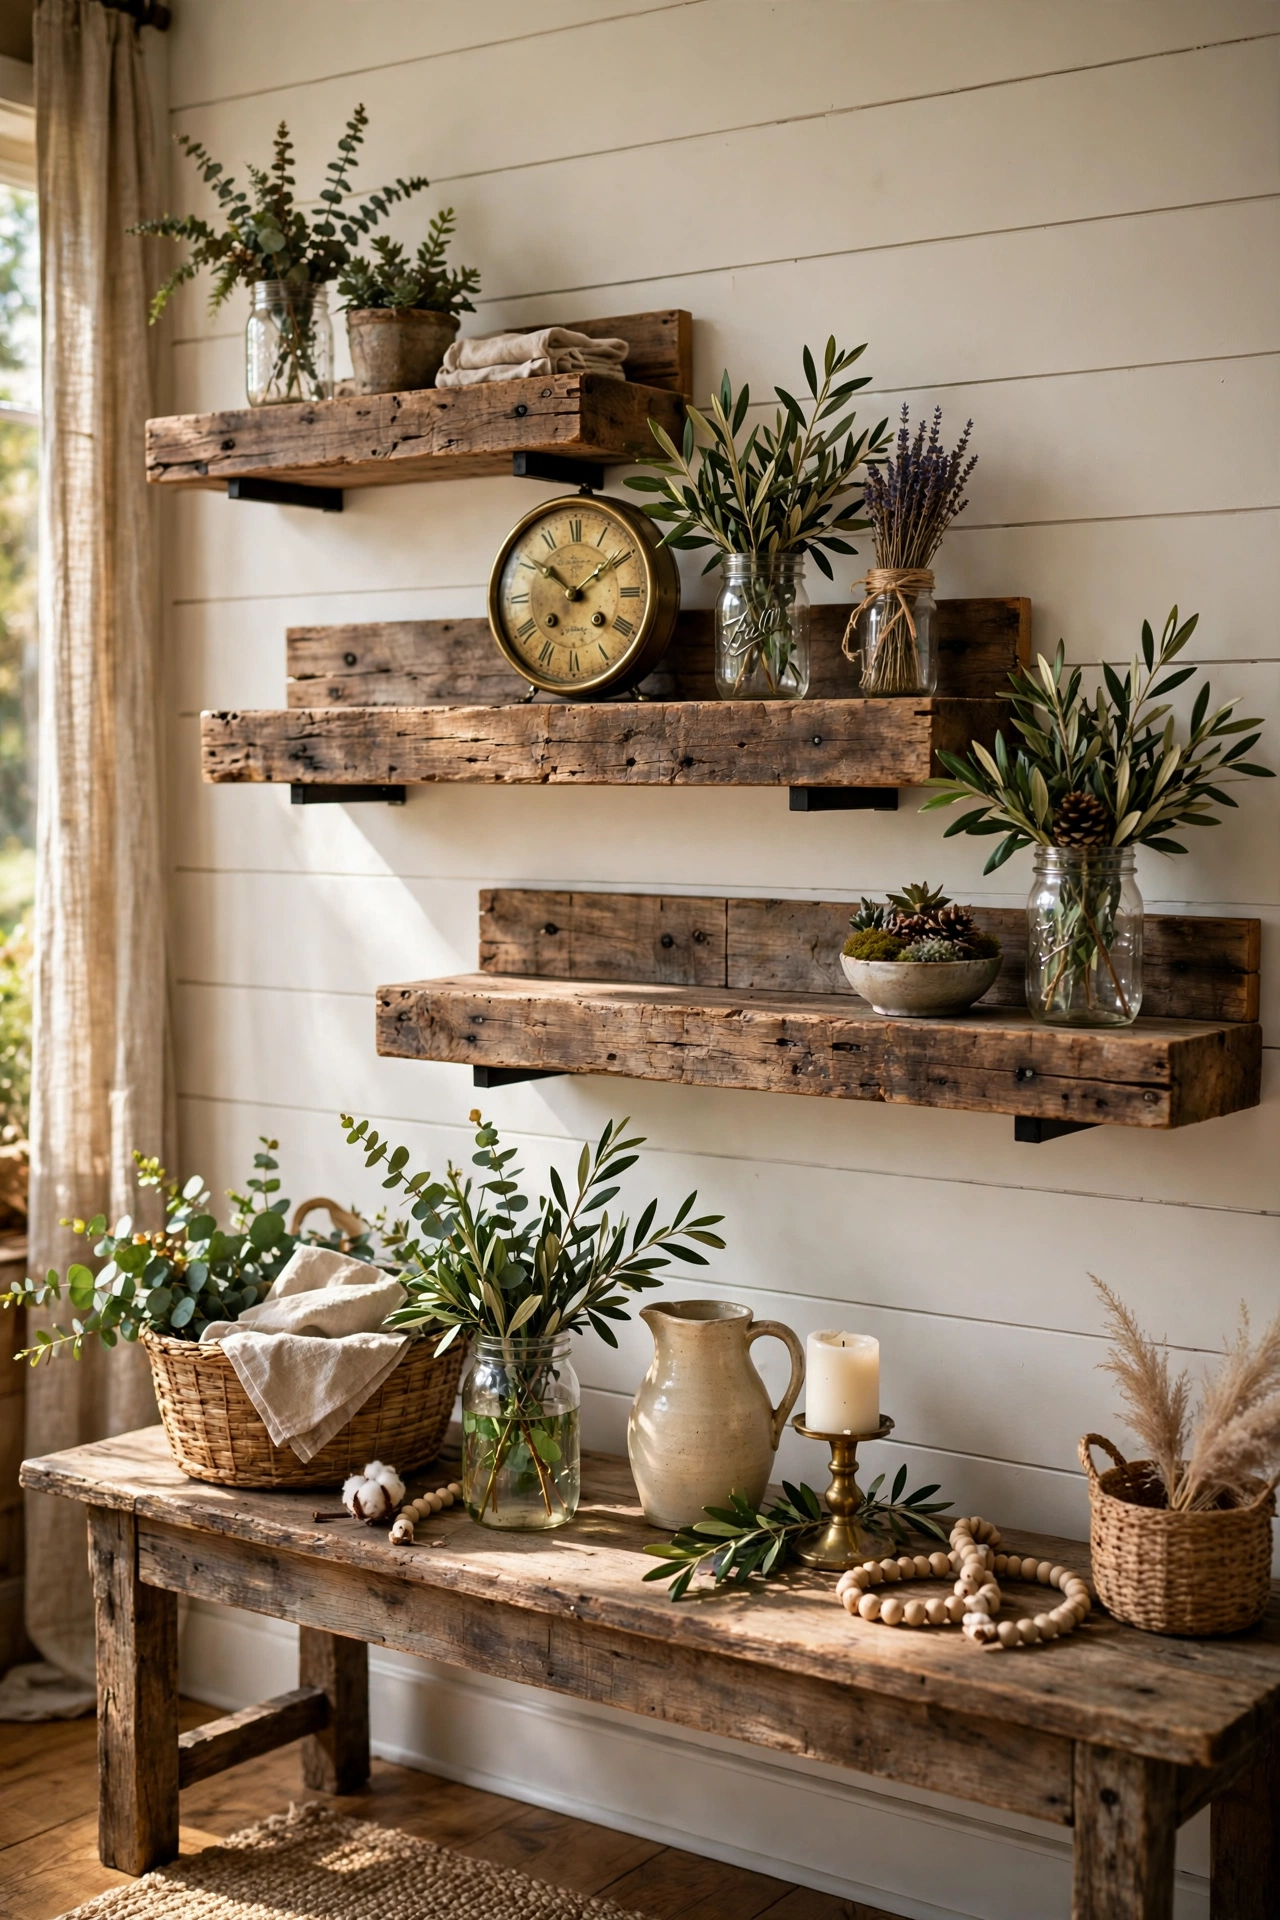
Reclaimed wood brings instant warmth to staggered shelves, and the farmhouse look depends on imperfection. Choose boards with visible grain, knots, and varied tones, then mount them at staggered heights above a console table, fireplace, or dining sideboard. The uneven character of the wood means the stagger feels natural rather than fussy — no two shelves match exactly, and that is the point. Pair the shelves with iron brackets or hidden mounts, depending on whether you want the hardware visible. Style with a mix of old and new: mason jars, a vintage clock, greenery, and one or two modern ceramics to keep the look from feeling like a theme park. Seal reclaimed boards before mounting, since old wood can be dusty or splintery, and check each board for level even if the heights are staggered — the shelves themselves should never tilt. This is the coziest of the staggered shelf ideas, and it suits living rooms, kitchens, and entryways alike.
13. Black Metal and Walnut Modern Contrast
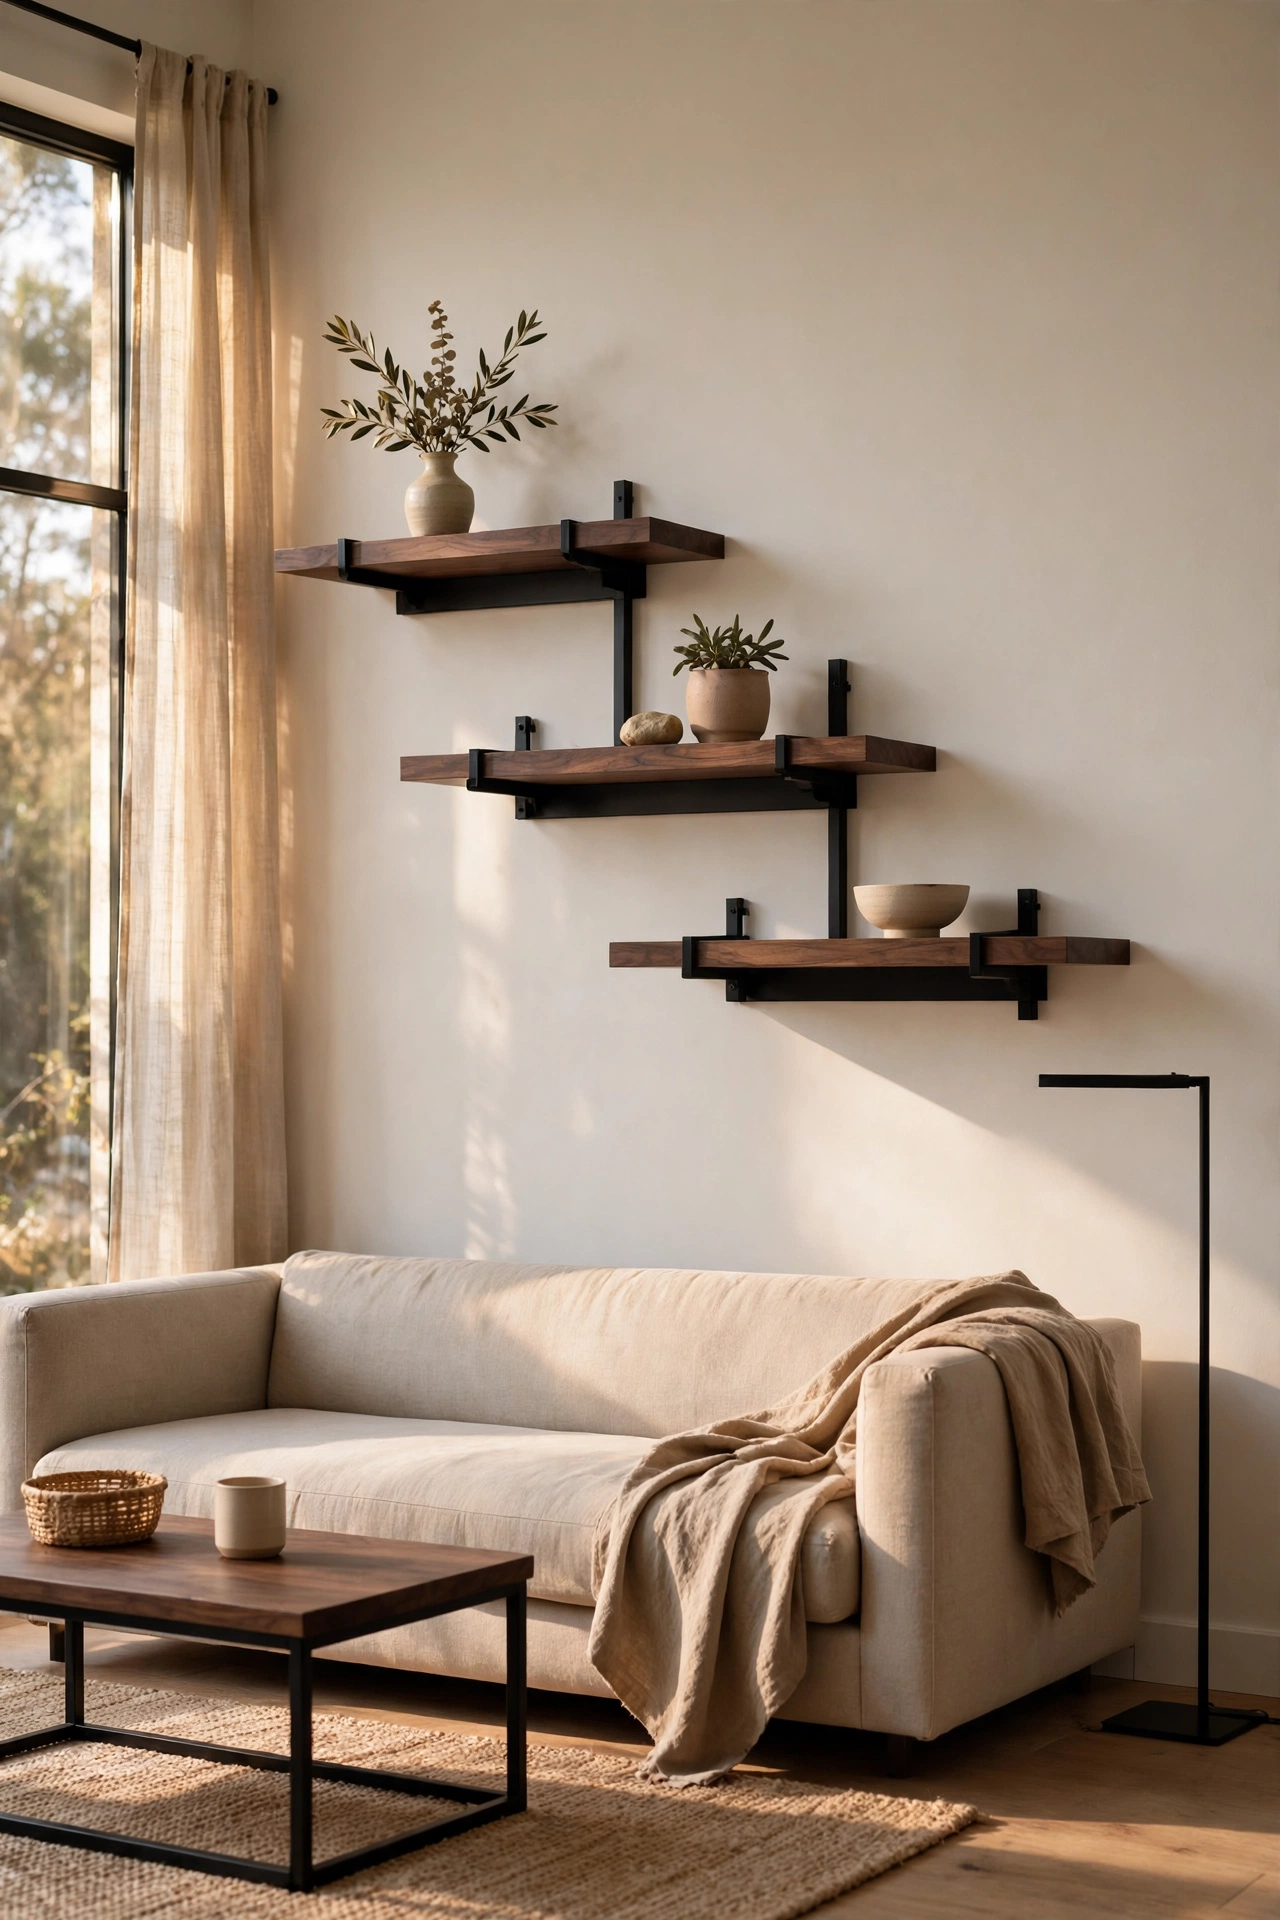
For a modern room, pair dark walnut shelves with black metal accents and let contrast do the work. Mount walnut boards at staggered heights against a light wall, and use black brackets or black-framed art on the shelves to echo the hardware. The dark wood reads as a strong horizontal line even when staggered, so the wall gains structure without feeling heavy. This combination suits living rooms, home offices, and dining rooms with modern or industrial furniture. Keep styling minimal — a black vase, a white ceramic, a stack of design books — because the material contrast is already the decoration. Walnut is dense and heavy, so stud mounting is non-negotiable, and a matte finish looks more modern than high gloss. If your room already has black window frames or light fixtures, the shelves will tie the whole space together.
14. LED-Lit Display Shelves
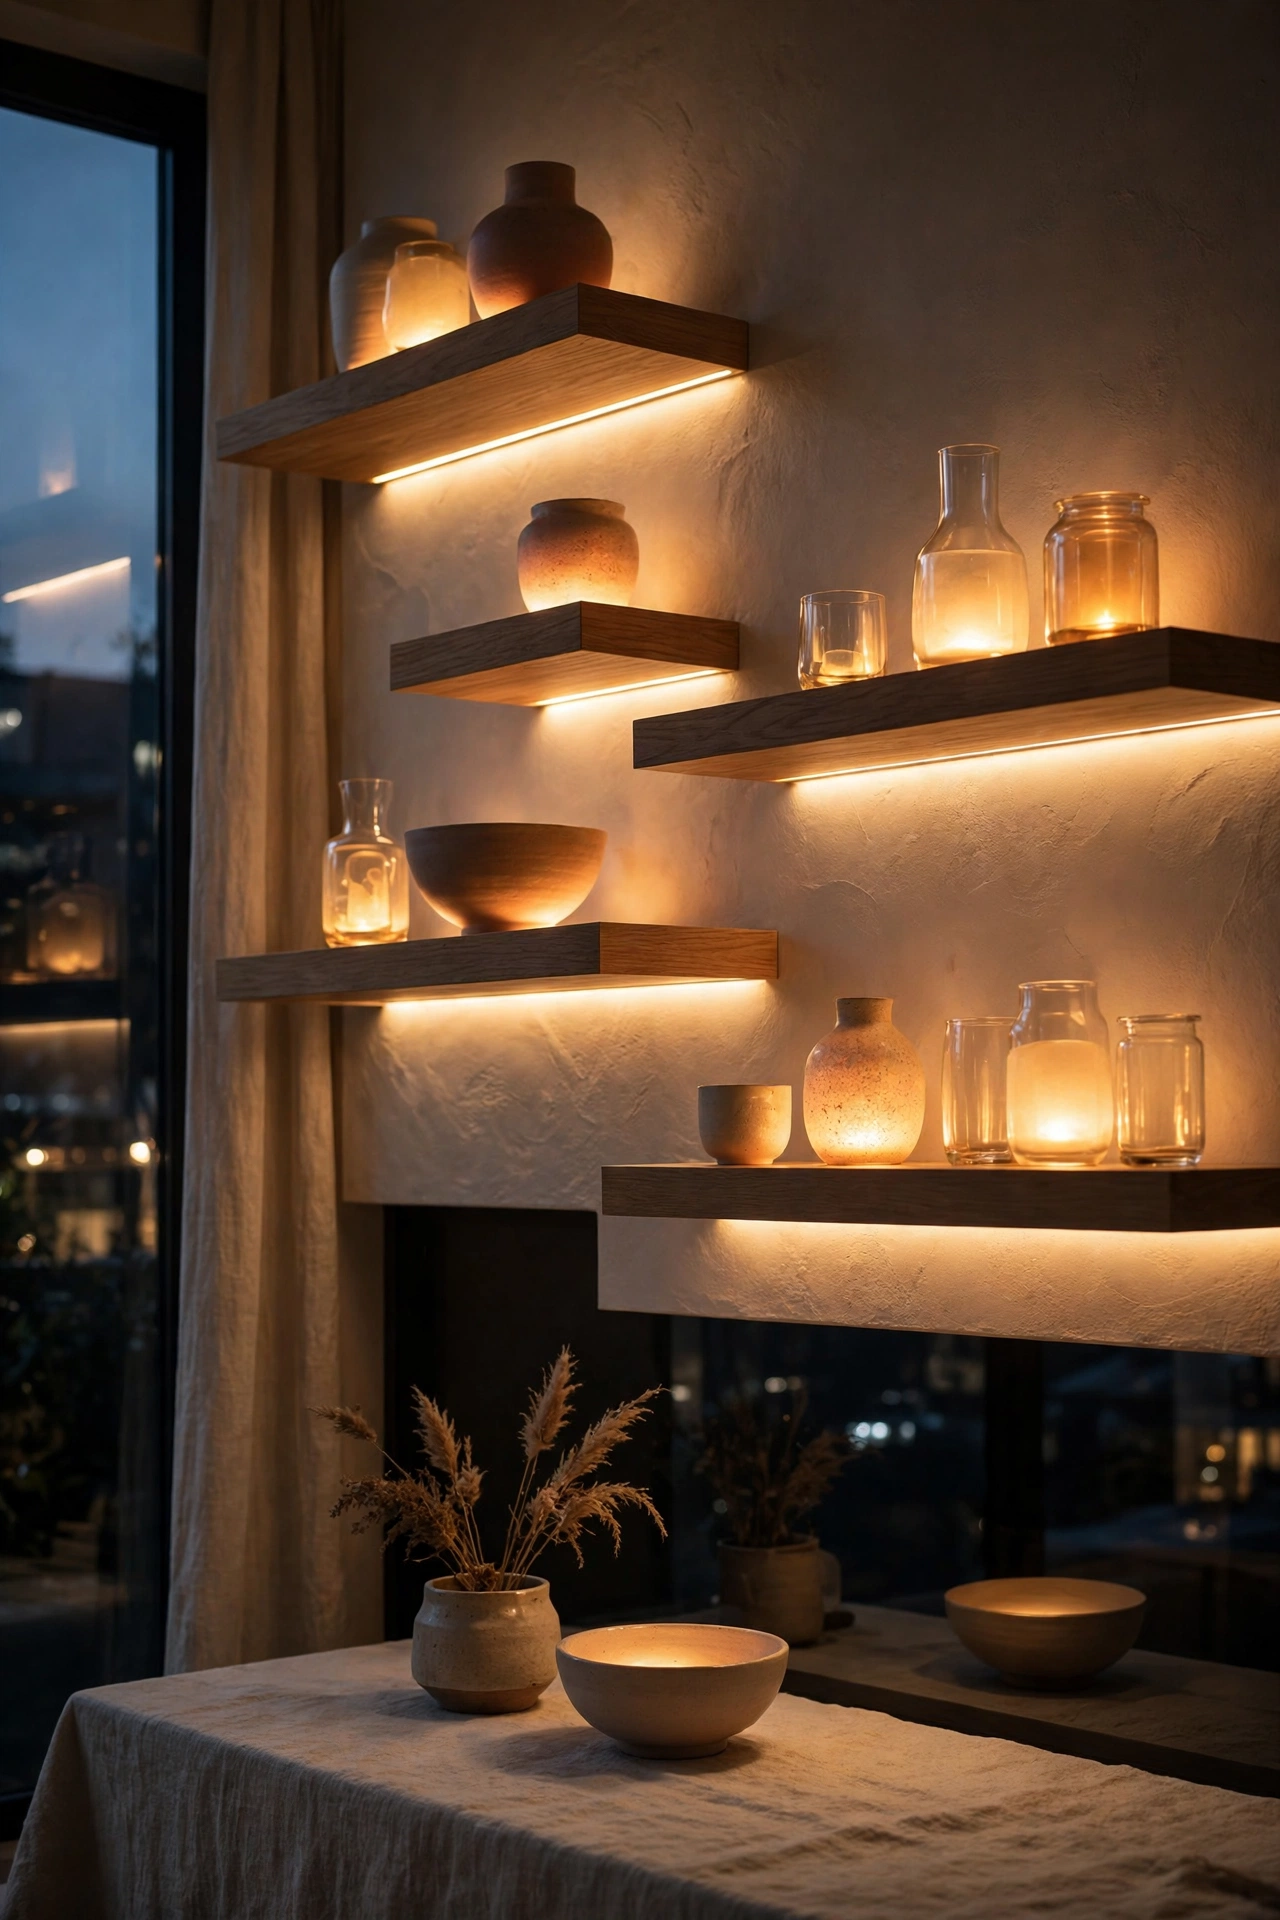
Built-in LED strips turn staggered shelves into a nighttime feature. Mount slim LED tape under each shelf, slightly recessed so the light washes the wall below rather than glaring outward, and suddenly ceramics, glassware, and art glow like a gallery after dark. Warm white (2700K) suits living rooms and bedrooms, while cooler light works in kitchens and offices. Battery-powered LED bars are the renter-friendly option; hardwired strips with a dimmer give the cleanest result. The stagger makes lighting more interesting than a single straight shelf, because light pools at different heights and creates layered shadows. Plan the wiring before mounting — run a discreet channel or choose rechargeable bars if you cannot hide cables. Style the lit shelves with objects that catch light: glass, metallics, and pale ceramics look best. This is the idea that makes guests ask where you got your shelves.
15. Bedroom Headboard Flanking Stagger
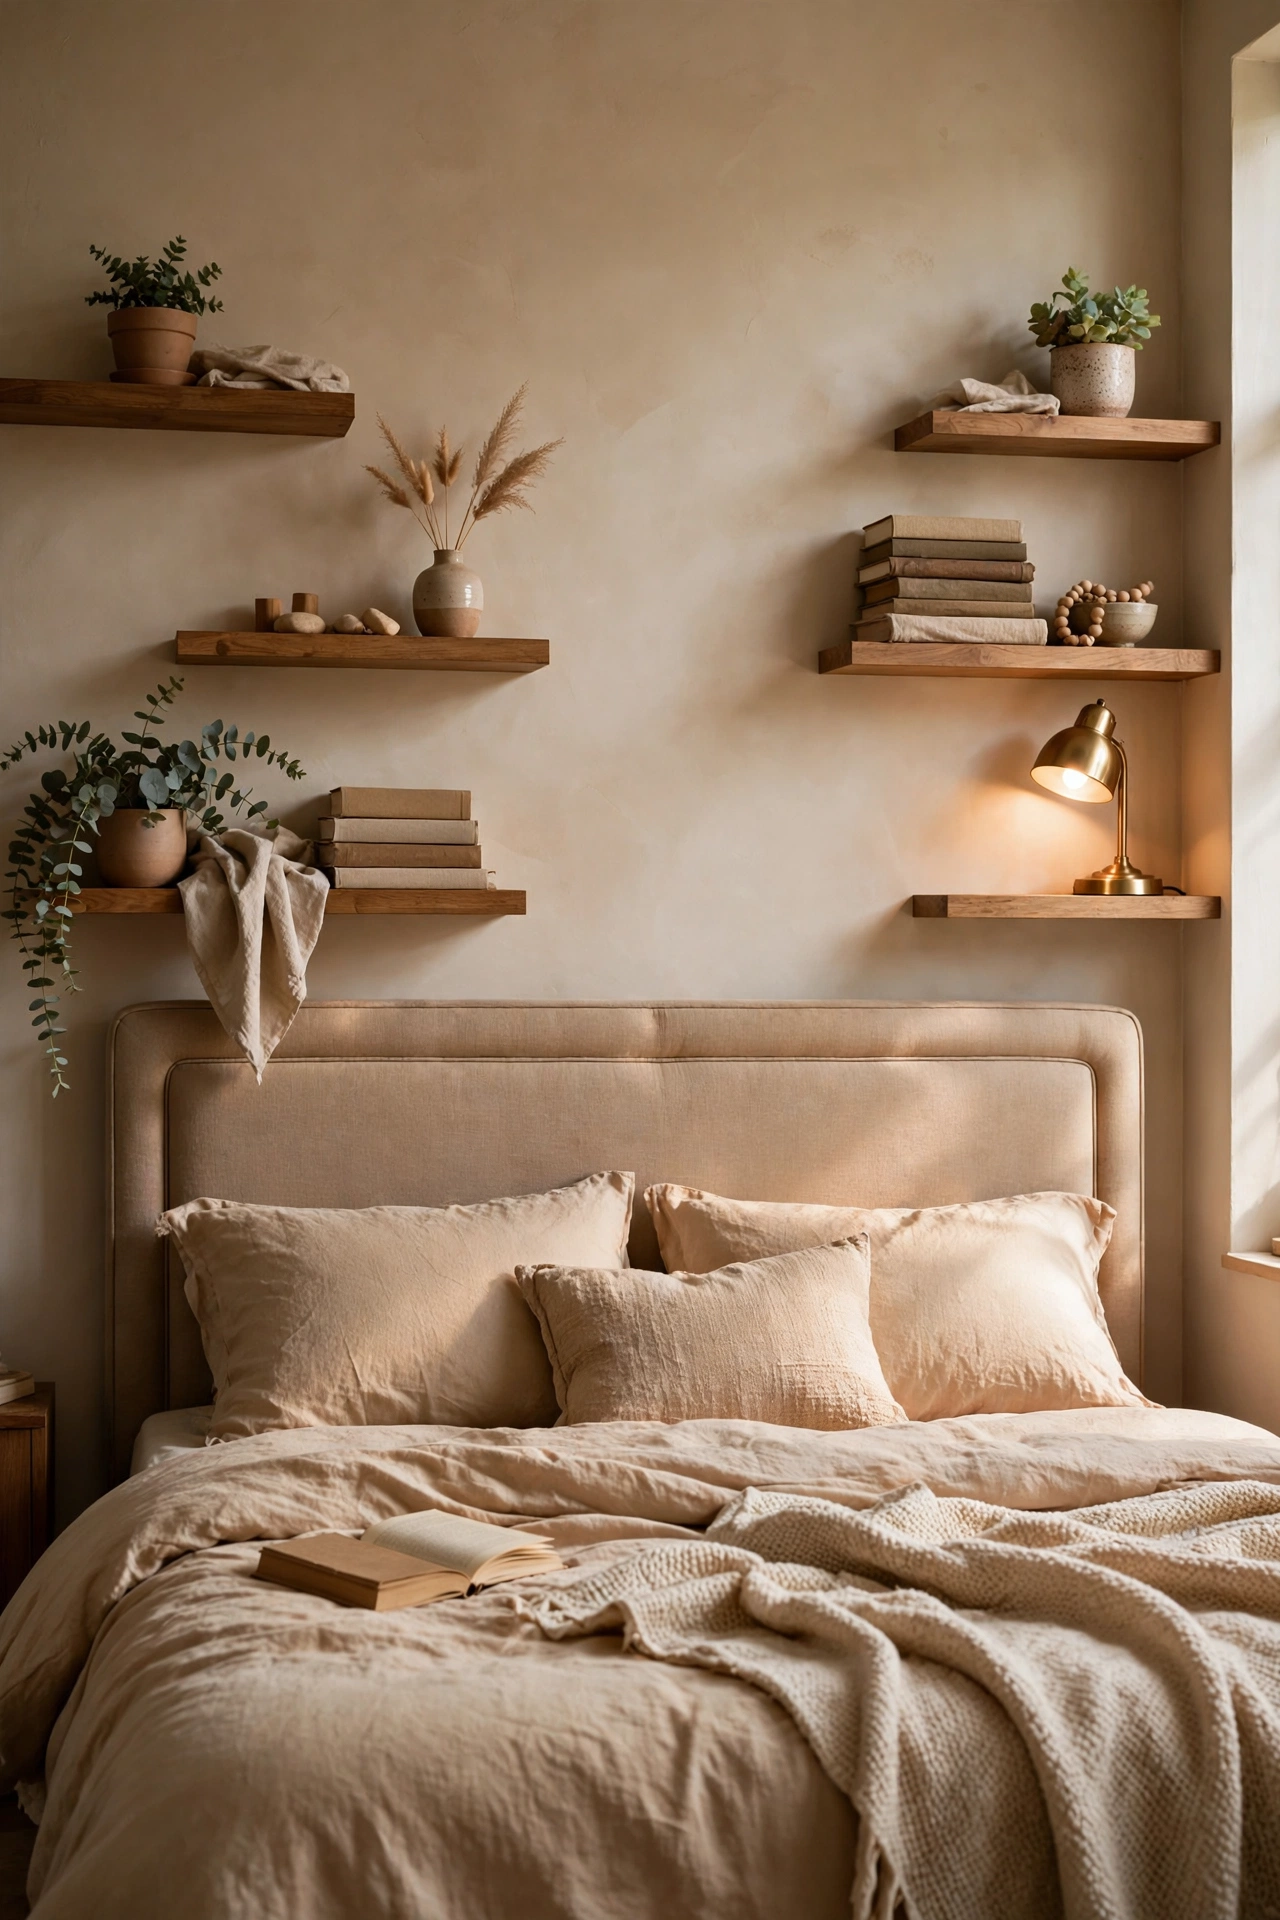
Nightstands are not the only option beside a bed. Staggered shelves flanking the headboard free up floor space and look far more custom. Mount a short shelf at lamp height on each side for a book and phone, then stagger a second, higher shelf on one side for art or a plant. The asymmetry is deliberate — identical shelves on both sides would look like a hotel, while the stagger looks personal. Keep the lowest shelf within easy reach from bed, about 6 inches above mattress height, and choose shallow depths so you never bump your head. A small clip-on light or a candle on the upper shelf adds evening warmth. This idea pairs beautifully with an upholstered or wooden headboard, and it is a lifesaver in small bedrooms where a nightstand would crowd the walkway. For more bedroom inspiration, see our 31 sage green and pink bedroom ideas.
16. Home Office Staggered Storage and Display
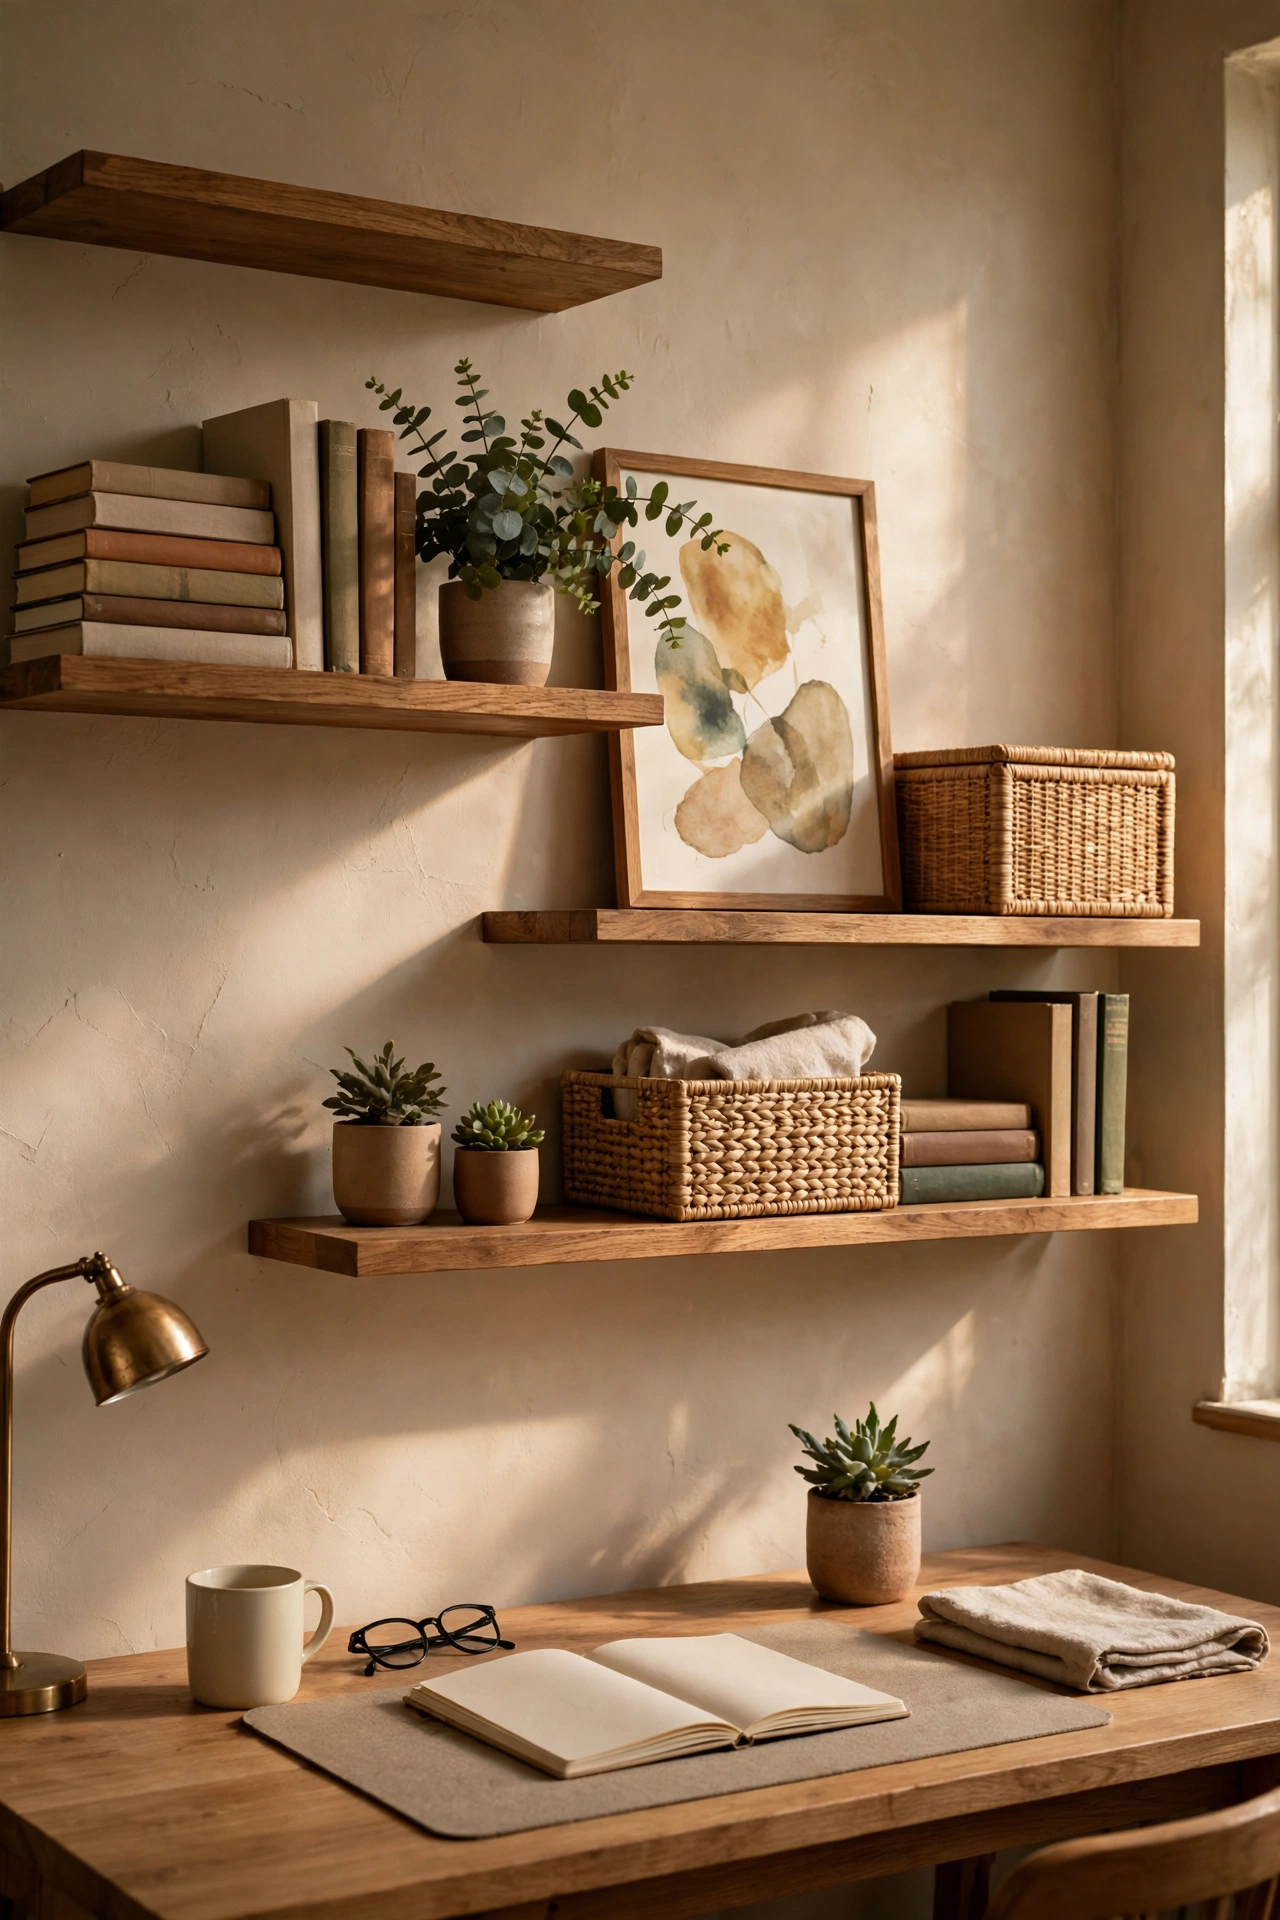
A home office needs both storage and inspiration, and staggered shelves above the desk deliver both. Mount a long shelf at arm’s reach for reference books and supplies, a shorter one above for plants and art, and a third offset shelf for awards, photos, or a small clock. The stagger keeps the wall from feeling like office shelving — it reads as a designed backdrop for video calls, too. Keep the lowest shelf high enough that your monitor fits beneath it, usually 18 to 20 inches above the desk surface. Use closed boxes or baskets on one shelf to hide chargers and cables, and leave the other shelves open for display. Matching shelf material to your desk creates cohesion; contrasting it makes the wall a feature. Either way, stud-mount everything — office shelves carry real weight in books and binders.
17. Dining Room Buffet Wall Stagger
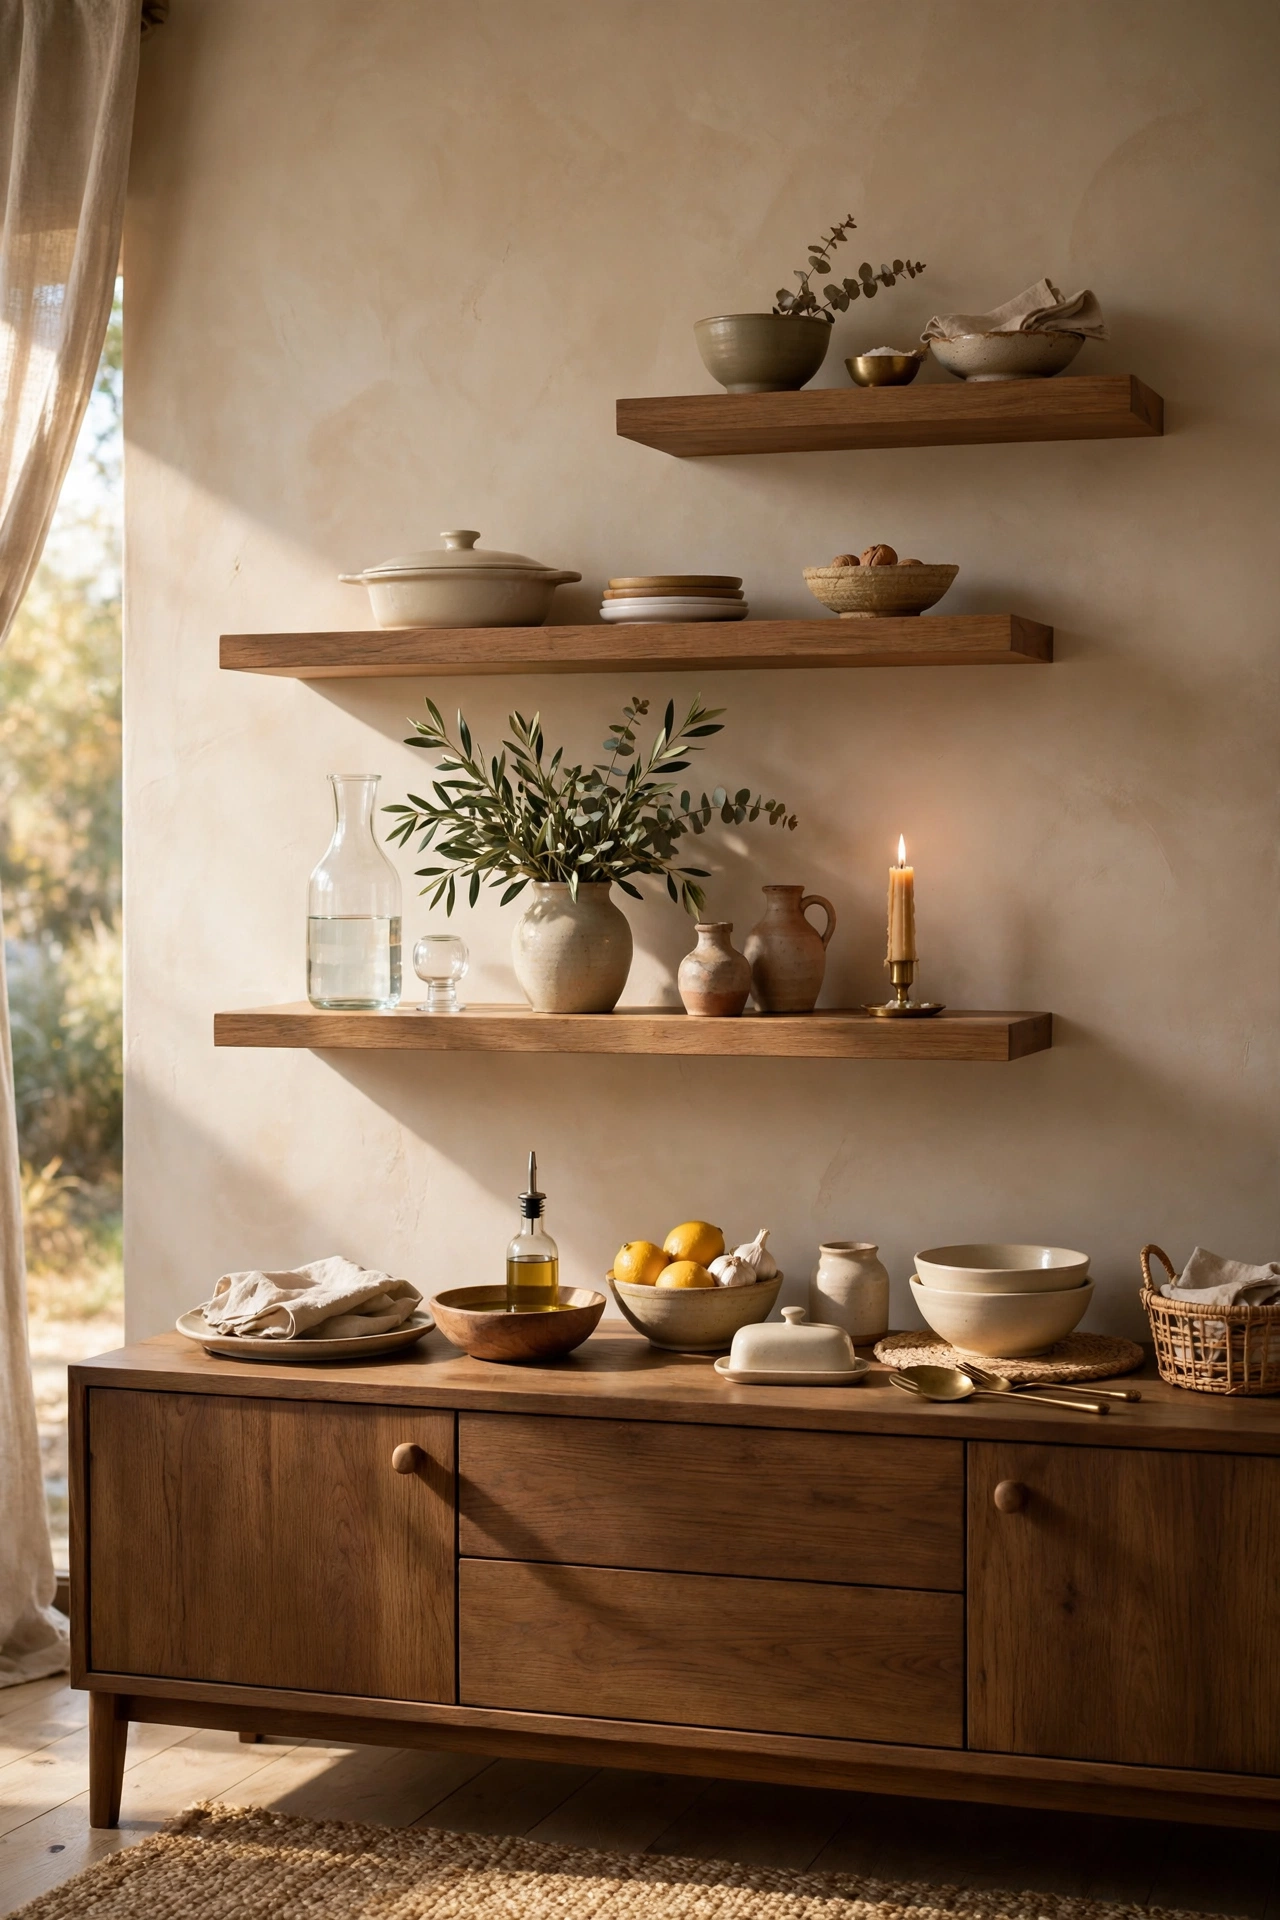
Above a dining room buffet or sideboard, staggered shelves turn a serving station into a display. Mount two shelves at different heights: the lower one for serving pieces you actually use — a carafe, a stack of bowls, a candle — and the upper one for art, a vase, or seasonal decor. Because the buffet anchors the arrangement, the shelves do not need to be long; two short boards staggered across the wall above it are enough. Keep the lowest shelf about 12 inches above the buffet surface so tall items fit beneath it, and style with pieces that echo your tableware for a pulled-together look. This is also the perfect spot for a seasonal rotation — swap the upper shelf’s decor for holidays without touching the everyday serving pieces below. The stagger keeps the dining wall from looking like a restaurant shelf row, which is exactly the homey-but-polished effect you want.
18. Nursery Staggered Shelves for Books and Keepsakes
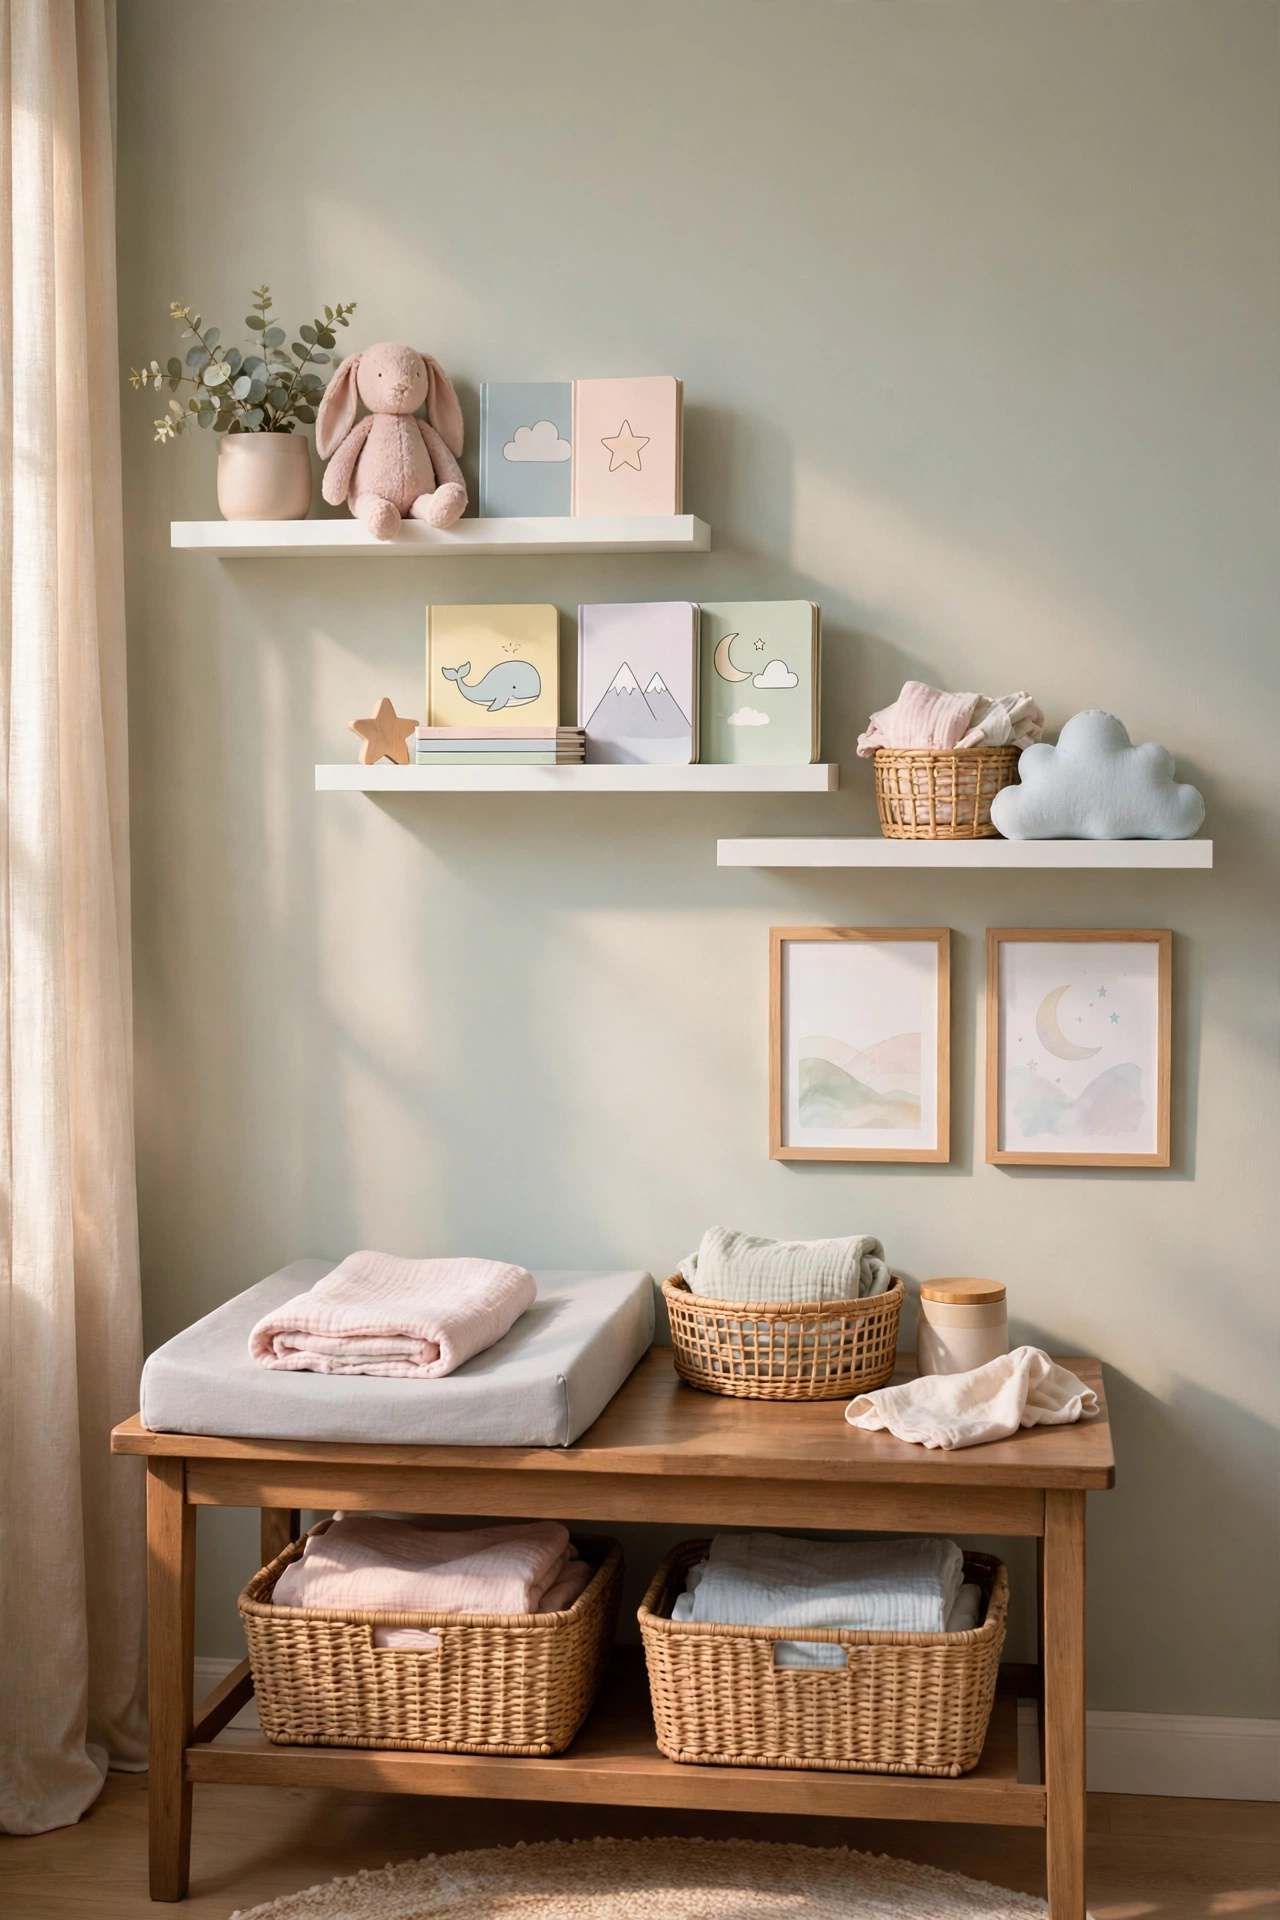
In a nursery, staggered shelves do double duty: they display the sweetest things — first shoes, a stuffed animal, framed nursery art — and they store board books at a height you can reach during story time. Mount shelves above the changing table or reading chair, keeping anything within a baby’s grabbing range soft and unbreakable. Safety comes first here: stud-mount every shelf, use brackets rated well above the expected load, and never place heavy frames above the crib. Soft colors work beautifully — white or pale wood shelves with pastel books and toys read calm and airy. As the child grows, the same shelves transition from keepsakes to chapter books and trophies, so choose a neutral finish that outlasts the nursery phase. The stagger keeps the wall playful rather than formal, which suits a child’s room perfectly.
19. Box Cube Staggered Arrangement
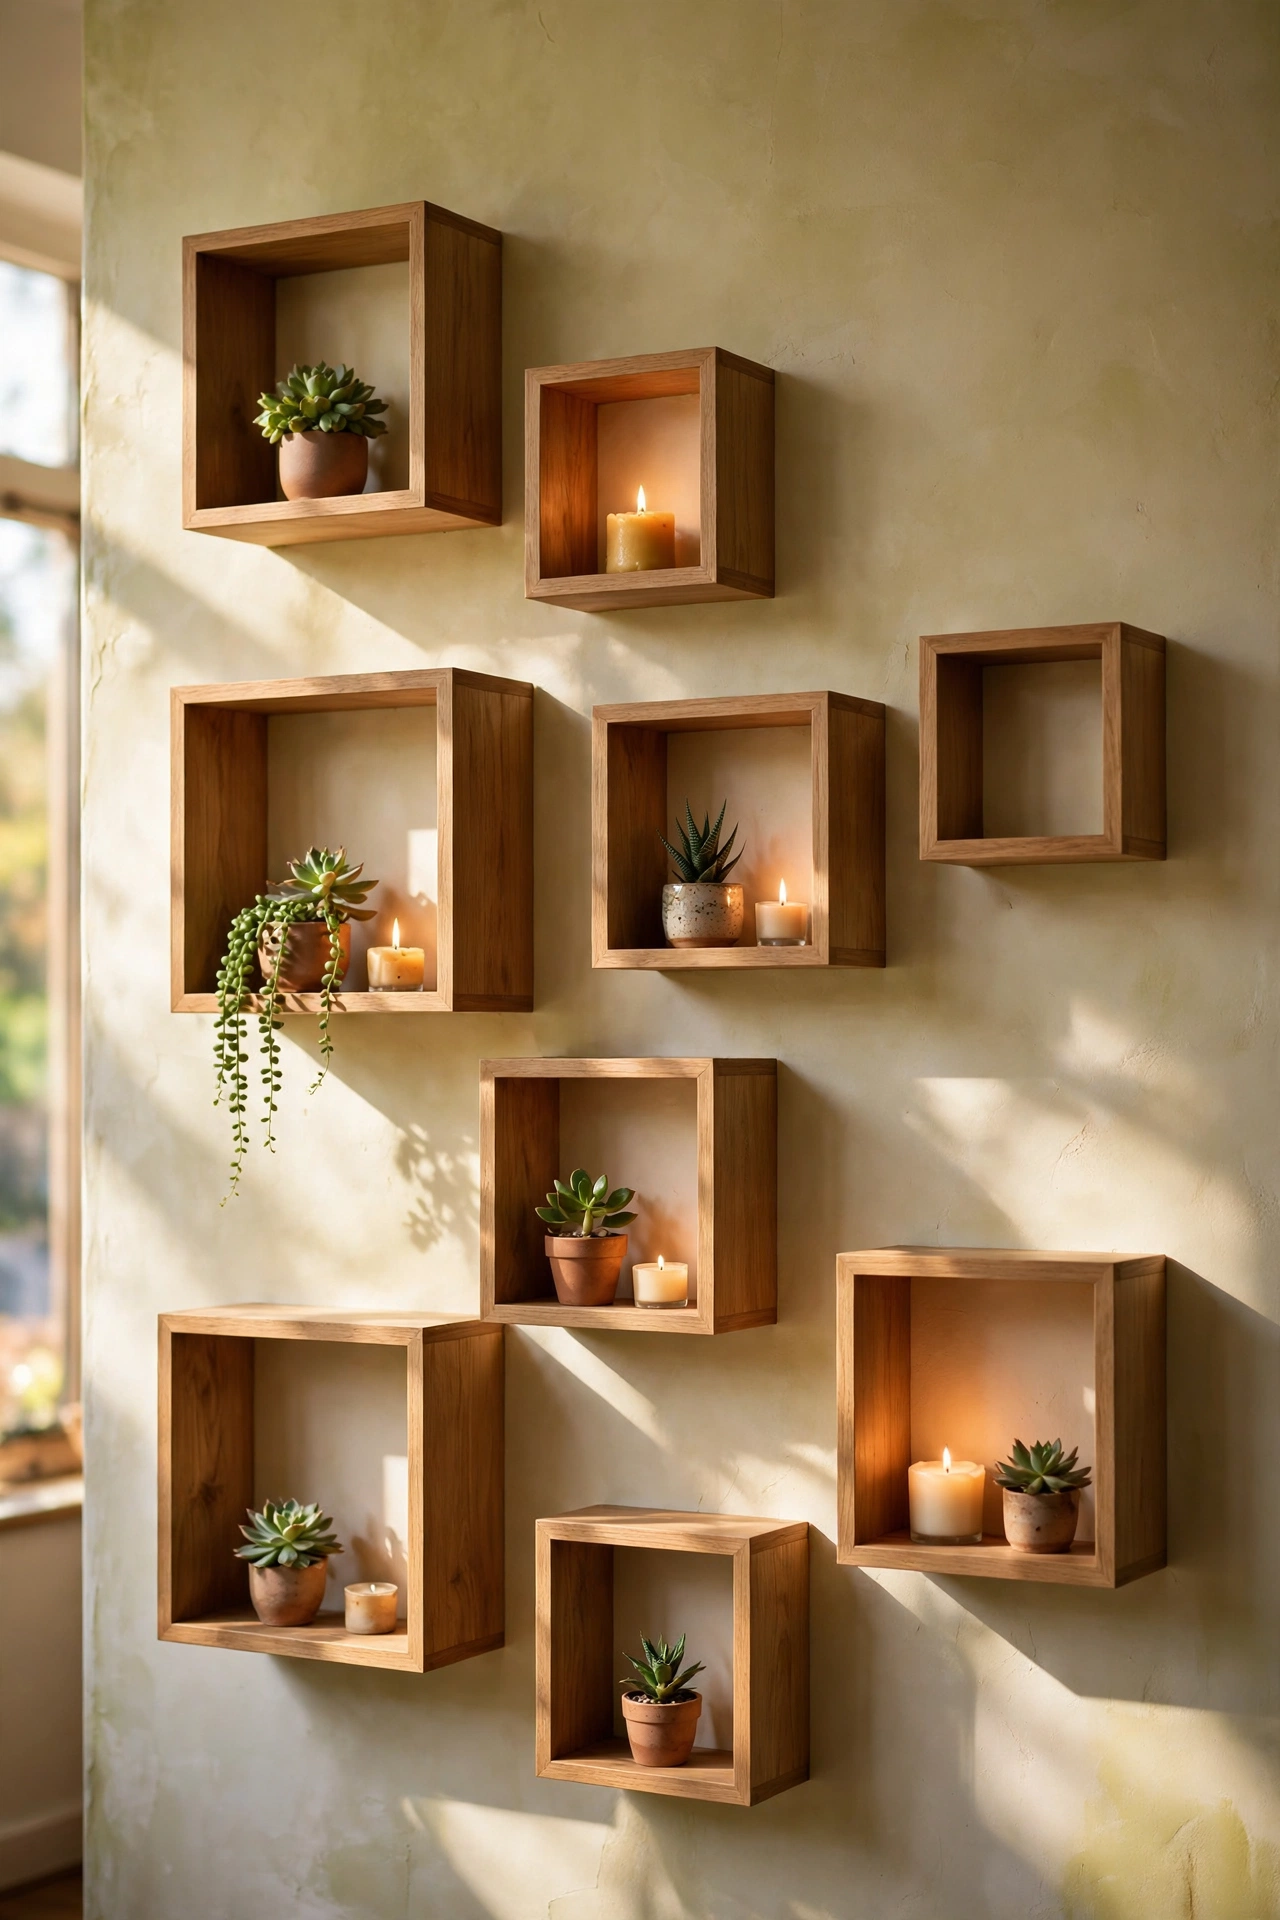
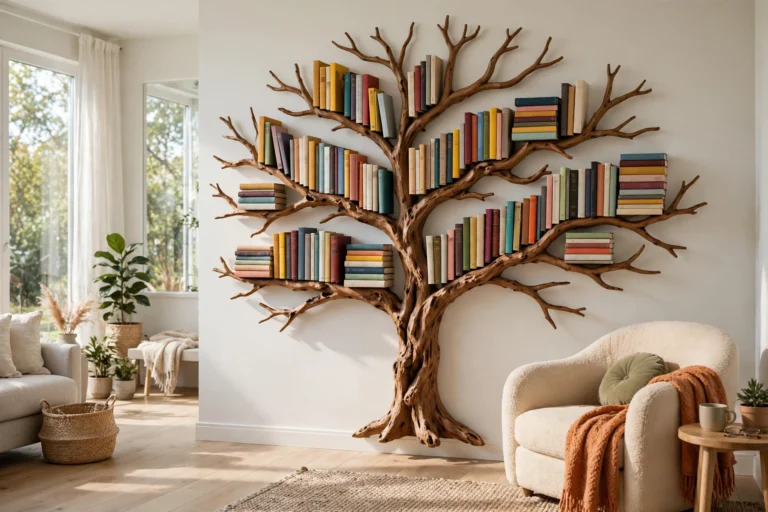
Box cubes — open-sided square or rectangular frames — take staggering in a different direction: instead of flat boards, you arrange cubes at offset heights and positions to form a geometric composition on the wall. Mix small, medium, and large cubes, and vary their depths so some sit proud of the wall and others recess. Paint the outsides one color and the insides another for a subtle surprise when you look straight on. Cubes are ideal for displaying small collections — succulents, candles, mini vases, framed photos — because each cube frames its contents. Mount cubes into studs, especially the larger ones, and plan the layout on the floor first with painter’s tape on the wall. This idea suits modern and eclectic rooms, and it doubles as wall art even when a few cubes are left empty. For another take on statement wall storage, see our 24 tree bookshelf ideas.
20. Bathroom Vanity Side Stagger
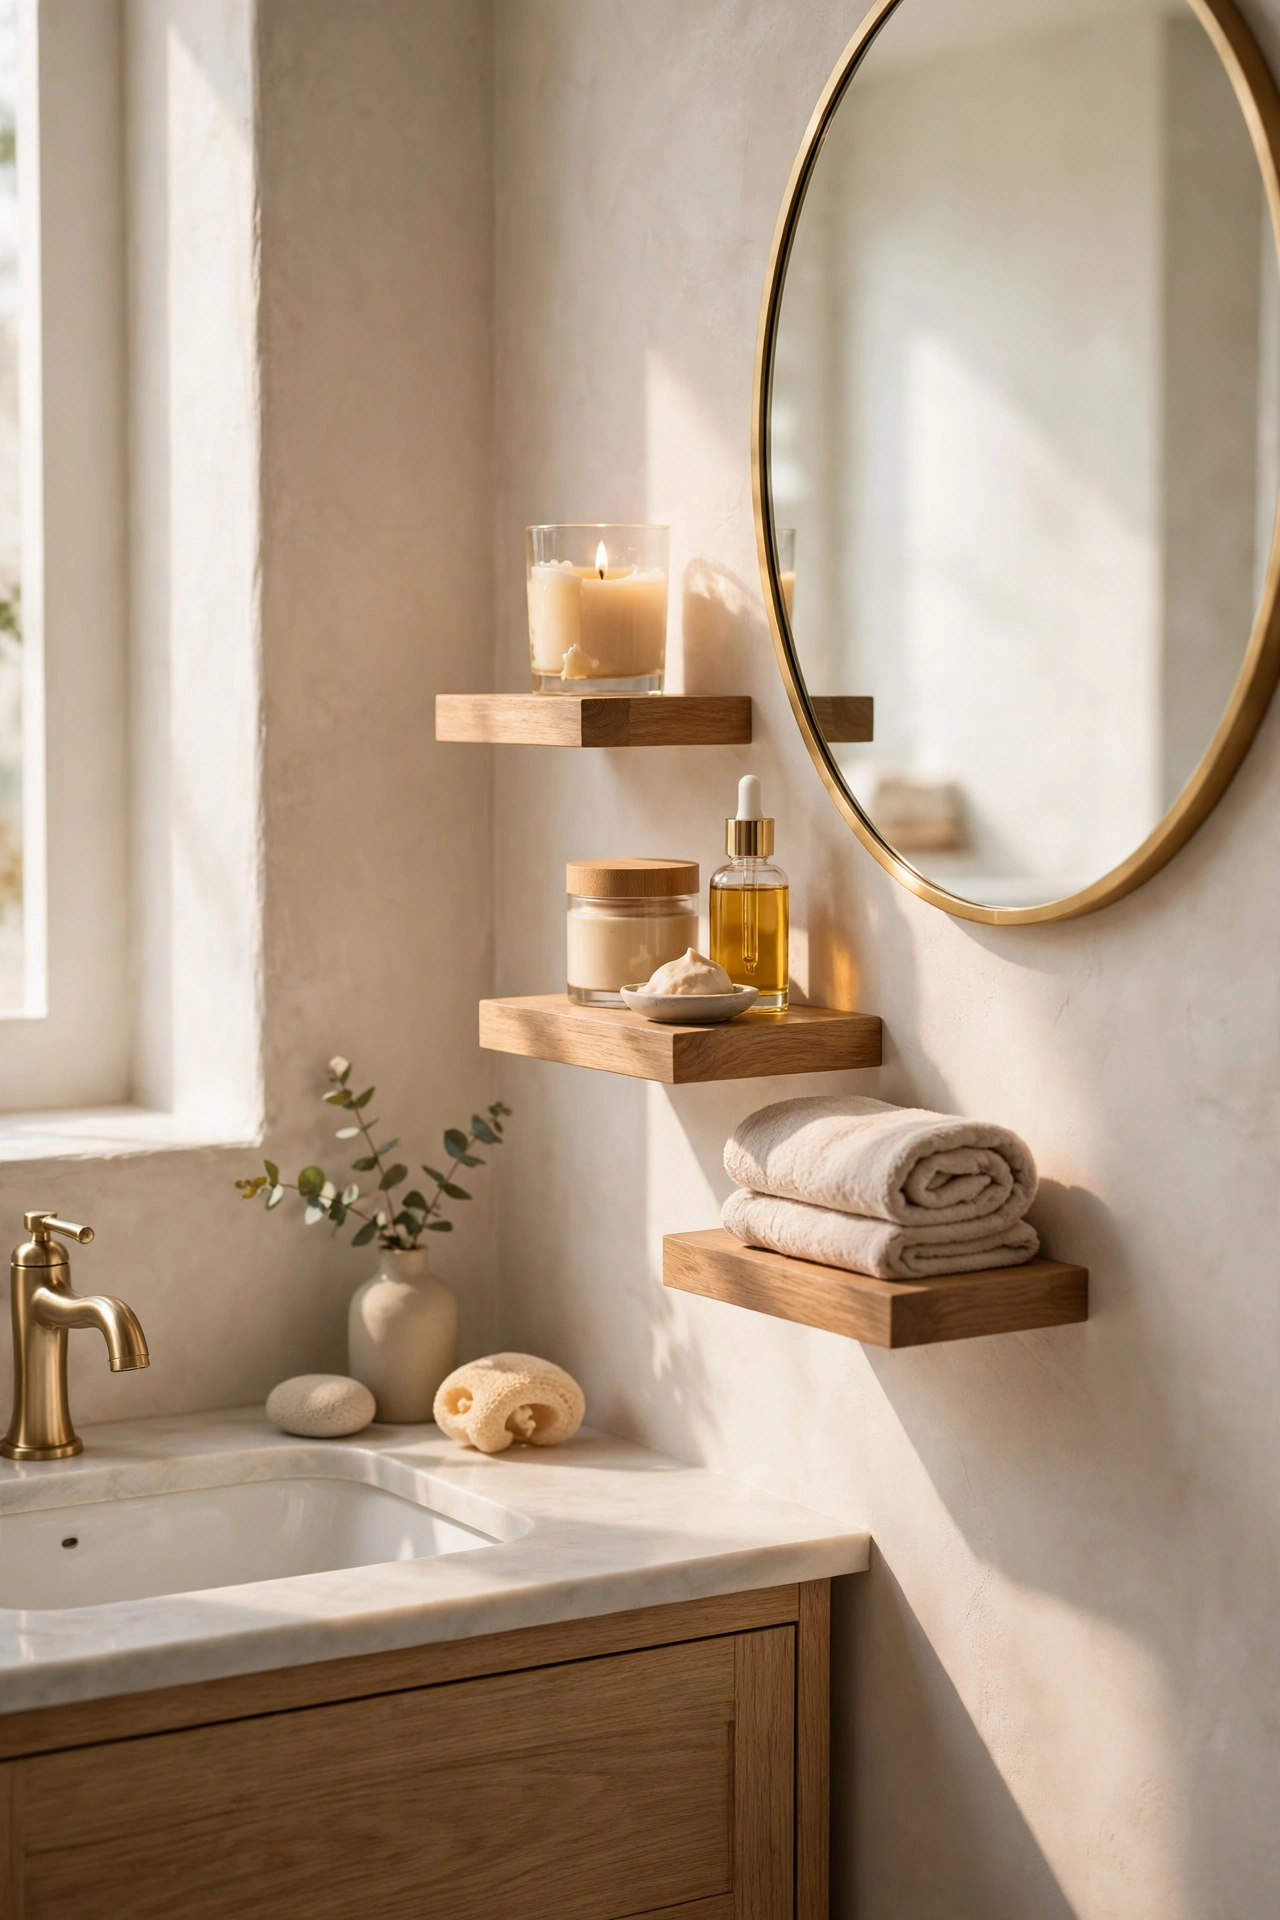
Beside a bathroom vanity, a short column of staggered shelves holds the daily routine without a cluttered counter. Mount two or three small shelves to one side of the mirror: the lowest for everyday skincare, the middle for a small plant or candle, and the top for extra towels or decorative jars. Keep shelves narrow — 5 to 6 inches deep — so they never crowd the mirror or the sink. Moisture-resistant materials are a must, and sealed wood or metal handles steam far better than unfinished boards. Matching the shelf finish to your vanity is an easy win: if you love warm wood tones, our 23 white oak bathroom vanity ideas show how the material carries across a whole bathroom. The stagger keeps the vanity wall from looking like a medicine cabinet row, and it puts everything you reach for daily exactly where your hand expects it.
21. Fireplace Mantel Flanking Shelves
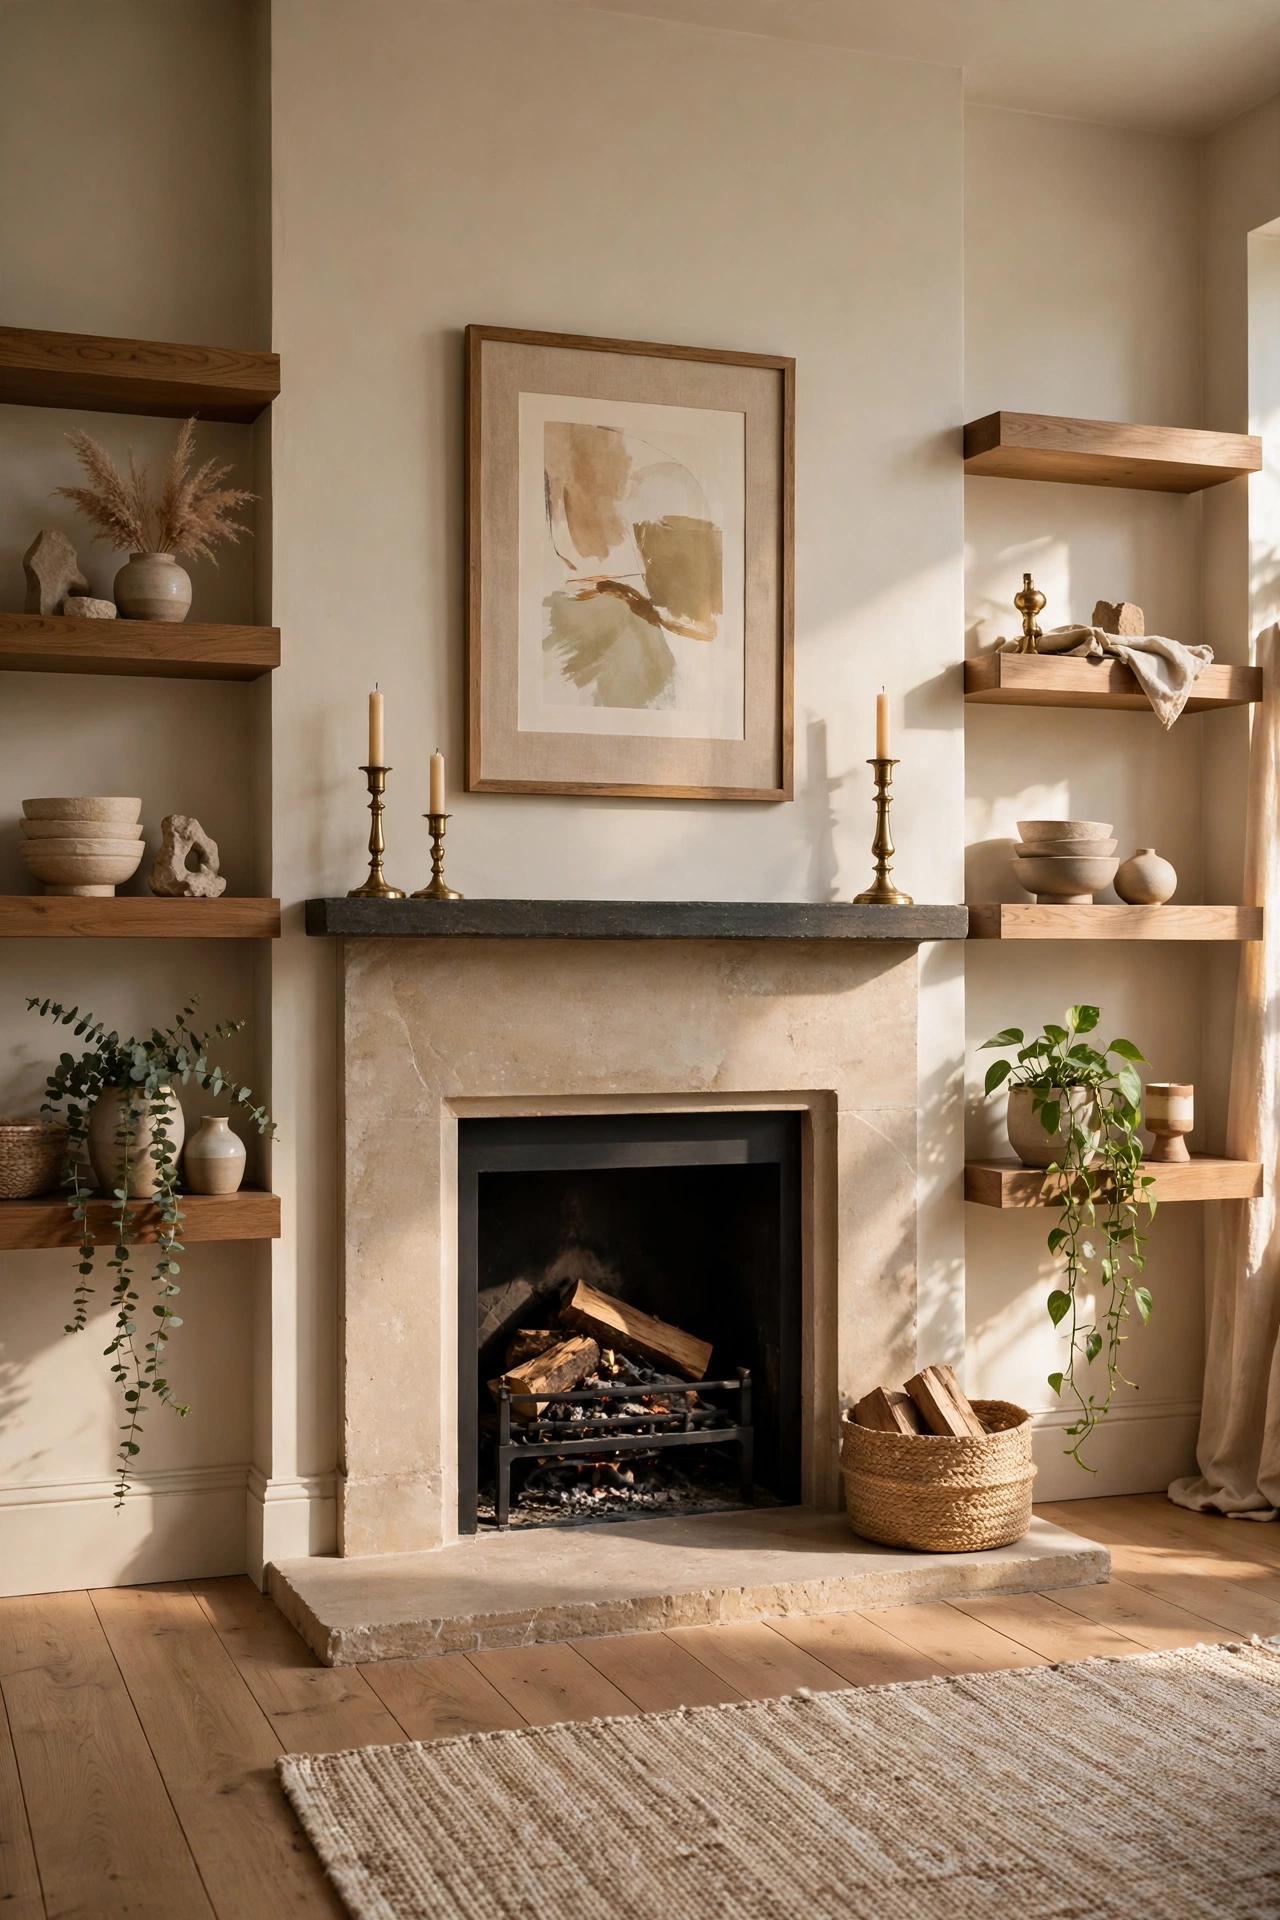
Flanking a fireplace with staggered shelves frames the mantel and balances the hearth. Mount shelves on both sides of the chimney breast at offset heights — higher on one side, lower on the other — so the arrangement echoes the fire’s asymmetry rather than competing with it. Style the shelves with a mix of tall and low pieces: candlesticks, framed art, a trailing plant that softens the brick or stone. Keep anything flammable well clear of the firebox opening, and avoid placing candles on shelves directly above the mantel where heat rises. Because fireplace walls are often masonry, use masonry anchors rated for the load, or mount into the studs of a framed chimney breast. The stagger draws the eye up the full height of the chimney, making the room feel taller — a trick designers use in living rooms with low ceilings. It also gives you display space without drilling into the mantel itself.
22. Small Apartment Vertical Storage Stagger
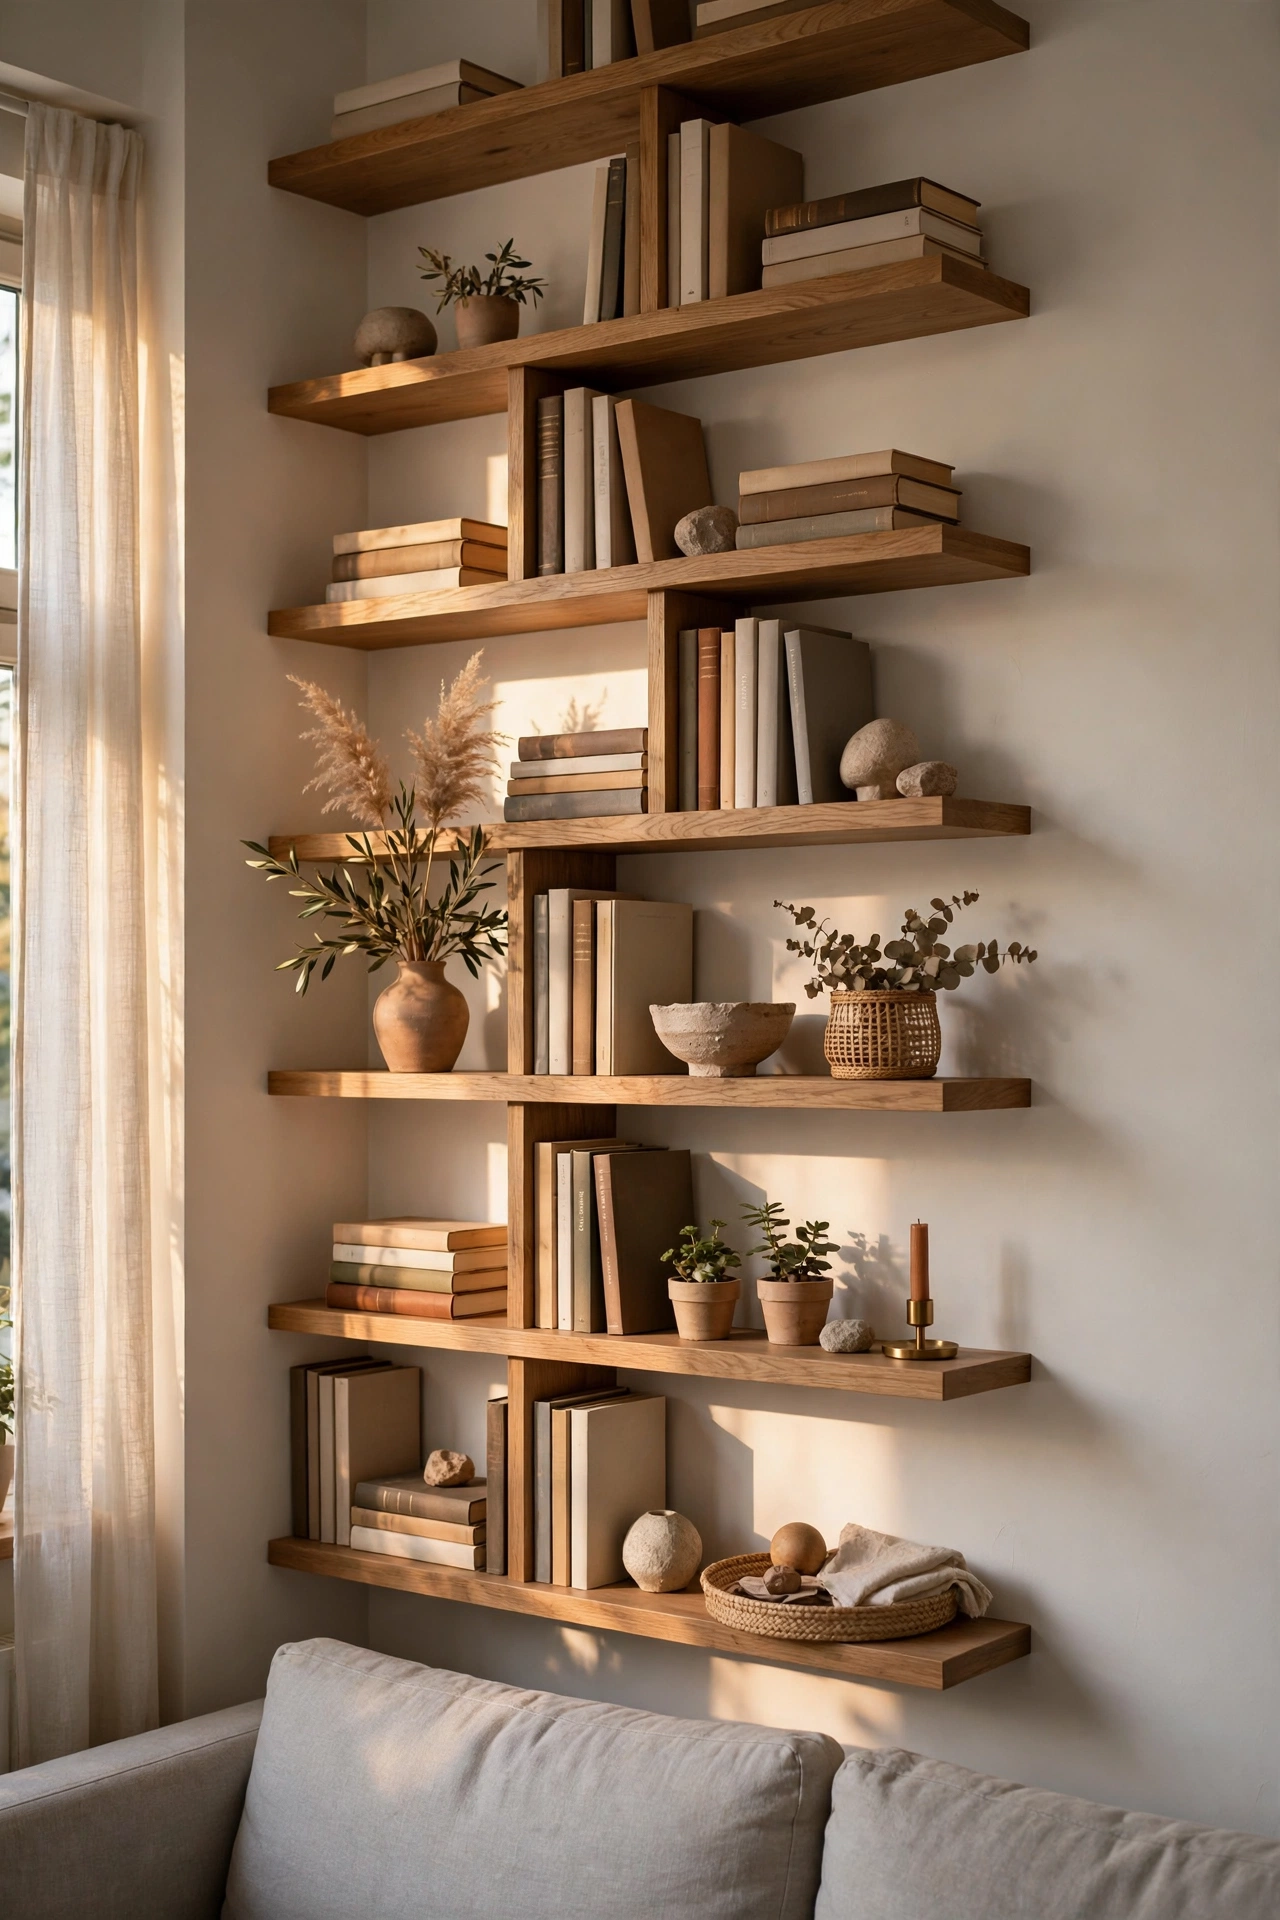
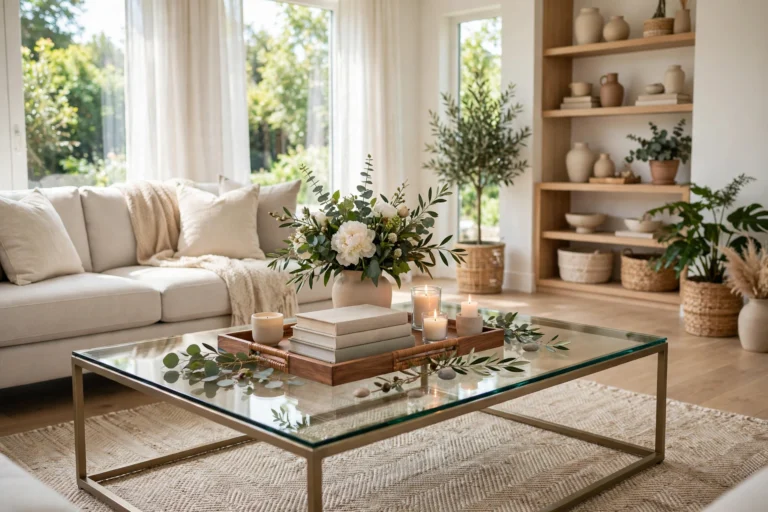
In a small apartment, vertical staggered shelves are the difference between cluttered and curated. Run shelves up an entire wall, from just above the sofa or desk to near the ceiling, staggering each one so the wall feels like a designed feature rather than a storage unit. The top shelves hold things you rarely need — seasonal decor, books you have already read — while the middle shelves carry daily items. Use the same slim shelf throughout so the vertical run reads as one piece, and keep colors light so the wall does not close the room in. A rolling library stool or a sturdy step stool makes the top shelves genuinely usable, not just decorative. This idea pairs well with a light, airy living room — if you like reflective surfaces that open a space, our 29 glass coffee table decor ideas complement the look. The key rule: if a shelf is too high to reach, it is decoration, so style it that way.
23. Kitchen Open Shelving With Staggered Plates Display
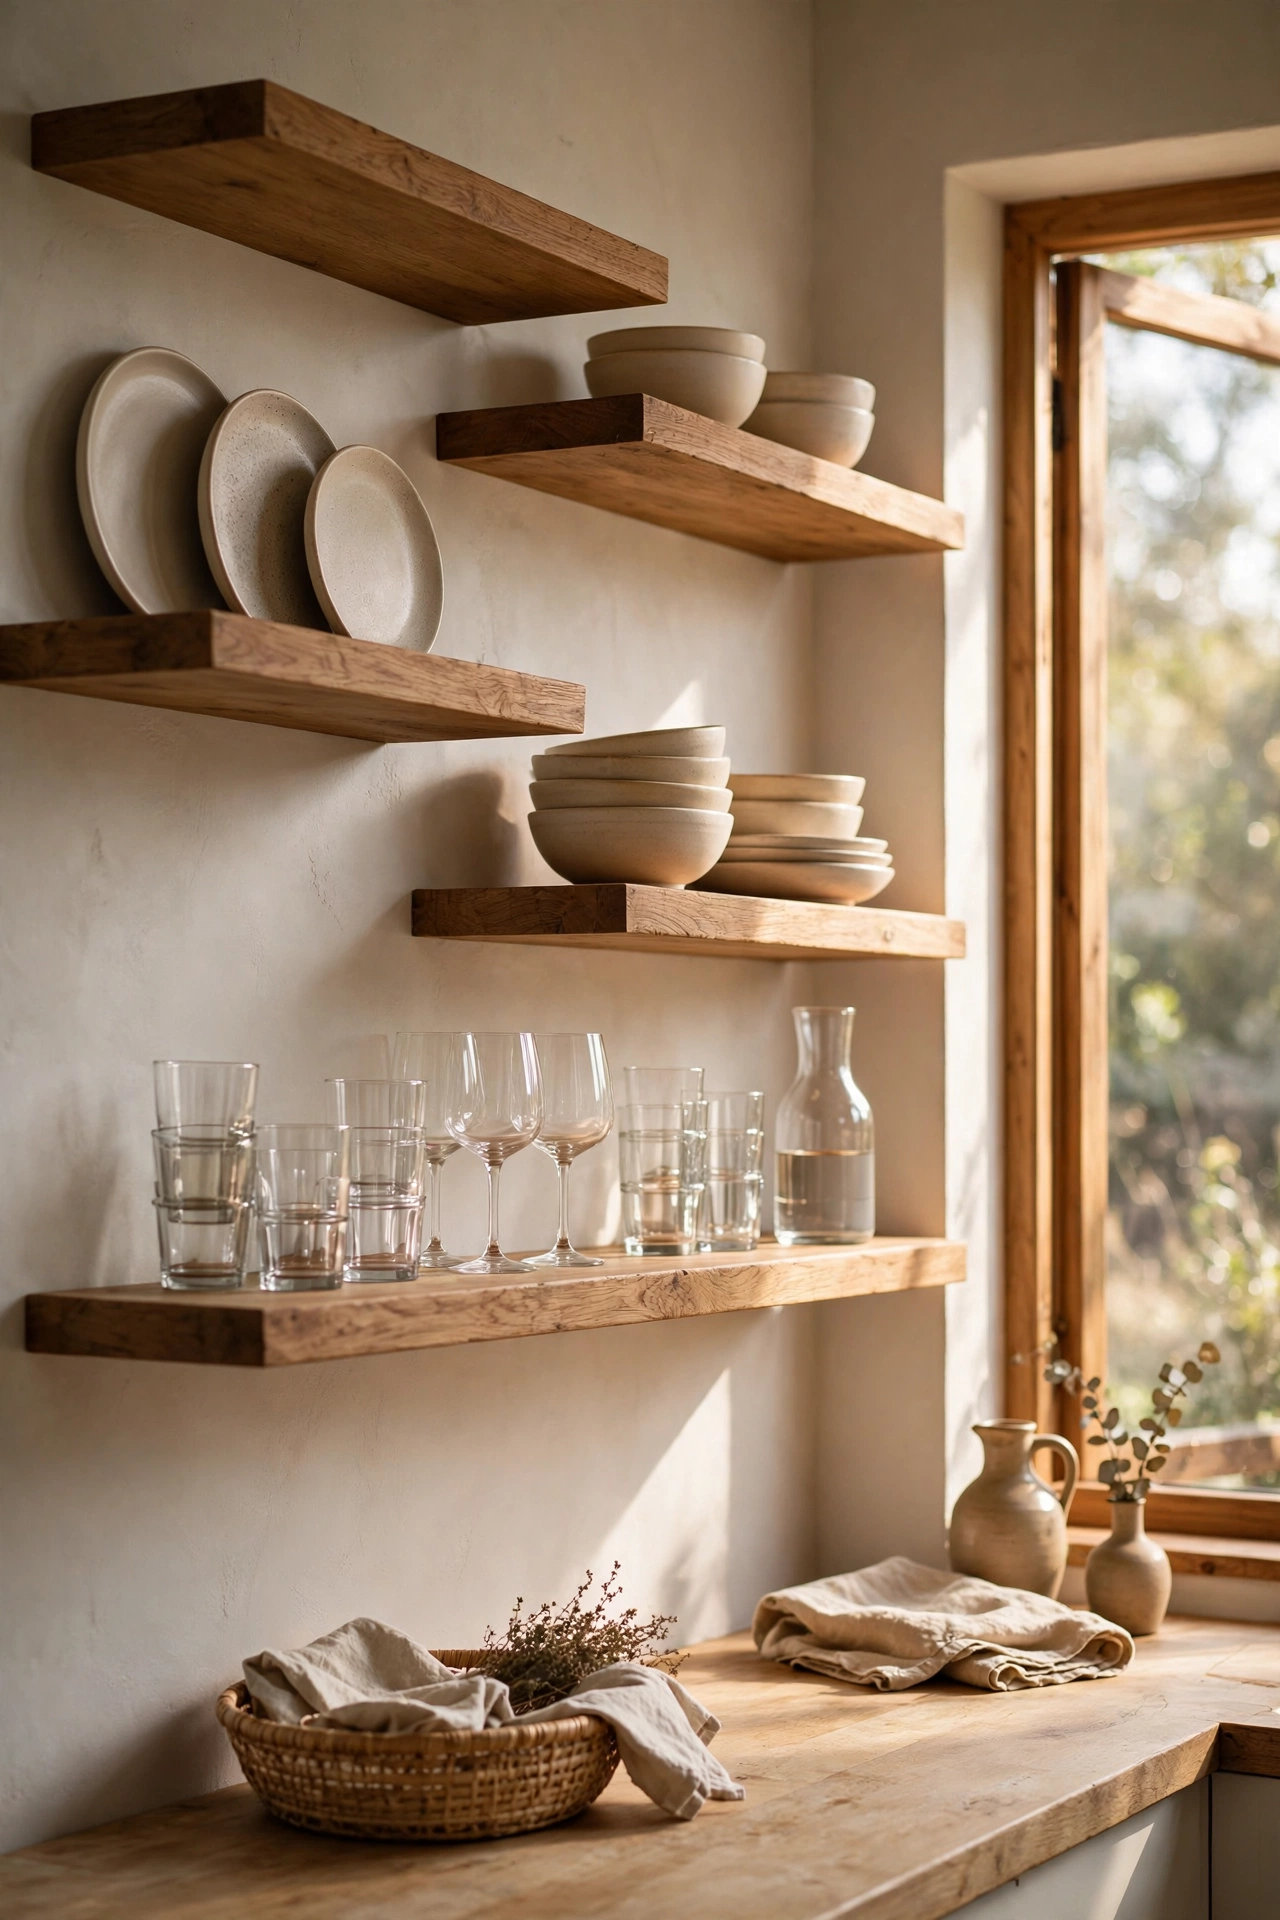
Open kitchen shelving looks best when it is staggered, not uniform. Mount shelves at different heights beside a window or range, and display plates upright in plate grooves on one shelf, bowls stacked on another, and glassware on a third. The stagger breaks up the visual weight of a full wall of dishes and lets you mix display with storage — everyday plates low, special-occasion pieces high. Keep shelf depth around 10 to 12 inches for plates, and use a small front rail or groove so plates lean safely. Stick to one color family for dishes on open shelves, or the display reads as clutter; white, cream, or stoneware tones are the safest. Grease and dust are real in kitchens, so choose shelves you can wipe down and plan to rotate dishes regularly. The payoff is a kitchen that feels like a farmhouse kitchen in a magazine — functional, beautiful, and personal.
24. Hallway Art Ledge Stagger
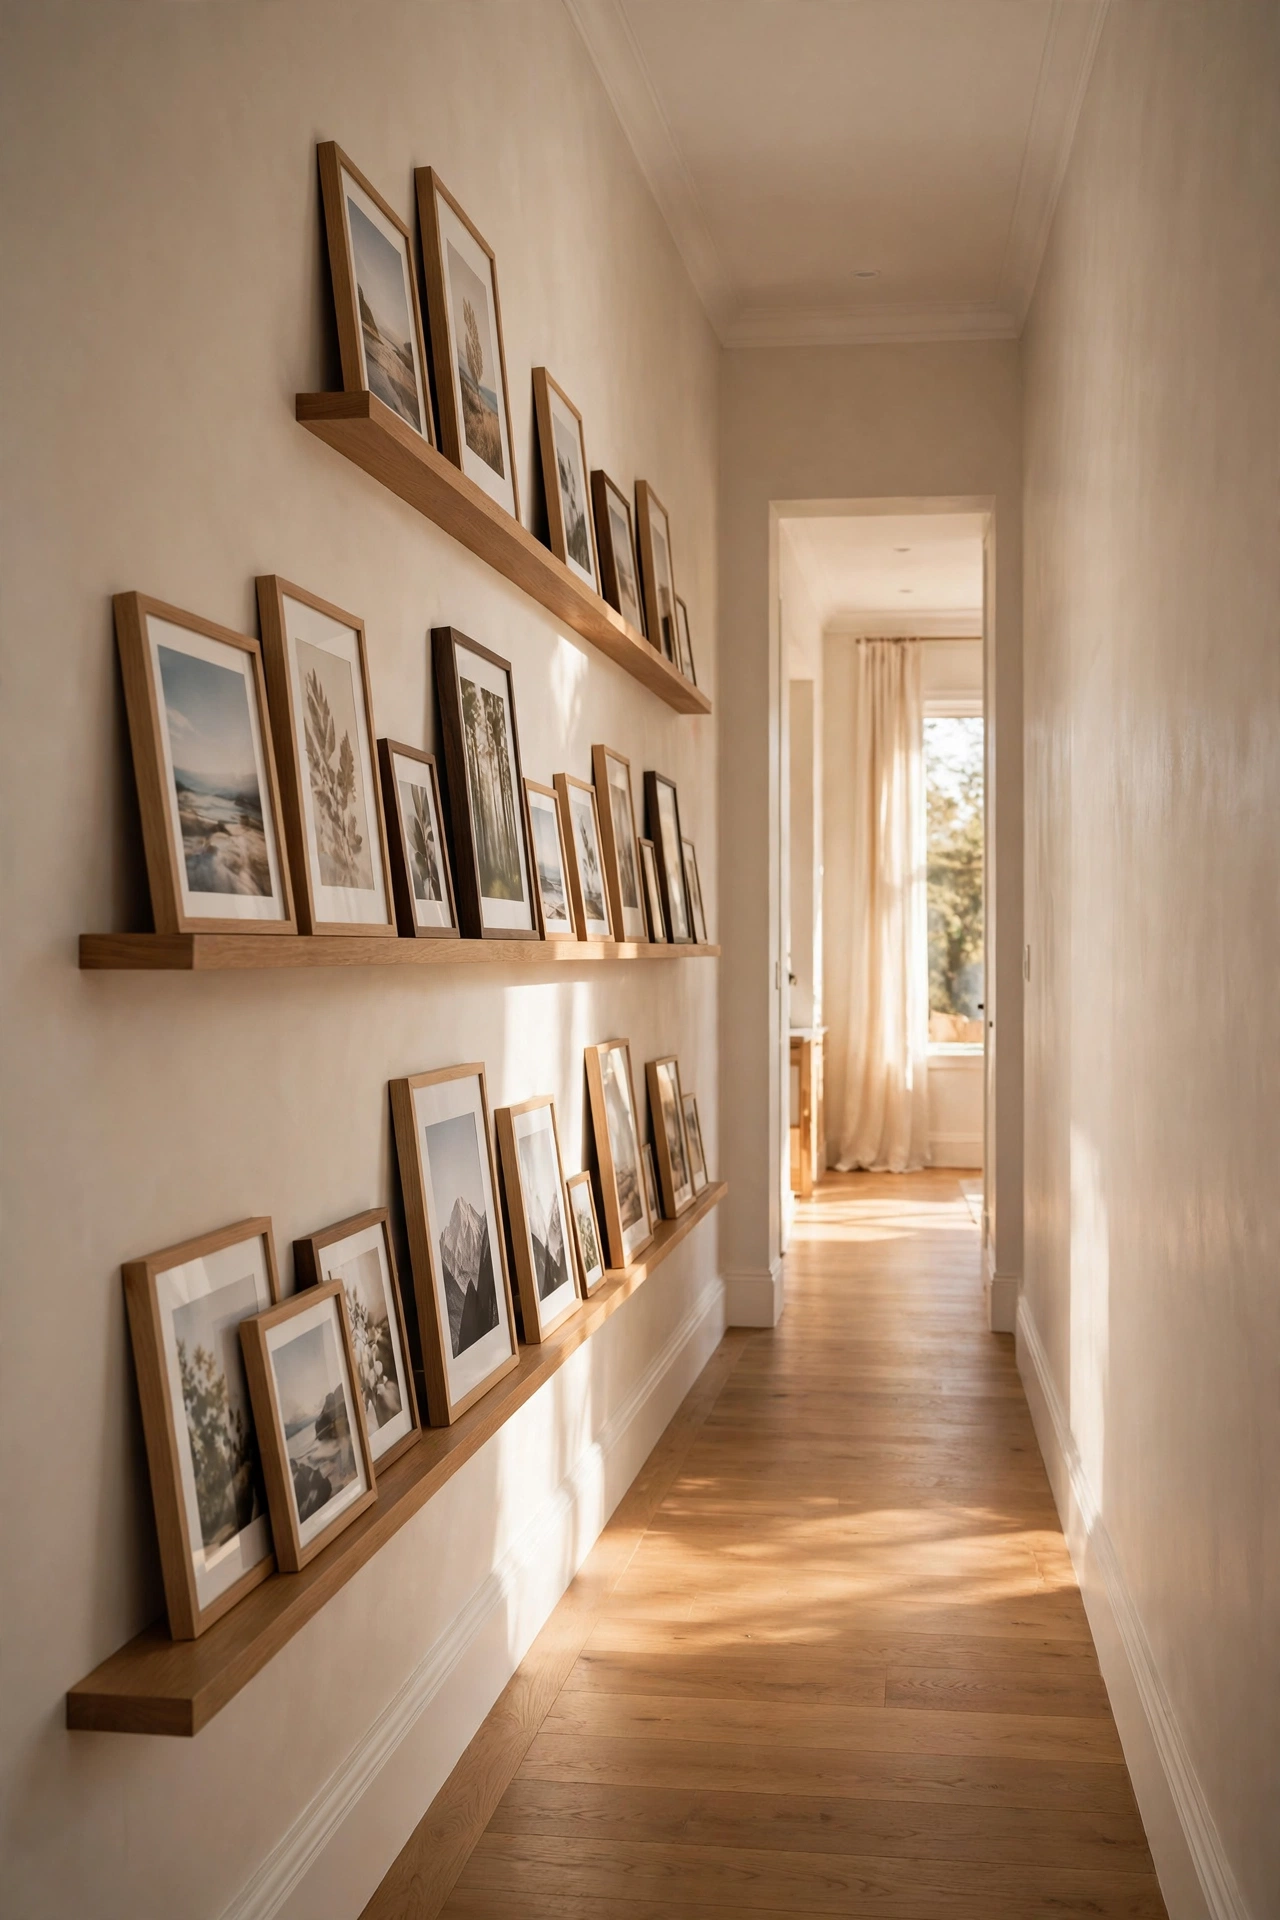
Hallways are gallery space waiting to happen, and staggered art ledges make the gallery changeable. Mount two or three shallow ledges at staggered heights along a long hallway wall, then lean framed prints, photos, and small objects on them, layering pieces in front of each other. The stagger keeps a long hallway from feeling like a tunnel of identical frames — the eye moves up and down as it travels the wall. Keep ledges shallow, about 4 inches, so the hallway stays walkable, and use a consistent frame color or mat style to unify the display. Because hallways get brushed past, secure leaning frames with a small dot of museum putty on the bottom edge. Rotate the art with the seasons or when you return from a trip; the ledges make swaps a five-minute job. This is one of the cheapest high-impact staggered shelf ideas, and it transforms the most boring wall in the house.
25. Seasonal Rotating Display Shelves
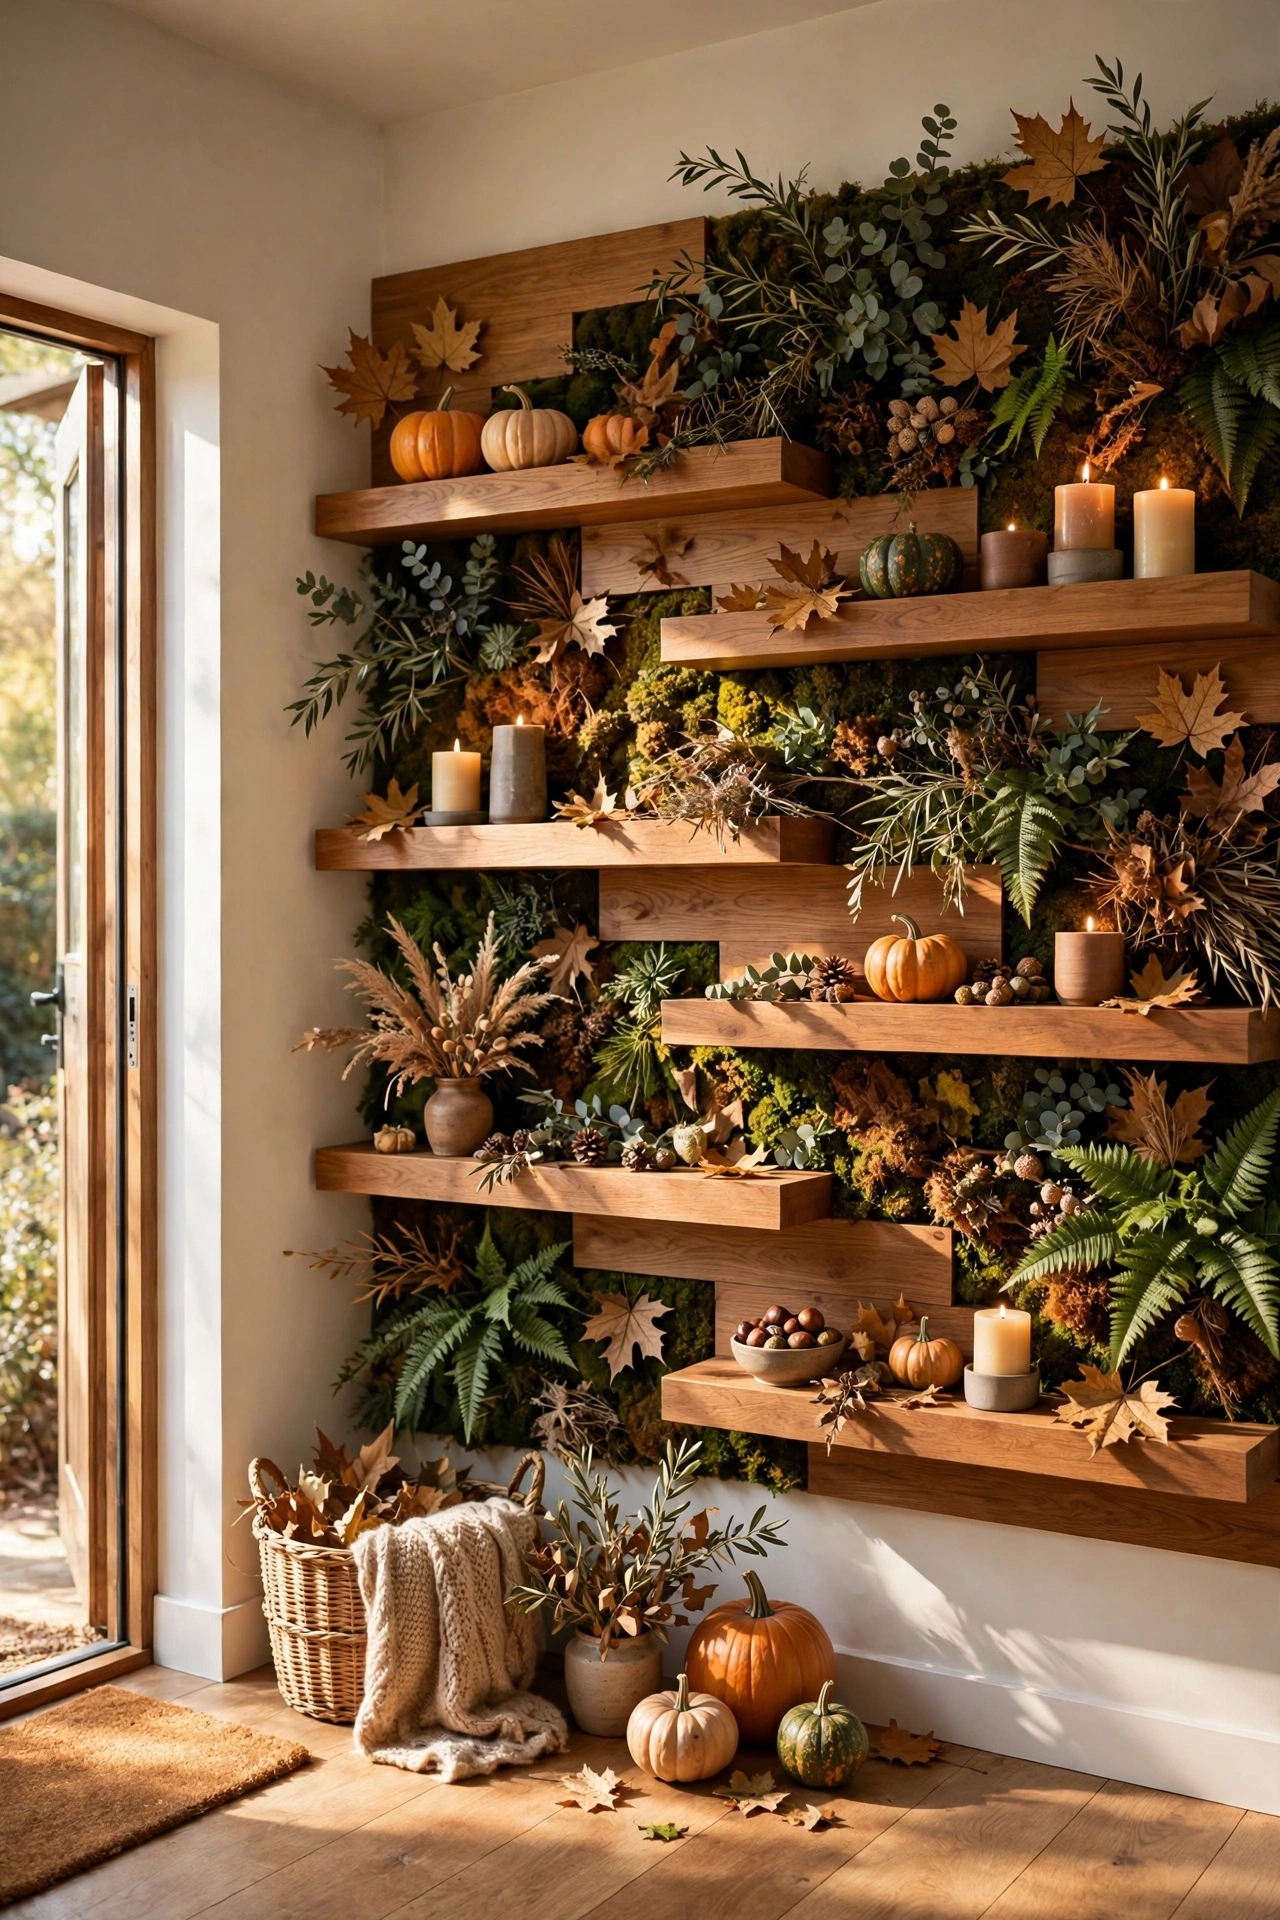
The final idea is less a layout and more a habit: dedicate one staggered shelf arrangement to seasonal rotation. Choose a prominent wall — entryway, living room, or dining room — and mount three shelves at staggered heights that you restyle four times a year. Spring gets fresh greenery and pastel ceramics; summer gets shells, woven textures, and bright art; autumn gets pumpkins, warm wood tones, and candles; winter gets evergreen sprigs, metallics, and cozy textiles. Because the shelves are staggered, each season’s display has natural focal points at different heights, so the arrangement never looks flat. Keep a storage bin of seasonal shelf decor so swaps take twenty minutes, not a weekend. This idea ties the whole house’s decorating rhythm to one wall, and it is the reason staggered shelves stay interesting years after installation — the wall is never finished, and that is the point. For an outdoor counterpart to this rotating-display mindset, explore our 33 backyard ideas.
How to Space and Hang Staggered Shelves Like a Pro
Good staggering follows a few simple rules. First, vary heights by at least 6 inches between neighboring shelves, or the stagger reads as a mistake. Second, keep 12 to 18 inches of vertical clearance above each shelf so objects fit and the wall can breathe. Third, always anchor into studs for anything heavier than a few framed photos — use a stud finder, and for masonry walls use rated anchors. Fourth, plan the layout with painter’s tape on the wall before drilling; step back and check the composition from across the room. Finally, style with odd numbers and leave empty space: a shelf that is one-third empty looks curated, while a shelf packed edge to edge looks like storage. If you follow those rules, any of the 25 ideas above will look intentional.
Frequently Asked Questions
How far apart should staggered floating shelves be?
Aim for 12 to 18 inches of vertical space between shelves, with at least 6 inches of height difference between neighboring shelves so the stagger is visible. Leave more room above shelves that hold tall vases or plants, and less above shelves used for small decor.
Can staggered floating shelves hold heavy books?
Yes, if they are mounted into wall studs with brackets rated for the load. Solid wood shelves on stud-mounted hidden brackets typically hold 20 to 30 pounds per shelf, but always check the manufacturer’s rating. For heavy book collections, keep books near the wall and distribute weight across several shelves.
What is the best shelf depth for staggered shelves?
It depends on the room: 4 to 6 inches for spice jars and hallway art ledges, 8 to 10 inches for living-room display and books, and 10 to 12 inches for kitchen plates. Shallower shelves look more modern and keep walkways clear; deeper shelves hold more but can feel bulky.
Do staggered shelves work in small rooms?
They work especially well in small rooms because they use vertical wall space and leave the floor open. Keep shelves slim, colors light, and styling minimal so the wall adds storage without closing the room in. A vertical stagger up one wall is often better than a wide arrangement in a tight space.
How do I style staggered shelves without clutter?
Follow the rule of threes, vary object heights on each shelf, and leave at least a third of every shelf empty. Group objects in odd numbers, repeat one color or material across shelves for cohesion, and step back to check the whole wall — if your eye does not know where to rest, remove one item per shelf.
Conclusion
Staggered floating shelves are one of the simplest upgrades with the biggest visual payoff. Whether you choose a minimalist oak trio, a plant-filled living wall, a kitchen spice stagger, or a full vertical run in a small apartment, the principle is the same: vary the heights, anchor into studs, and style with breathing room. Start with one wall, plan the layout with painter’s tape, and let the shelves grow with your home — the best staggered walls are the ones that keep evolving.