27 DIY Banquette Seating Ideas for a Cozy Custom Breakfast Nook
27 DIY Banquette Seating Ideas for a Cozy Custom Breakfast Nook
A banquette turns the most awkward corner of your kitchen into the seat everyone fights over. That built-in bench — the kind you see in diners and cozy cafes — squeezes more people around the table than chairs ever could, hides a surprising amount of storage under the seat, and makes an ordinary breakfast nook feel custom-built for your home. The best part is that you do not need a contractor or a custom-cabinet budget to get one: a simple plywood box, a pair of IKEA shelving units, or a few reclaimed boards can become a banquette in a single weekend. These 27 DIY banquette seating ideas cover every layout, budget, and skill level, from a beginner-friendly freestanding bench to a curved wraparound booth with hidden drawers and a charging station. Pick the layout that fits your room first, then steal the storage and finishing ideas that make it yours.
1. Classic L-Shaped Corner Banquette
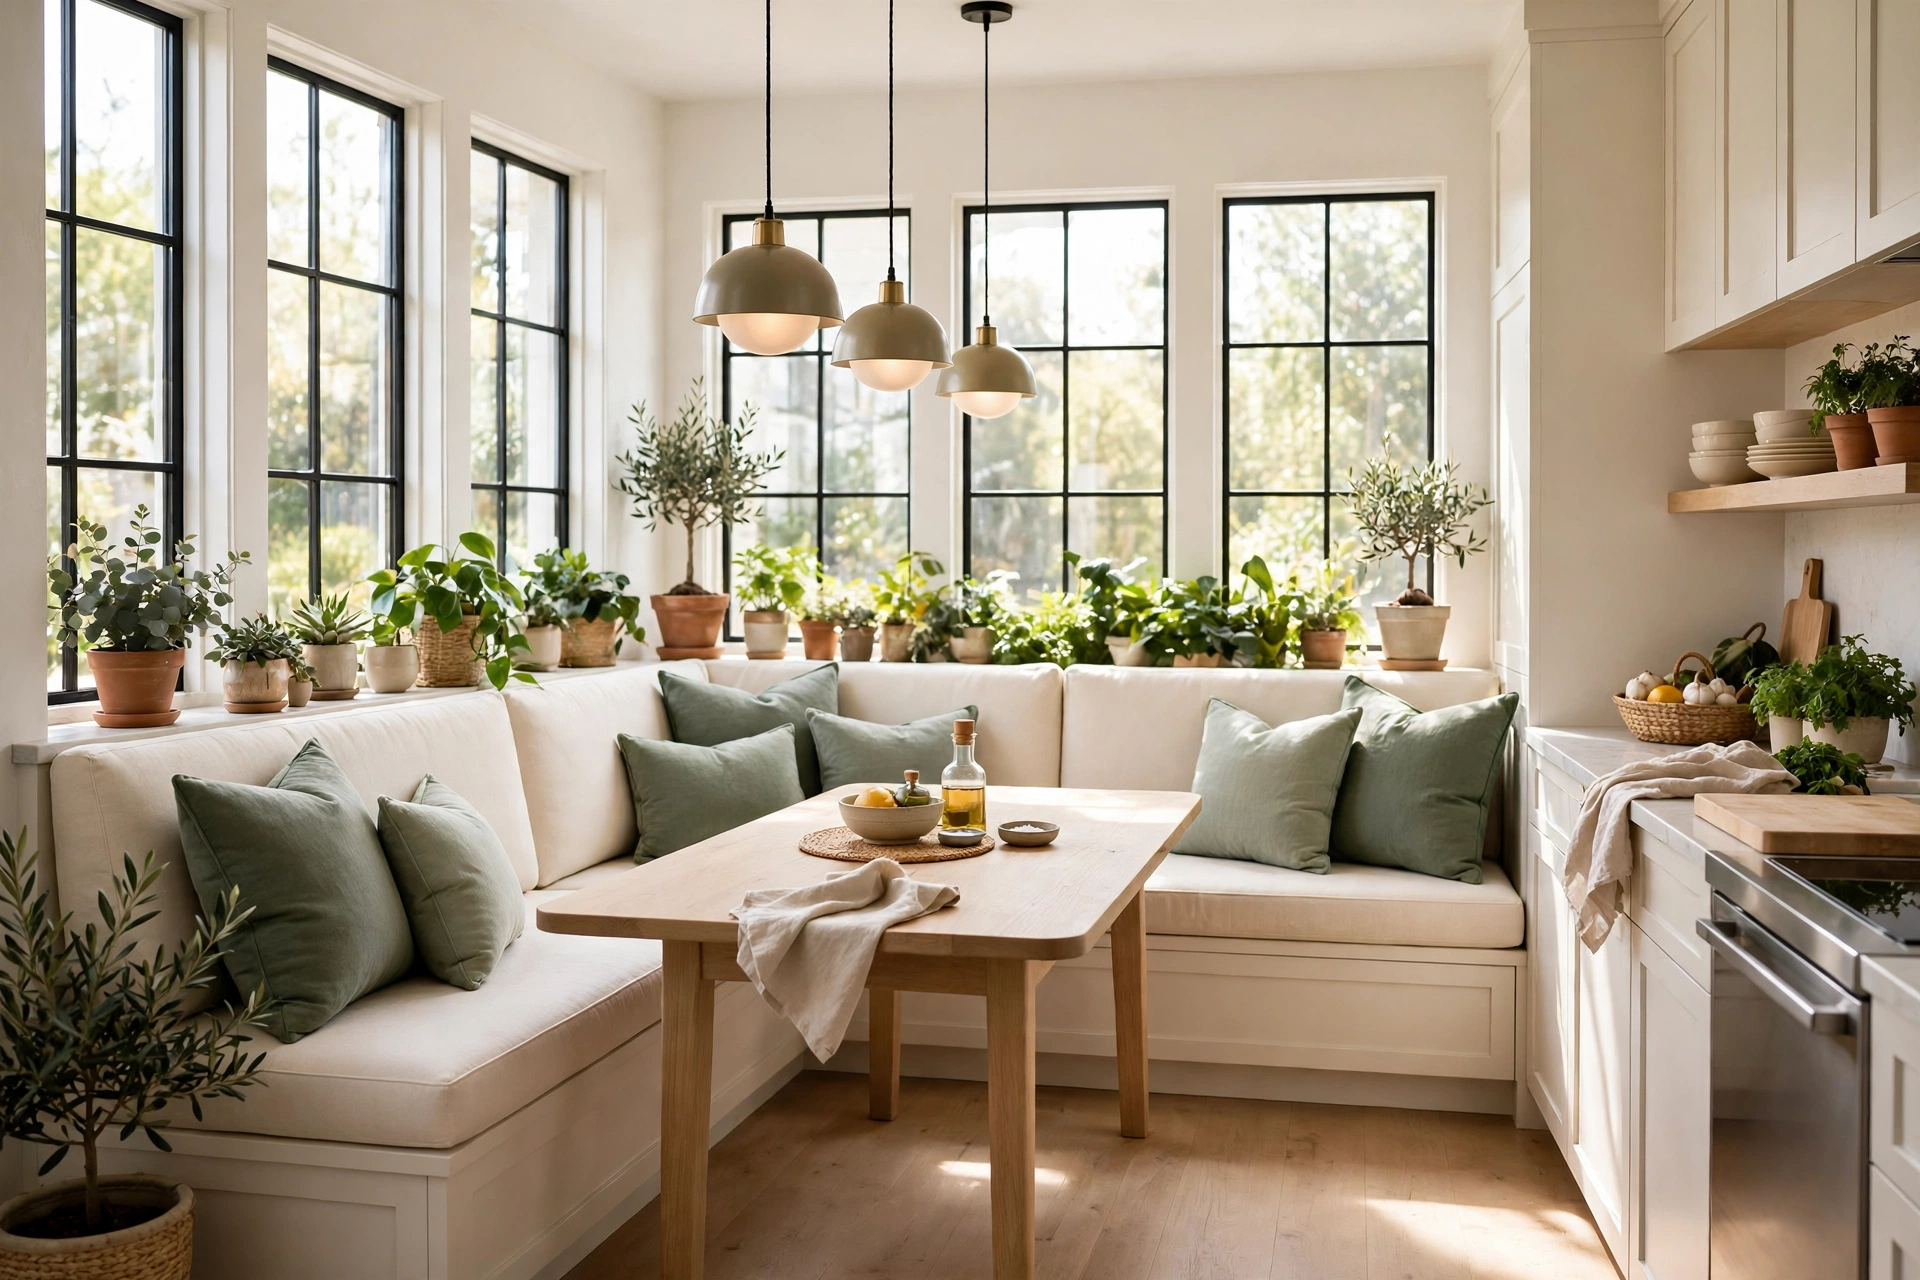
The L-shaped corner banquette is the original space-saver, and it is still the most popular layout for a reason: it tucks into the dead corner where two walls meet and seats four to six people without a single chair sticking out into the walkway. Build two bench boxes from 2×4 framing and plywood, one along each wall, and join them at the corner with a shared post so the whole unit feels like one solid piece of furniture. Aim for a seat height of 18 inches and a seat depth of 18 to 20 inches, which matches a standard dining chair and lets everyone slide in and out without a struggle. Add a low backrest or a row of plump cushions against the wall, and the corner stops being wasted space and becomes the warmest seat in the house — the one where morning coffee tastes better and homework somehow gets done.
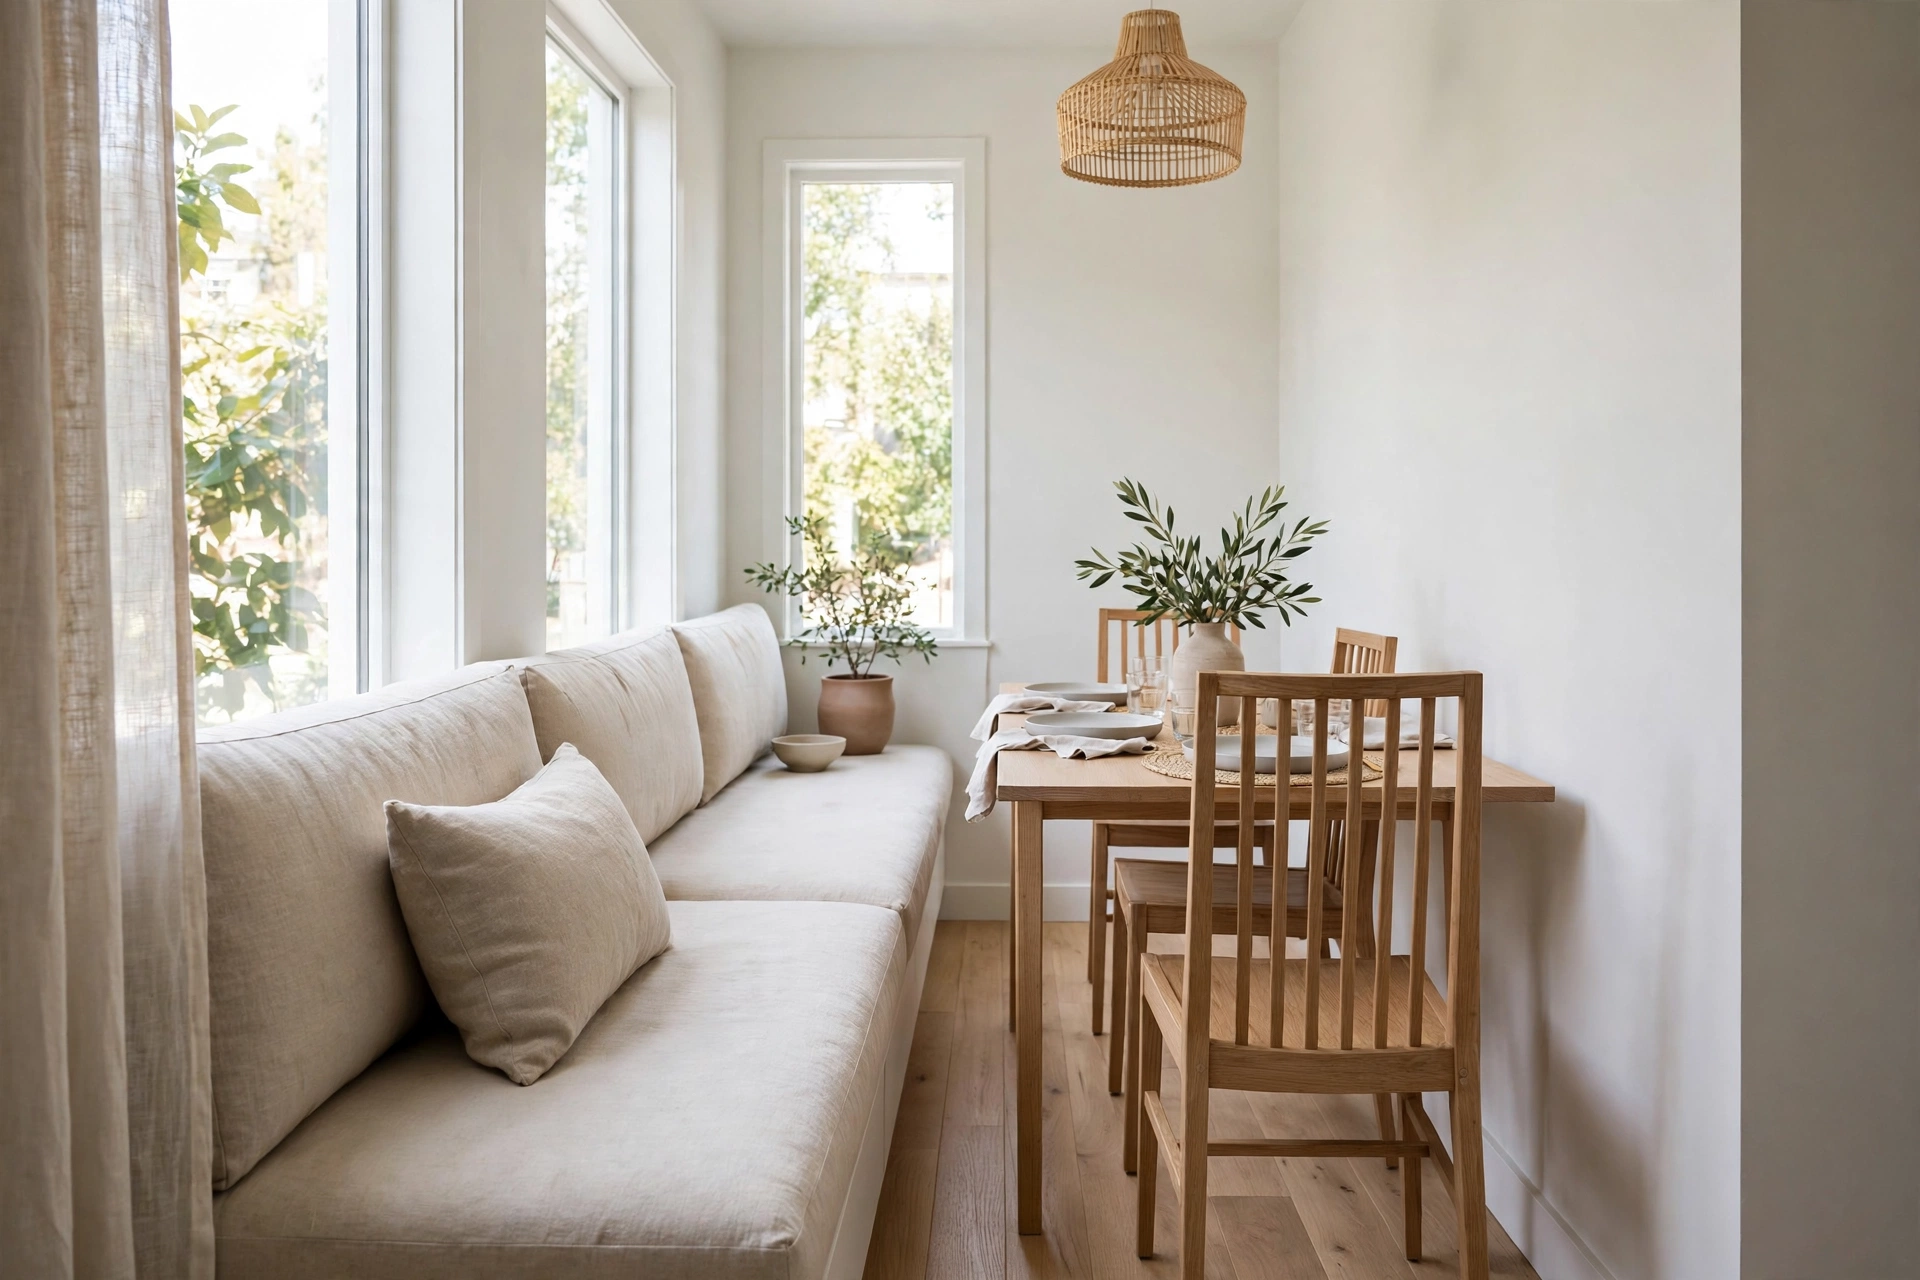
2. Straight-Wall Banquette for Narrow Rooms
Not every kitchen has a free corner, and a straight-wall banquette is the answer for a long, narrow dining area or a galley kitchen with one blank wall. A single bench runs flat along the wall, facing a slim table, with chairs on the open side — so the room keeps its walkway and still seats more people than two rows of chairs ever could. This is the easiest layout to build because it is just one rectangular box, no corner joints to figure out, and it is the friendliest option for renters if you build it freestanding rather than screwing it to the wall. Style it with a long lumbar cushion instead of individual pillows, and the whole wall reads like a deliberate design feature rather than a bench shoved against the plaster. It works beautifully in dining rooms too, especially under a long window.
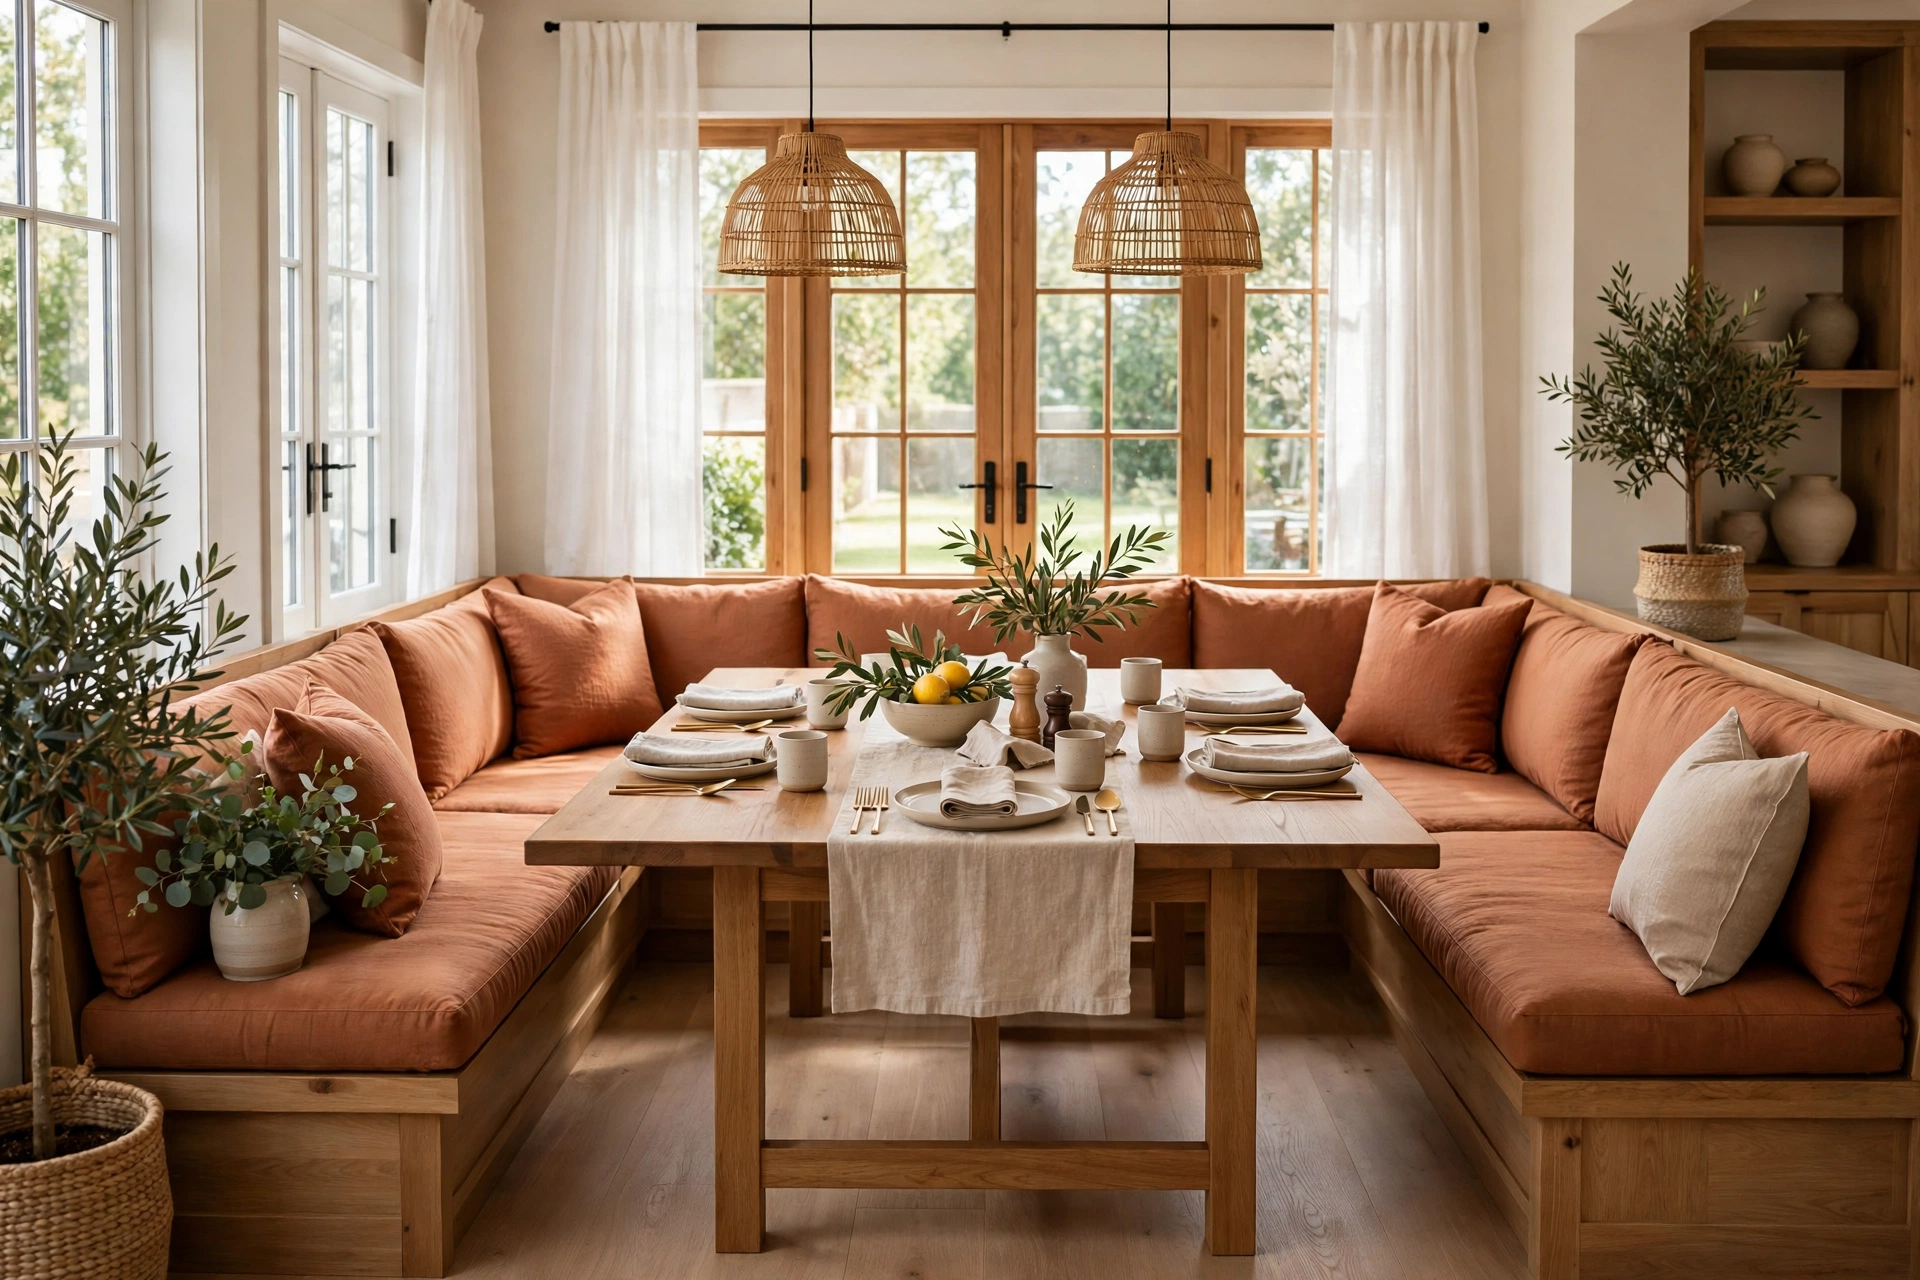
3. U-Shaped Wraparound Banquette for Big Families
When your household regularly feeds six or eight people, a U-shaped wraparound banquette is the layout that makes it possible without a ten-foot table. Three bench sections wrap around three sides of the table, so the middle seats slide in from the open end and nobody is ever stuck in a chair blocking the kitchen. Build it as three separate boxes — two long sides and one short end — and bolt them together once they are in place, which makes the whole project far easier to move through doorways. Give the end section a slightly deeper seat so it doubles as a lounging spot, and keep the table narrow, around 30 inches wide, so everyone can reach the middle without stretching. It is a big build, but the payoff is a dining nook that feels like a family restaurant booth.
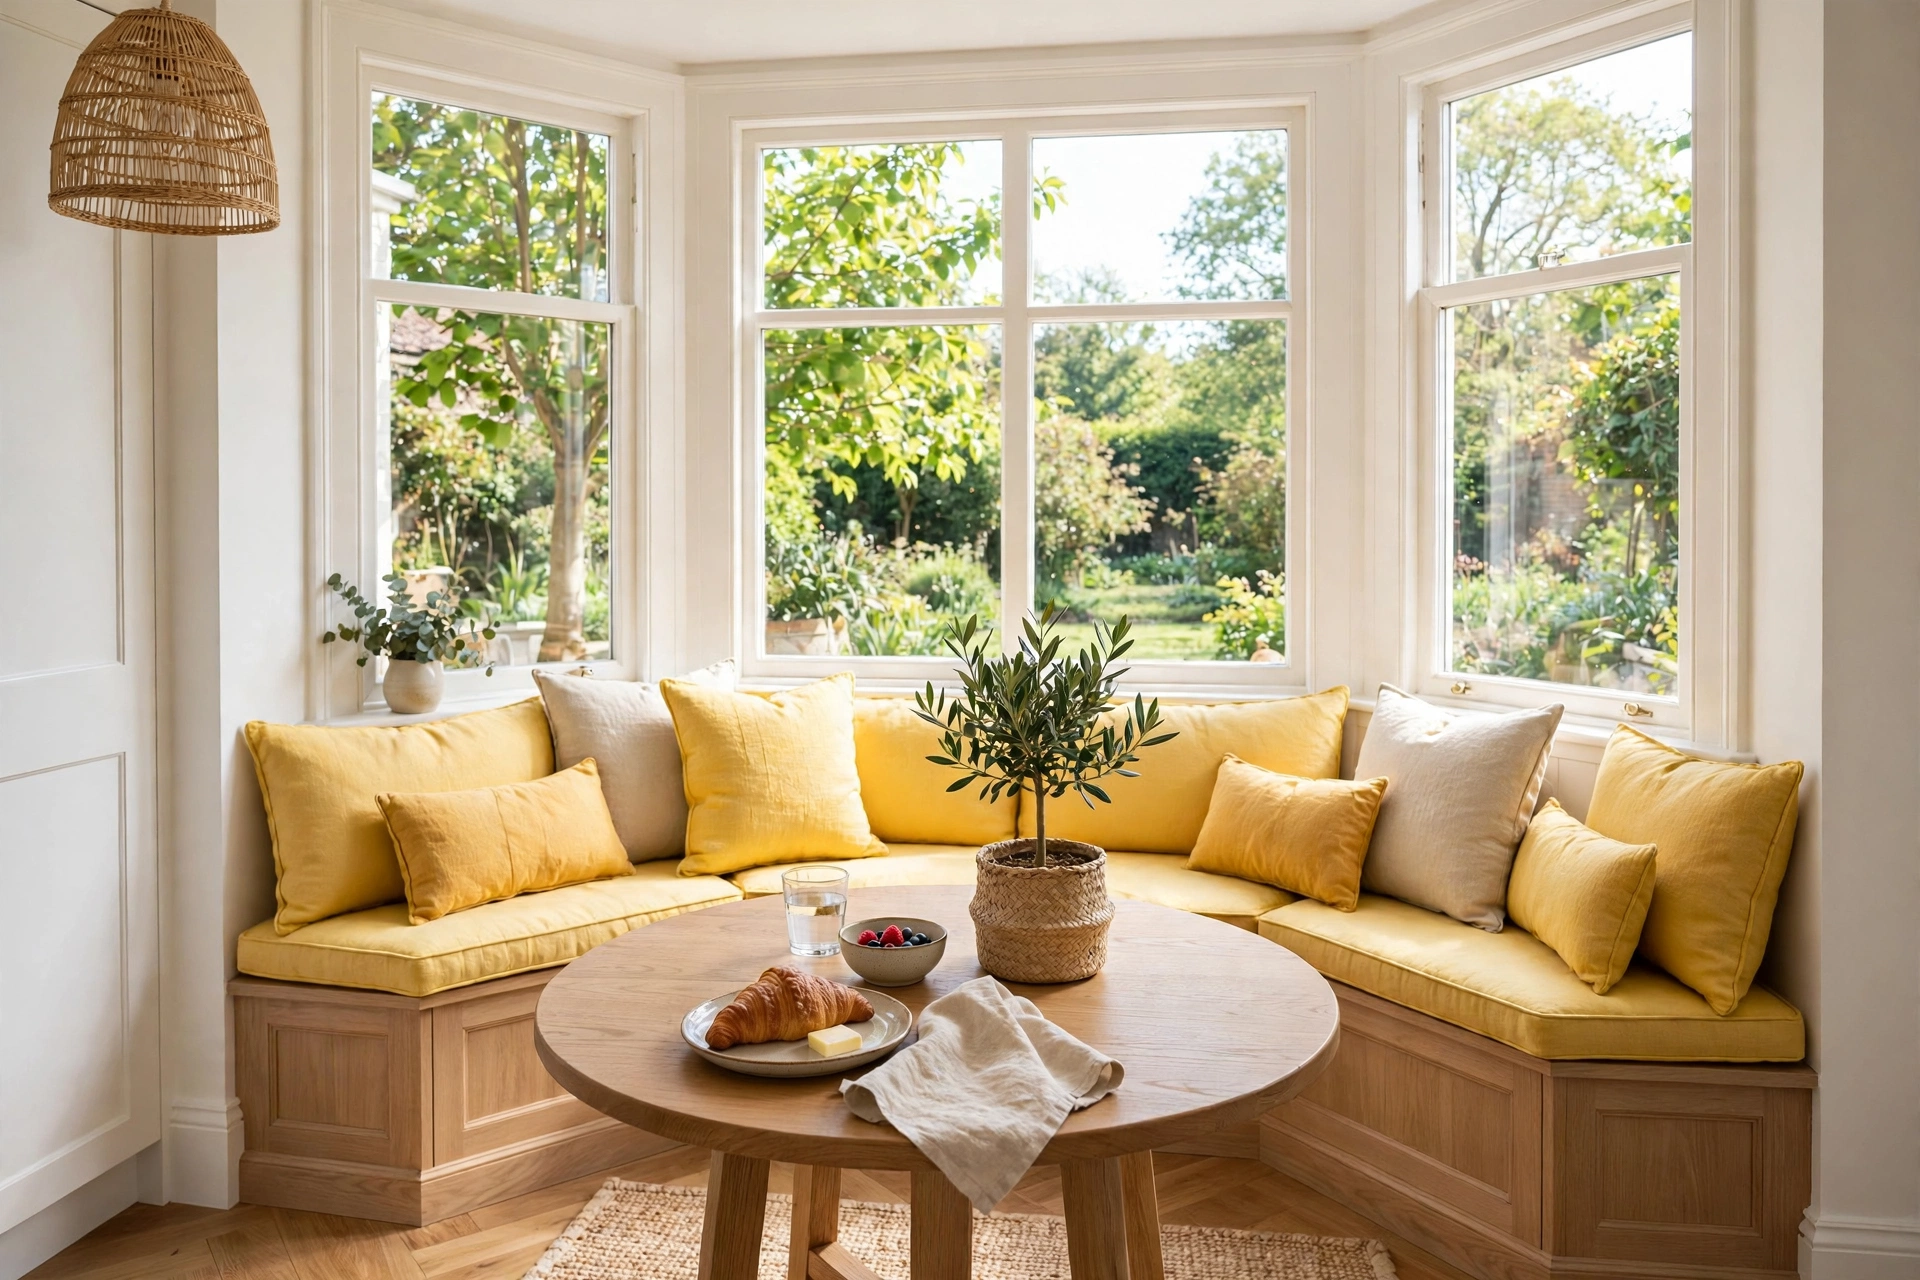
4. Bay Window Banquette
That awkward bay window — the one collecting houseplants and dust — is prime real estate for the dreamiest banquette in the house. Build the bench to follow the bay’s angles, using a cardboard template to trace each facet before you cut a single board, because bay windows almost never have perfect angles. The seat follows the glass, so everyone at the table gets a view outside, and the light that pours in makes the nook the brightest spot in the kitchen all morning. Keep the bench low, around 17 inches, so the cushions sit below the sill, and leave a gap or a vent cover wherever a heating vent or outlet sits under the window. Finish it with washable cushions in a sunny fabric, and a window you used to ignore becomes the reason everyone eats breakfast at home.
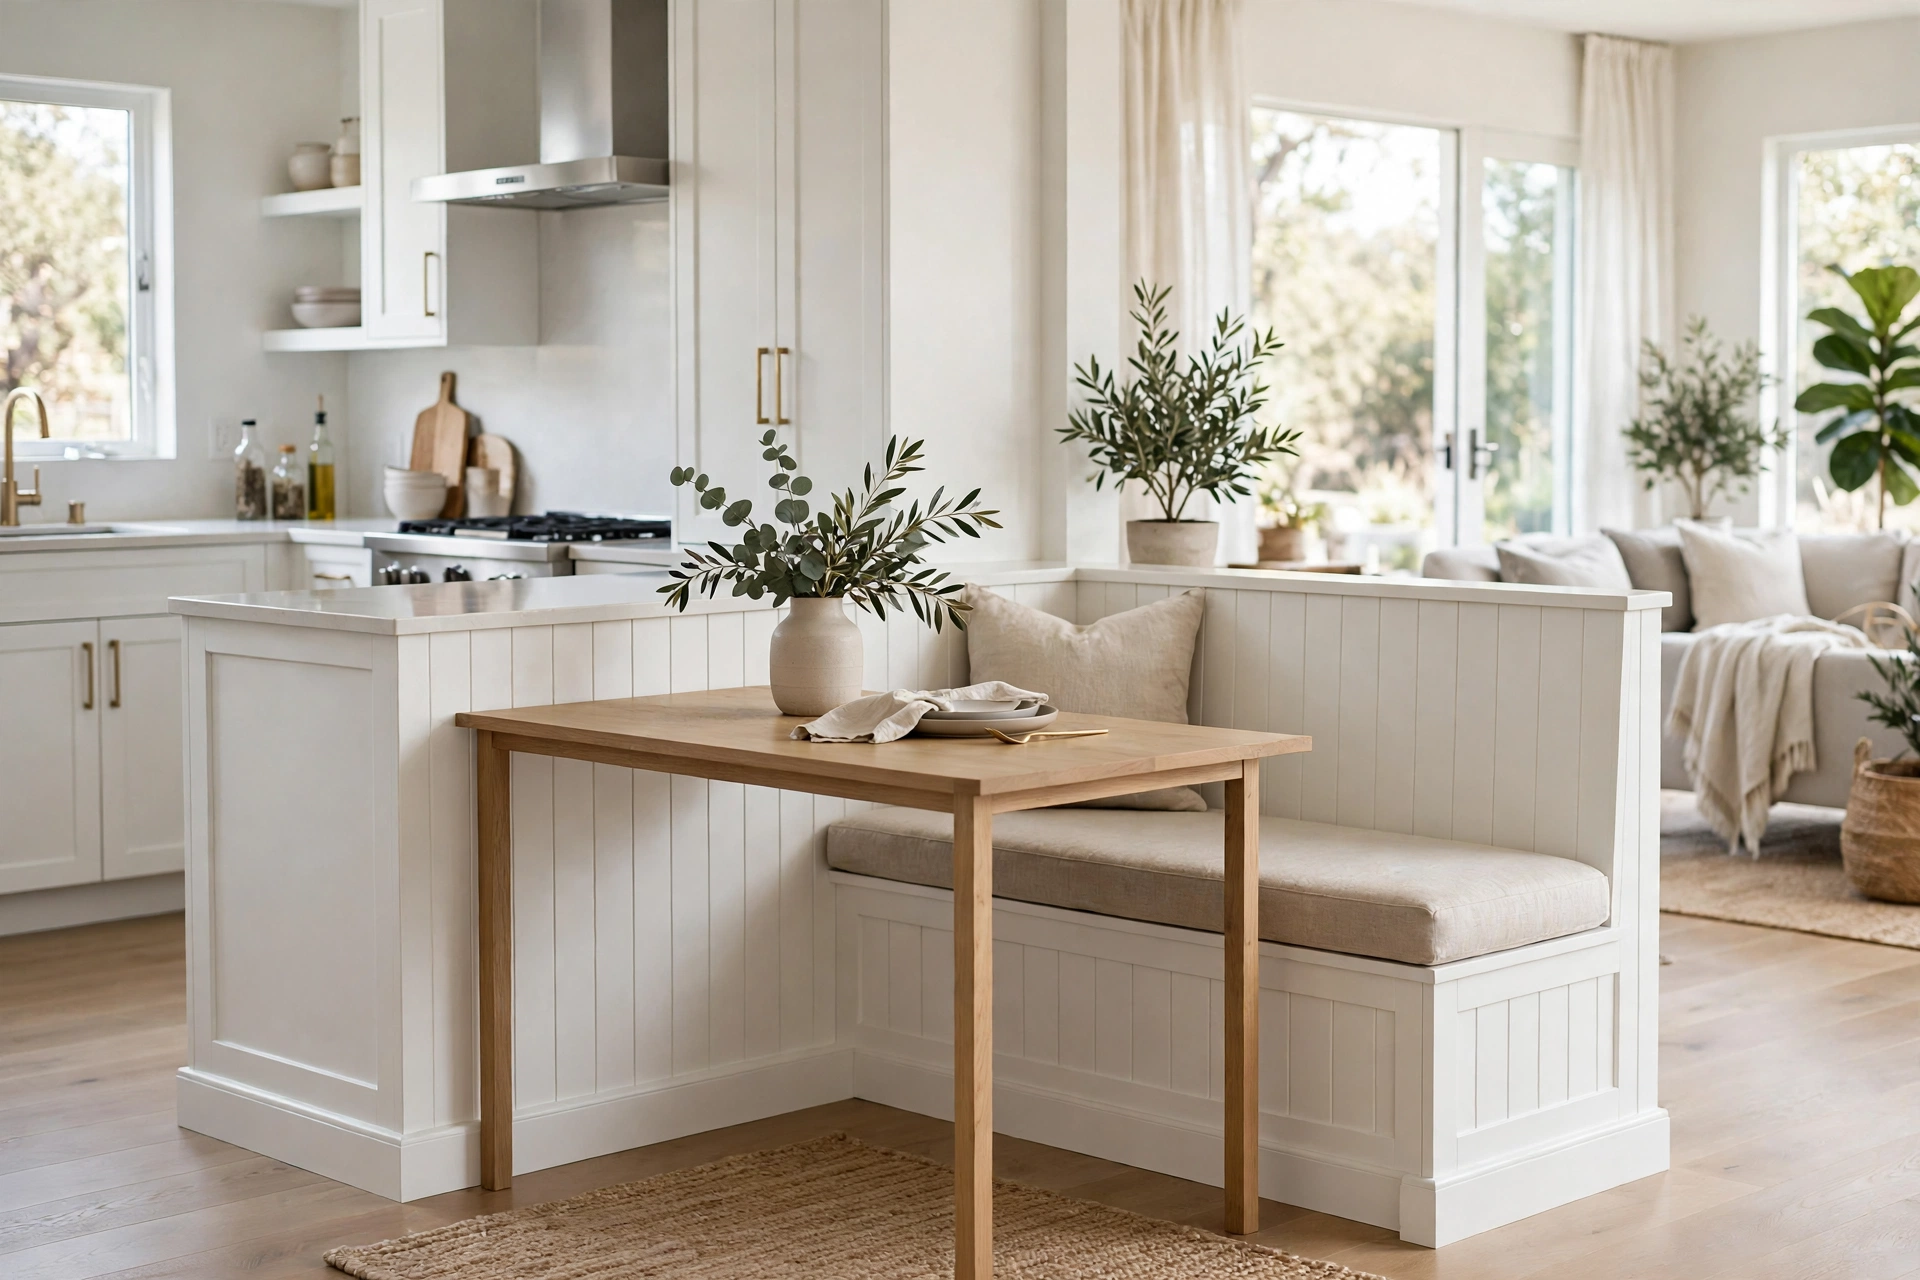
5. Banquette Attached to Your Kitchen Island
If your kitchen island already anchors the room, attach the banquette directly to its back side and you gain seating without giving up a single square foot to chairs. The bench runs along the island’s long edge, facing a slim table or even the island overhang itself, which means the cook and the breakfast crowd share one social hub. Build the bench box first, then lag-bolt it to the island’s base frame so it cannot creep away from the wall of cabinets, and match the island’s paint or paneling so the two pieces read as one built-in unit. This layout is perfect for open-plan kitchens where a separate dining table would chop the room in half. Add a row of hooks or a slim shelf on the island’s end for mugs, and the whole setup works from coffee at dawn to homework at dusk.
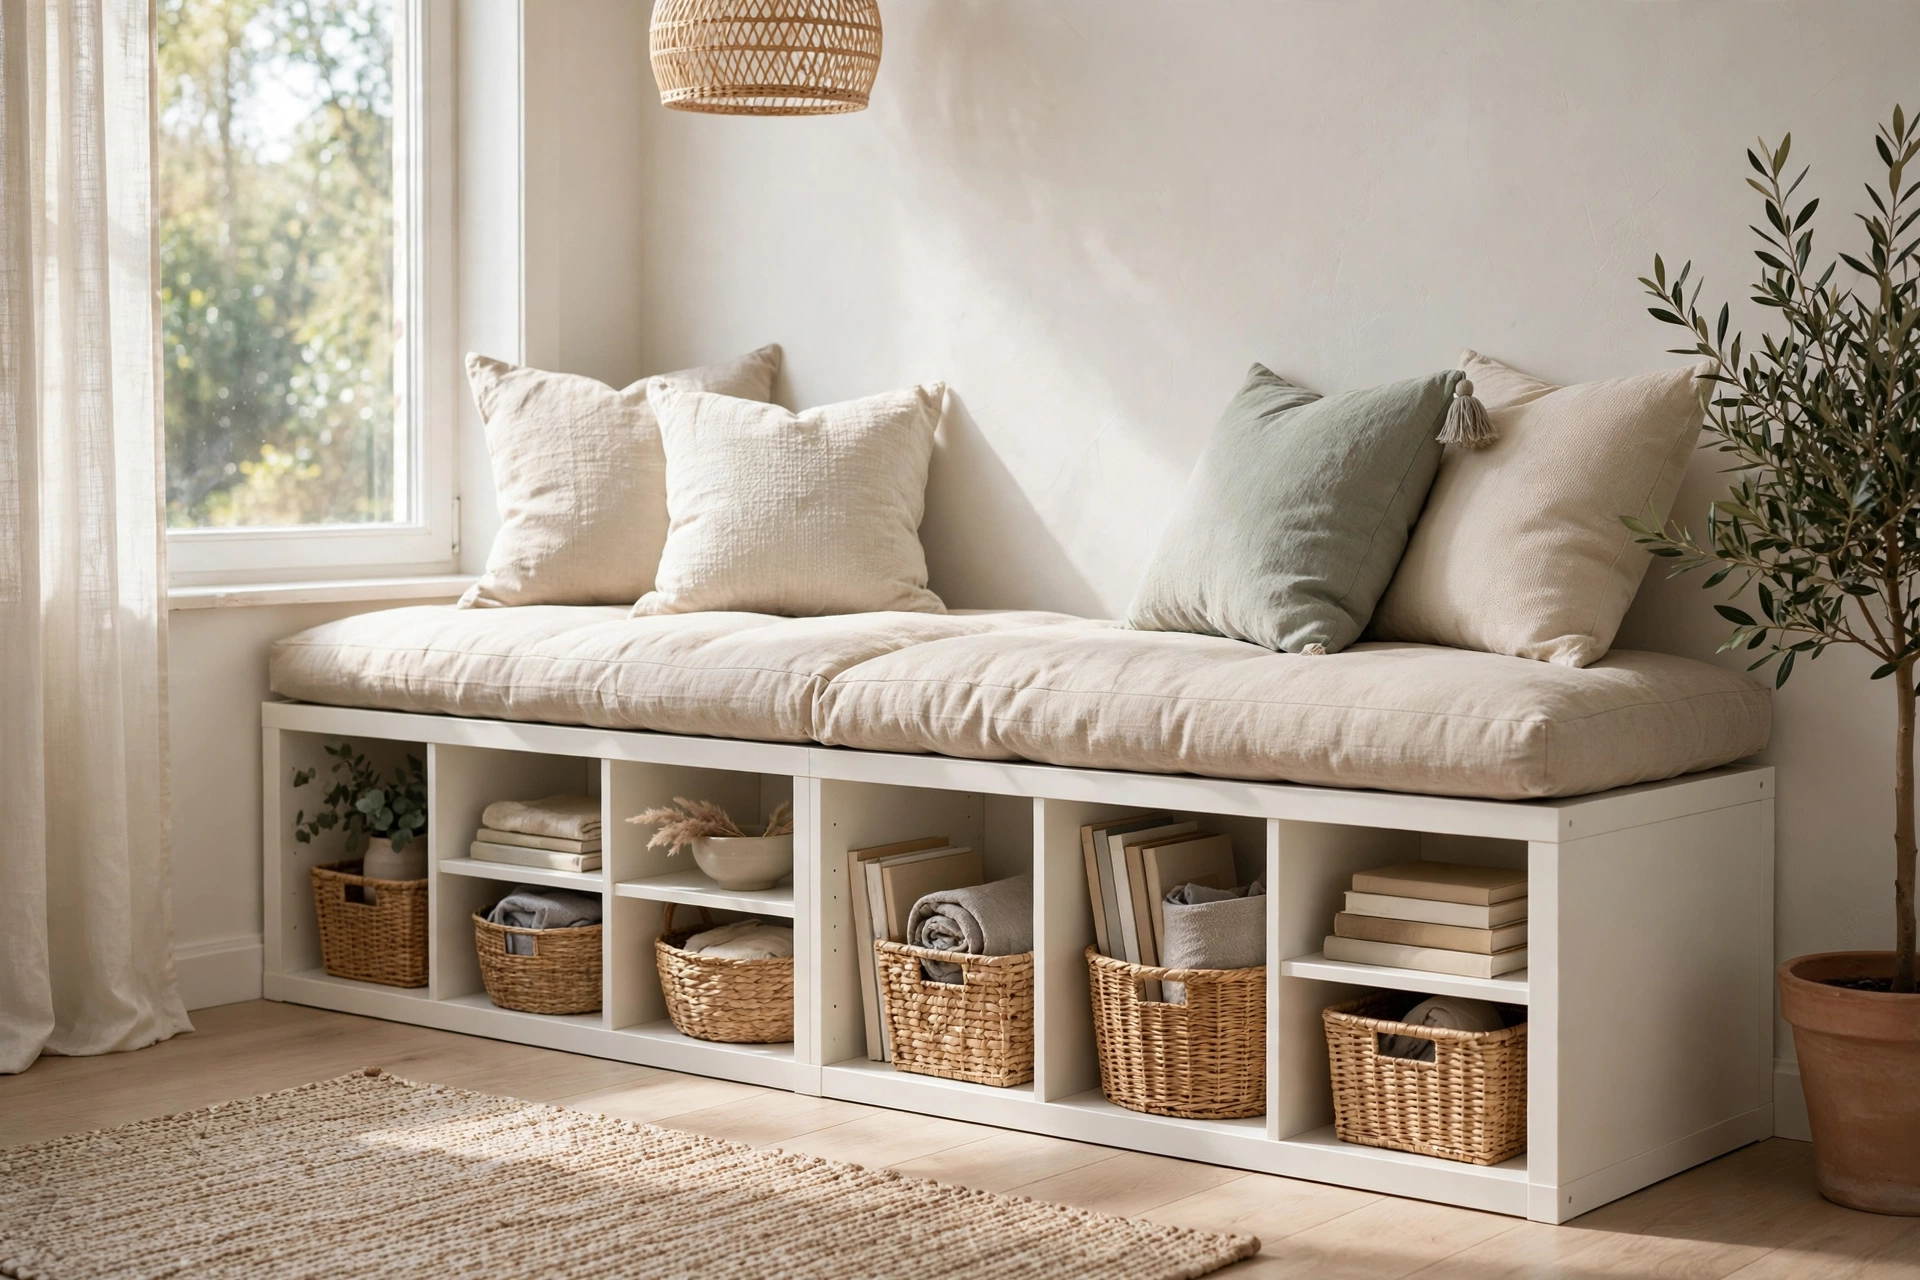
6. IKEA KALLAX Base Banquette
The fastest route to a banquette that looks custom is hiding in the IKEA warehouse: lay two KALLAX shelving units on their sides, join them, and you have an instant bench base with cubby storage already built in. Top the units with a sheet of plywood, add three inches of foam and a washable cushion cover, and the whole project can be finished in an afternoon with a drill and a staple gun. The cubbies are the real prize — they swallow cookbooks, board games, placemats, and kids’ art supplies without a single drawer slide to install. Paint the KALLAX to match your cabinets or leave it white for a clean Scandinavian look, and add a toe-kick board along the bottom so it reads as built-in furniture instead of a shelving hack. It is the best beginner banquette there is, and our roundup of genius IKEA hacks has more ideas in the same spirit.
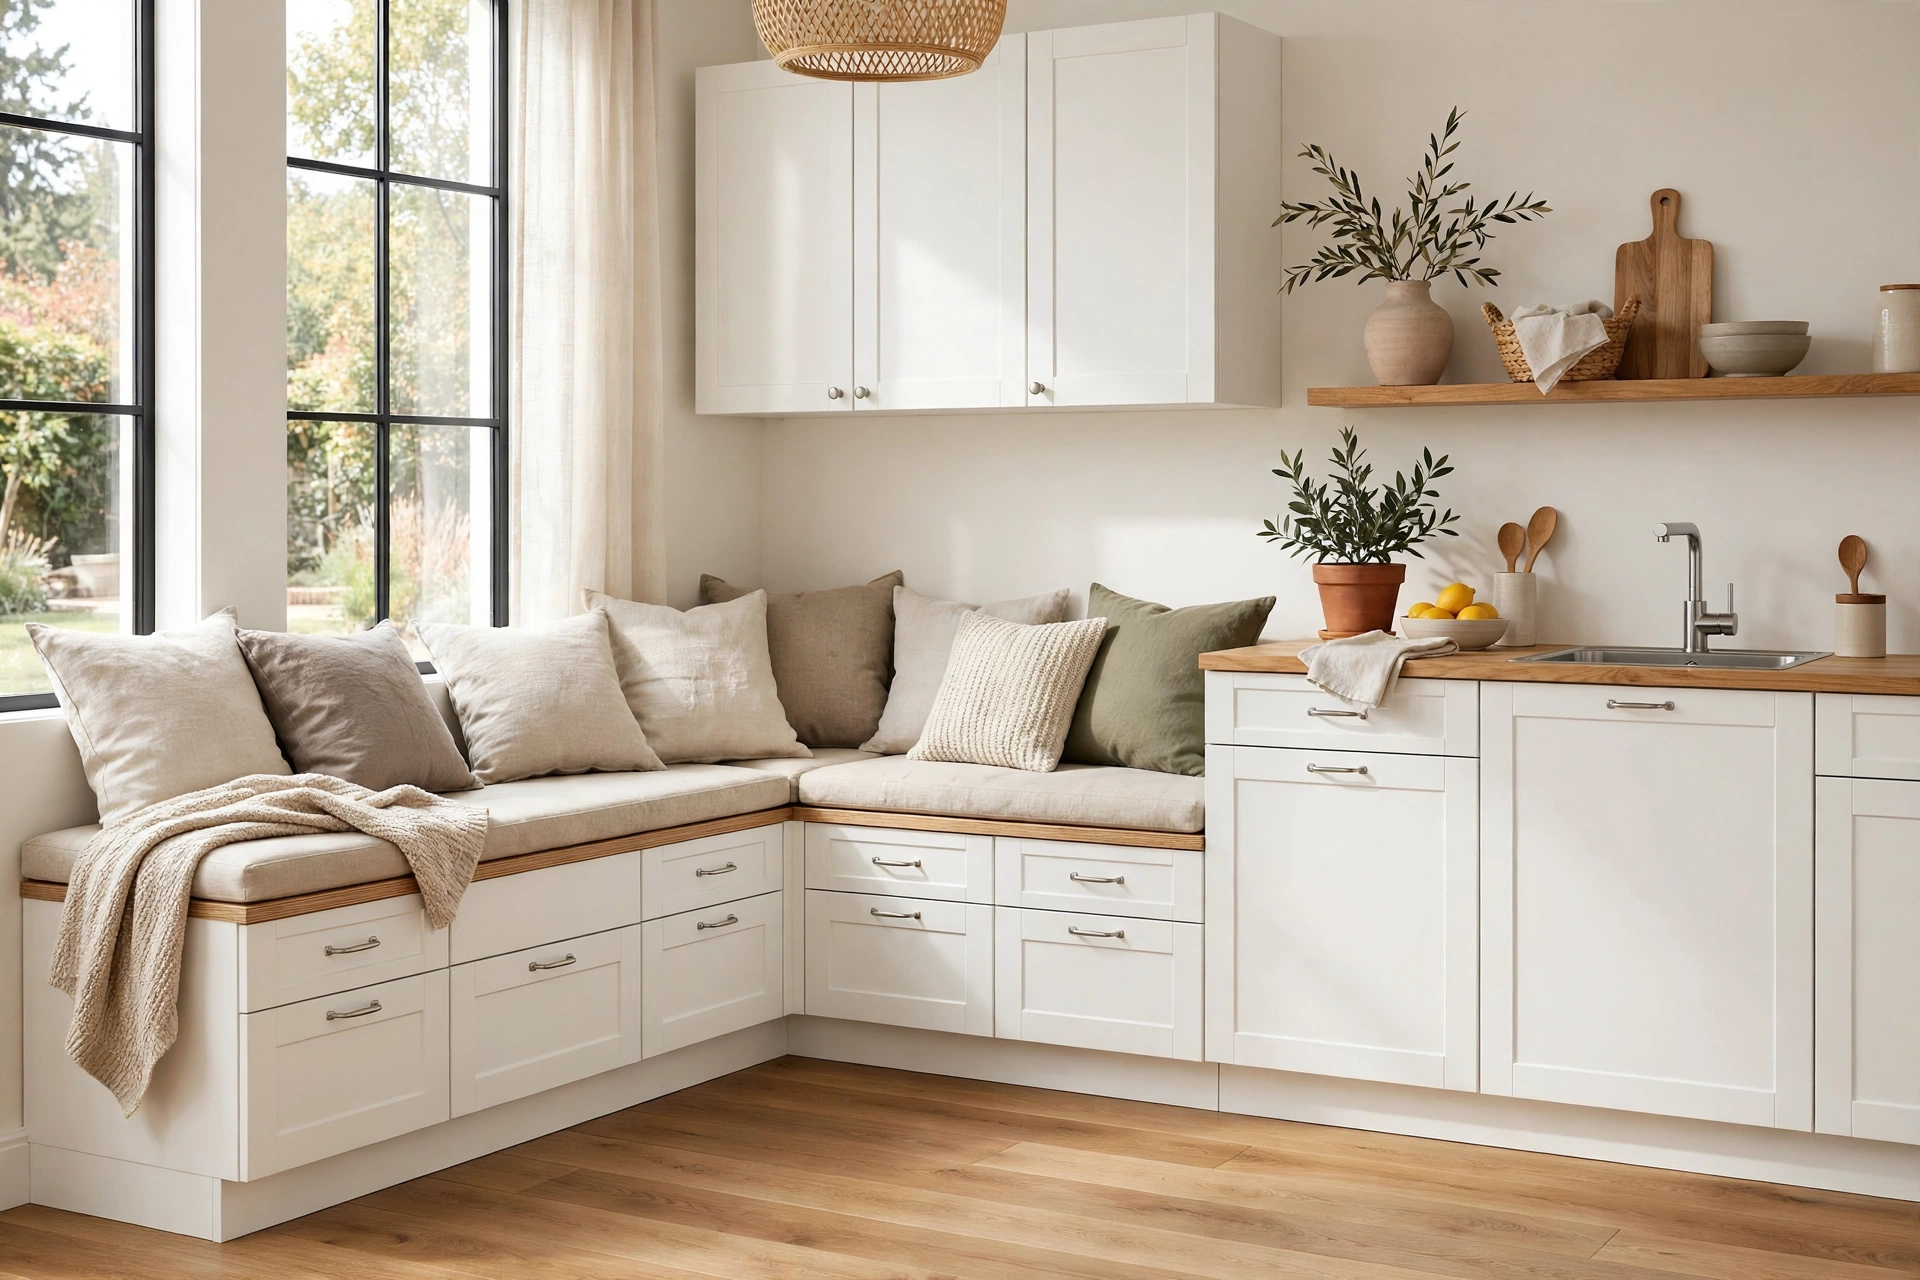
7. IKEA SEKTION Cabinet Base Banquette
For a banquette that looks like it came with the kitchen, build the base from IKEA SEKTION base cabinets instead of shelving units. Lay the cabinets horizontally, screw them together into one long run, and you get real cabinet doors and drawers under the seat — the kind of storage that hides the stand mixer, the holiday platters, and the table linens you only use twice a year. Top the cabinets with plywood and foam, then add a furniture toe-kick and a row of cabinet doors painted to match your kitchen, and even a keen eye will struggle to tell it from a custom millwork job. This is the smartest choice if your kitchen already has IKEA cabinets, because the door styles and paint colors match exactly. Budget one full weekend: the cabinets assemble fast, but leveling the run and scribing it to an uneven wall takes patience.
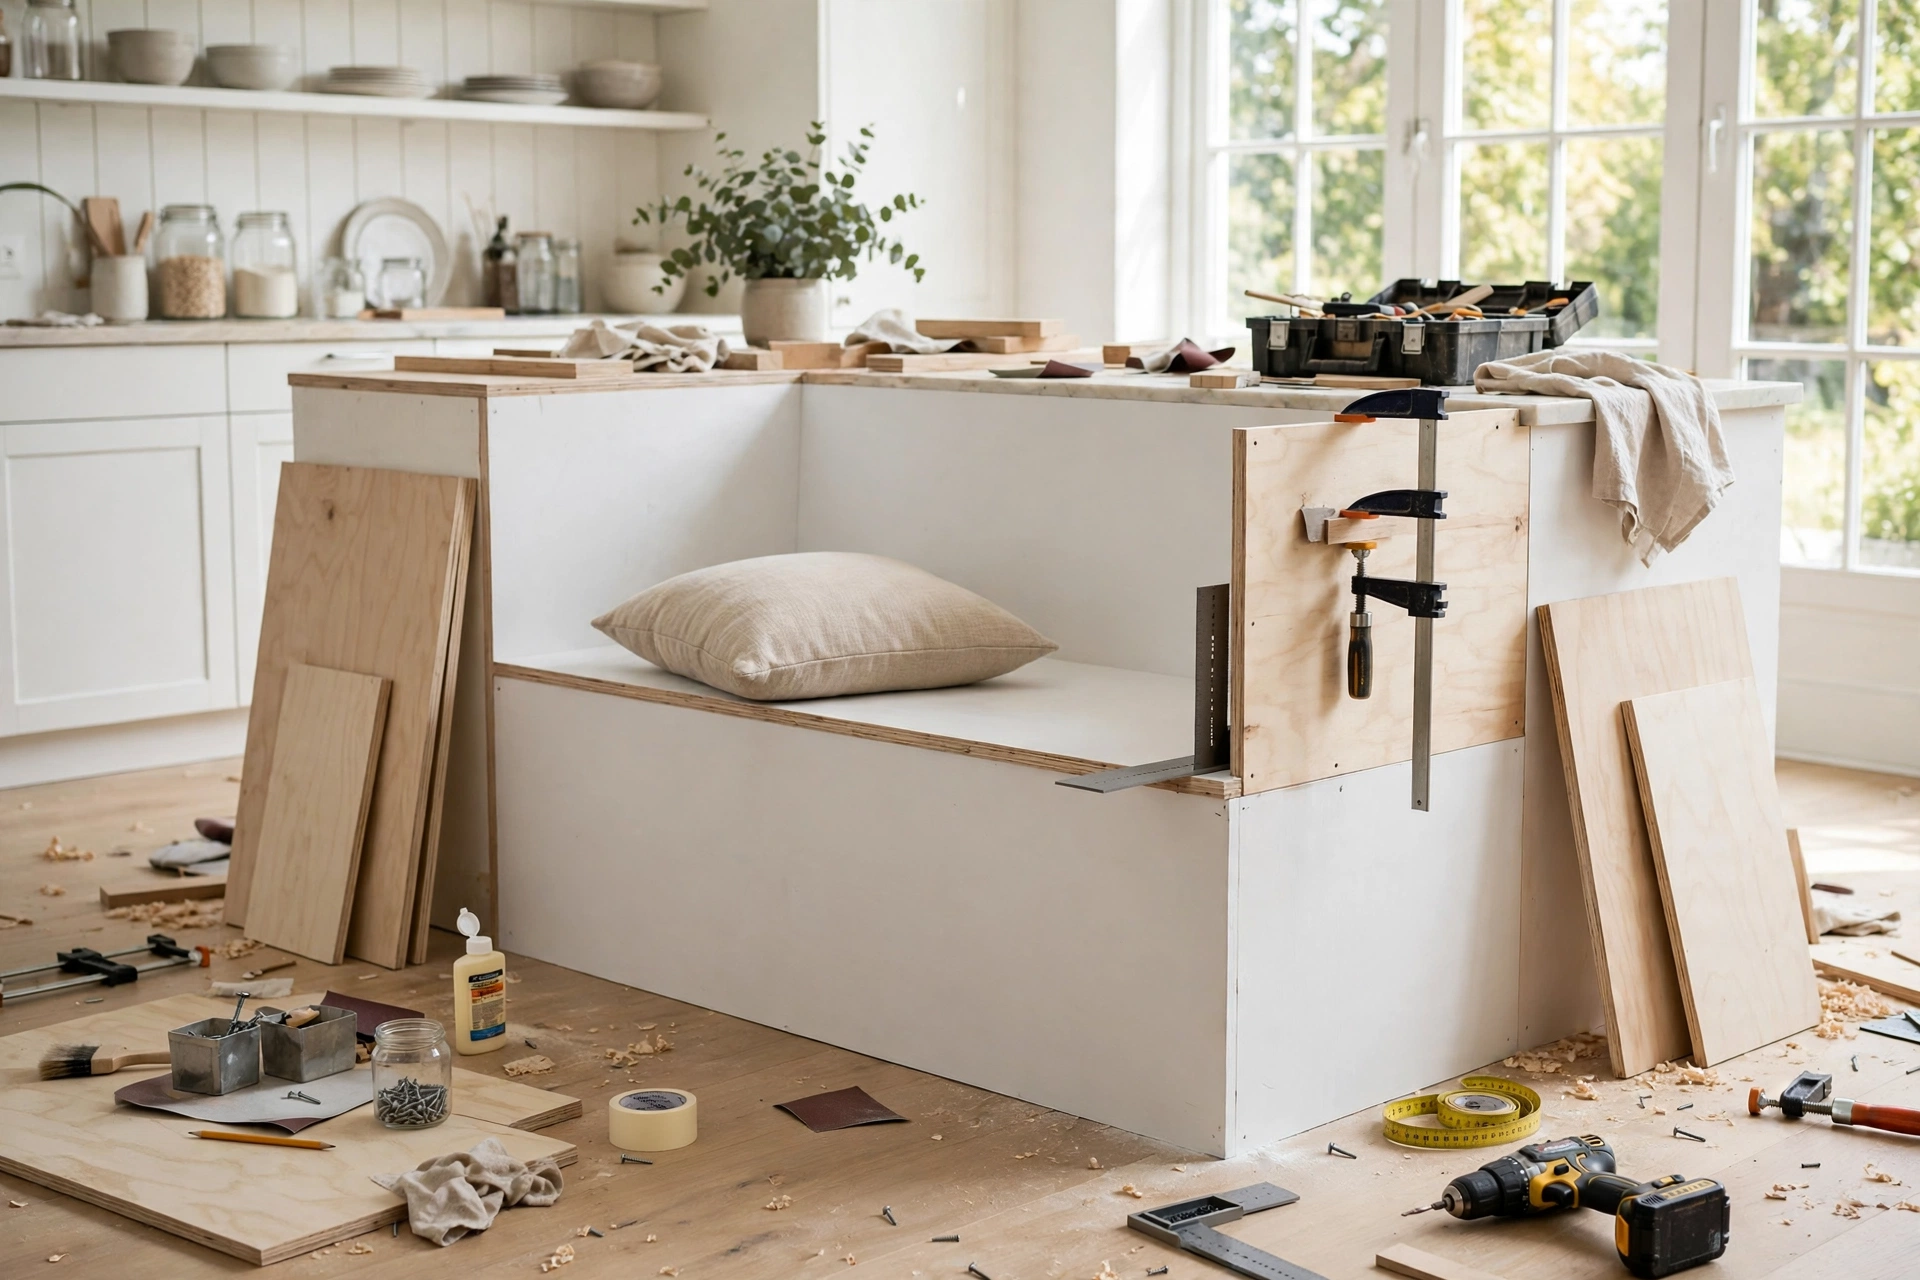
8. Simple Plywood Box Banquette for Beginners
If you can cut a straight line and drive a screw, you can build this banquette — it is the most common starting point for a reason. The whole bench is a rectangular plywood box: a top, two sides, a back, and a front panel, glued and screwed together, with a foam cushion on top. There are no angles to calculate and no joinery to master, yet the finished piece is rock solid and ready to paint, stain, or upholster however you like. Add a hinged lid later if you want storage, or leave it hollow and light so you can move it. Build the box 18 inches tall and as long as your wall allows, and use 3/4-inch plywood so the seat never flexes under a full table of guests. It is the perfect first woodworking project because the only visible skill is a clean paint job — and even that forgives a lot.
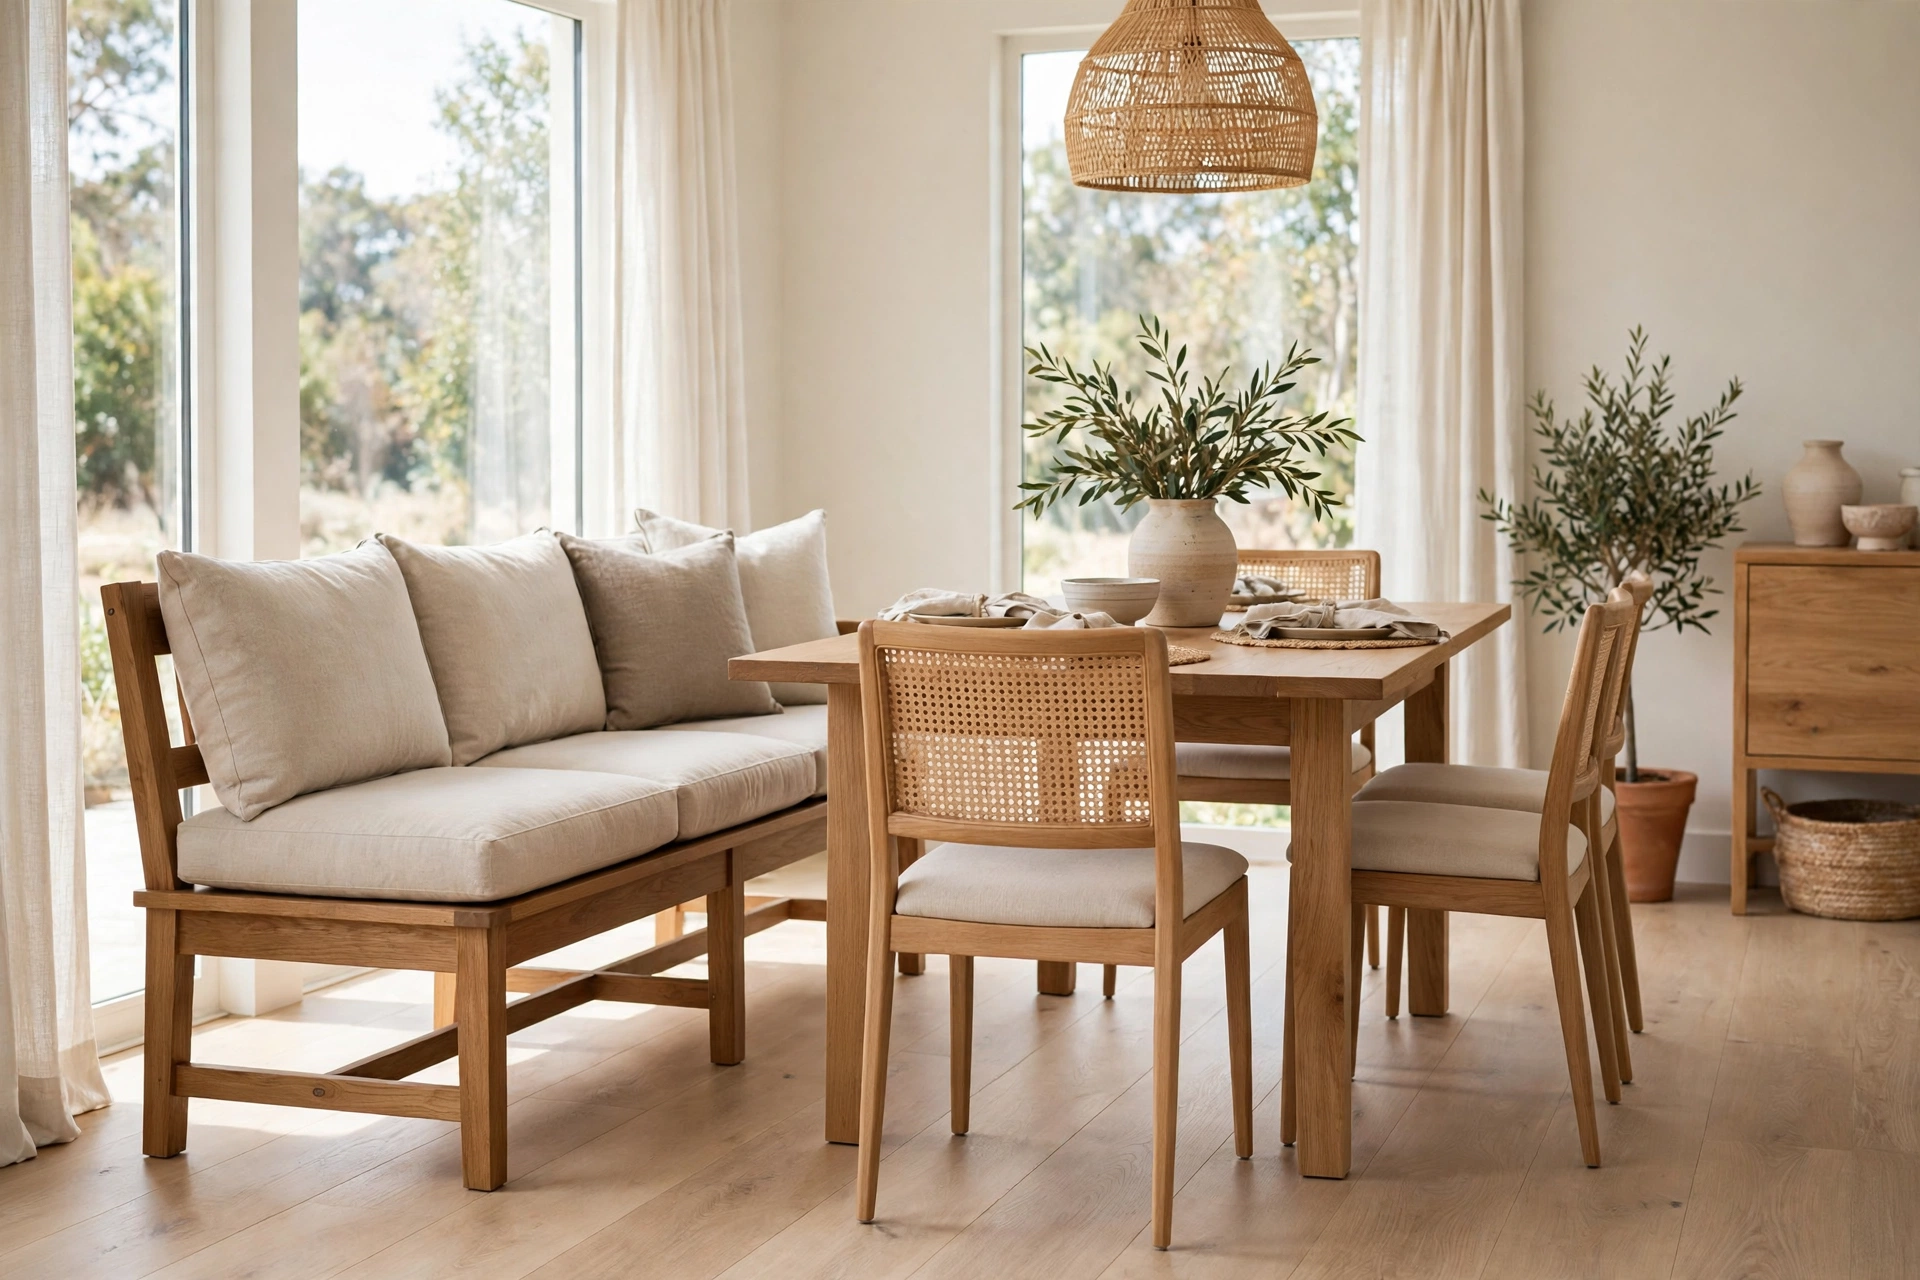
9. Freestanding Movable Bench Banquette
A banquette does not have to be bolted to the wall — a freestanding bench gives you the same cozy look with the freedom to rearrange the room whenever you like. Build it as a sturdy bench with legs or a plinth base, finish all four sides, and it works as dining seating today, an entryway bench tomorrow, and extra seating at a holiday table next month. The trick is weight and balance: use a solid wood top, add a lower stretcher rail between the legs, and keep the seat depth at 18 inches so it never tips when someone sits on the edge. Casters are tempting but skip them — they make the bench wander across the floor every time someone slides in. If you rent, this is your banquette: it leaves zero holes in the wall and moves with you to the next home.
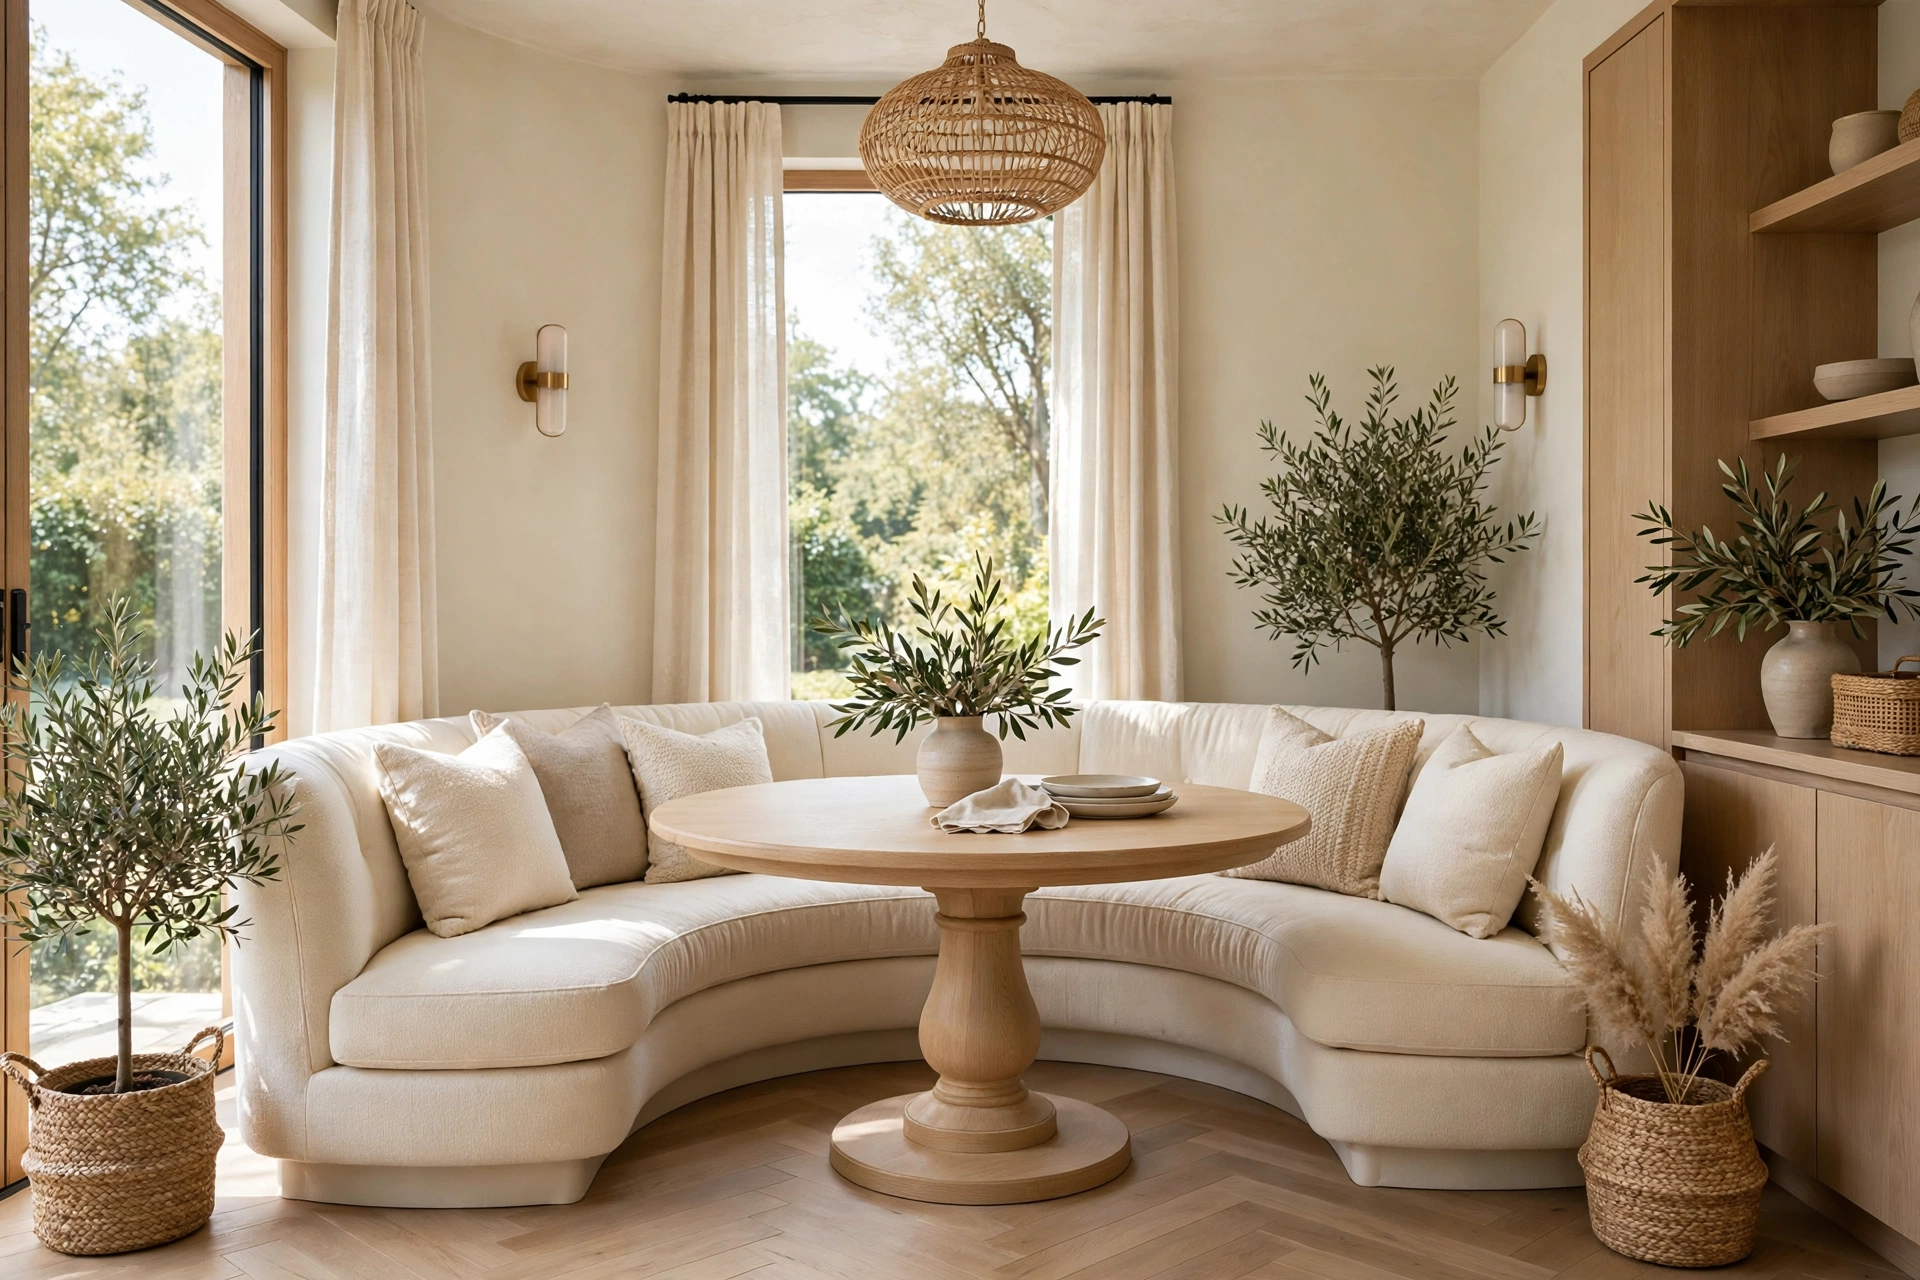
10. Curved Banquette for a Soft, Elegant Look
A curved banquette is the showpiece of the bunch — a gentle arc that softens a boxy dining room and makes the nook feel designed rather than built. Bendable plywood is the secret: it flexes around a curved frame of ribs cut from a template, then gets skinned with a second layer for strength, and the result is a smooth sweep with no visible facets. The curve also solves a real problem, wrapping around a round pedestal table so everyone faces each other instead of staring at a wall. This is an advanced build, so take your time with the template and clamp every rib before the glue sets. Upholster the back in a single sweeping cushion and the curve becomes the first thing guests notice — and the seat they ask to sit in.
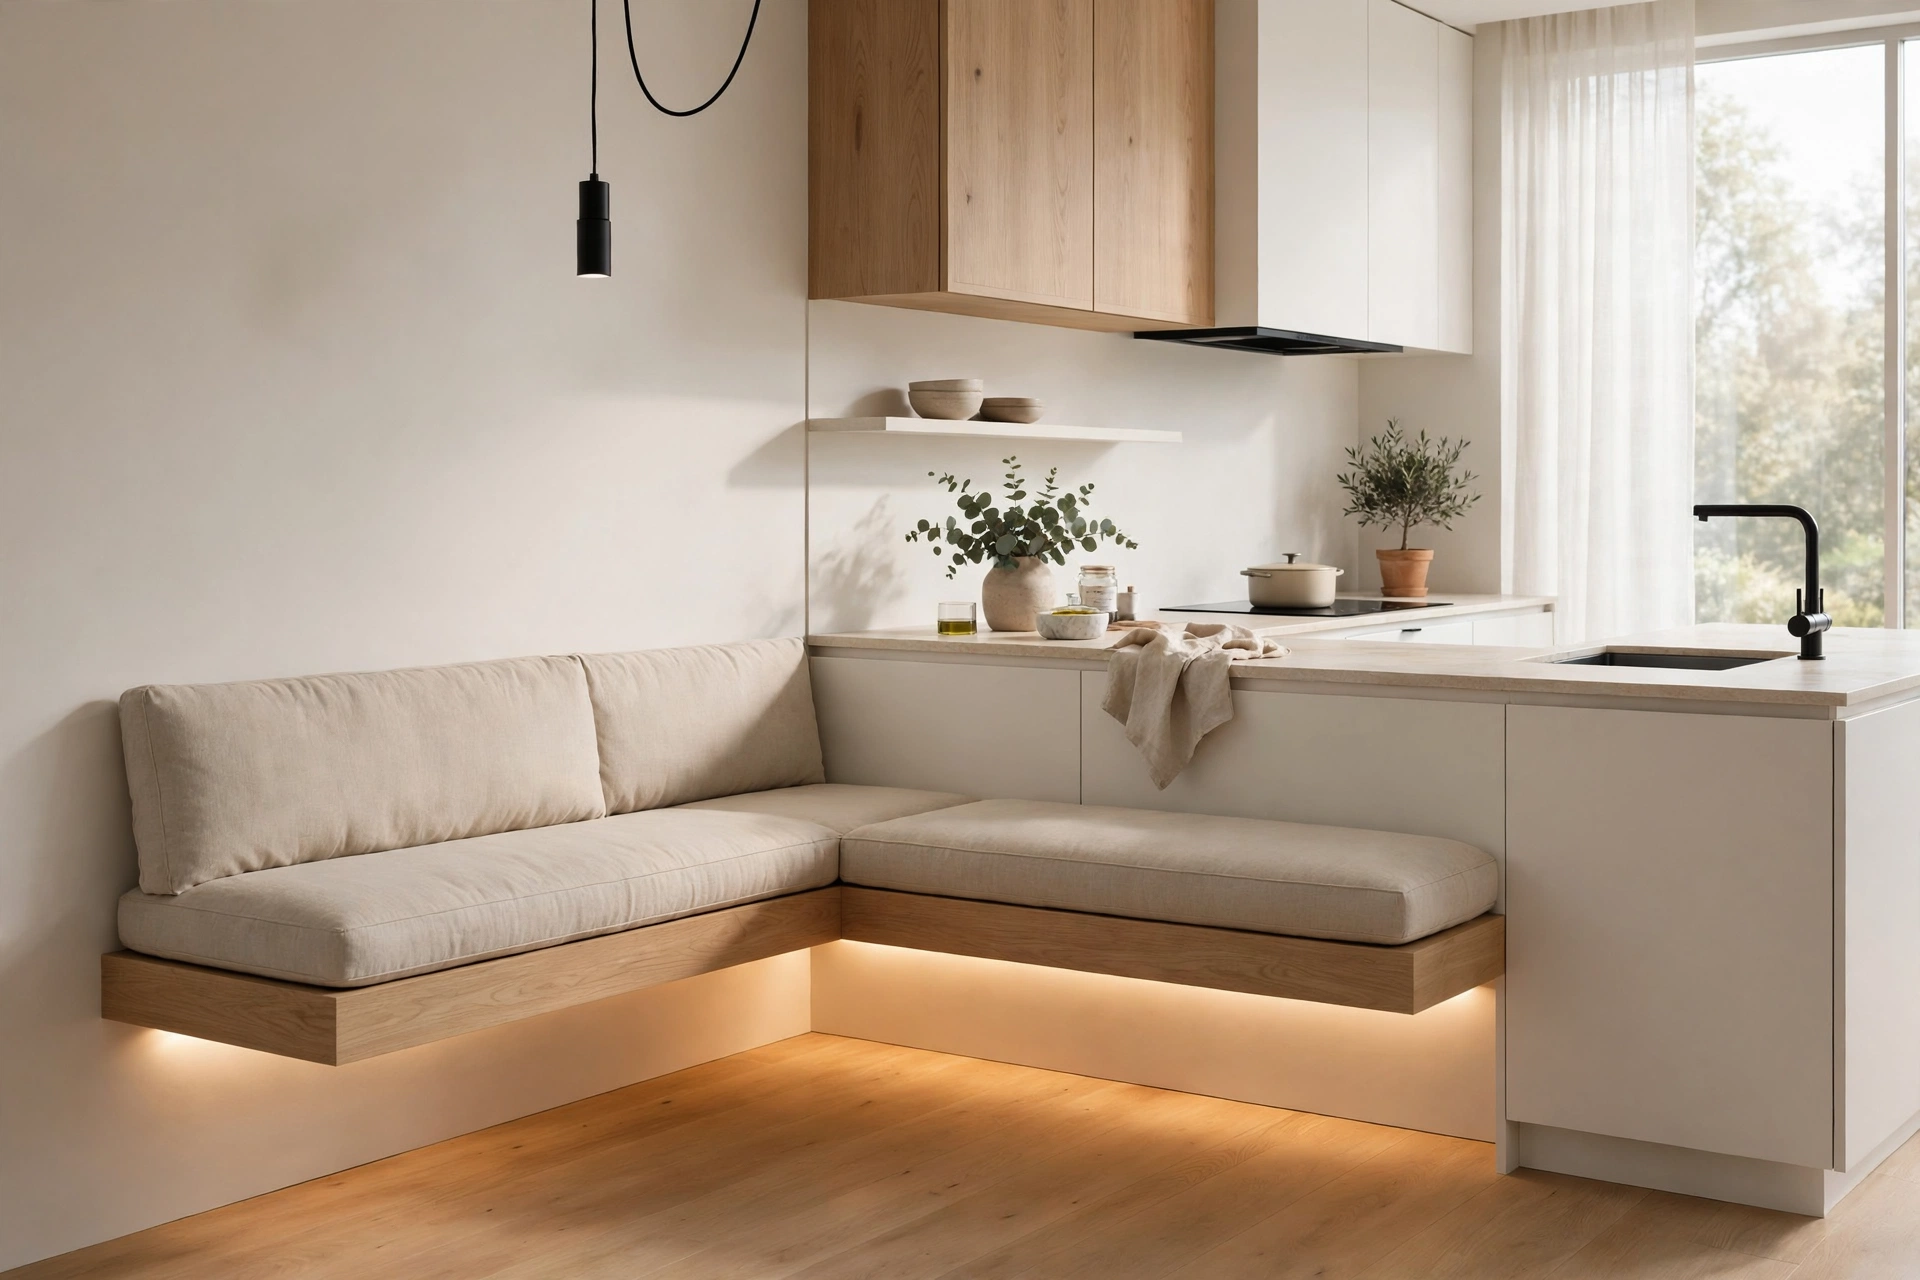
11. Floating Wall-Mounted Banquette
A floating banquette hangs on the wall with no legs and no base touching the floor, and the effect is pure magic in a small kitchen: the room looks bigger because you can see the floor run underneath, and mopping under the bench takes ten seconds. The secret is a French cleat system — a beveled strip of hardwood screwed into every stud along the wall, with a matching strip on the bench — rated to carry far more weight than the bench and its diners will ever put on it. Build the bench as a hollow torsion box so it stays light, and add a recessed LED strip under the seat for a soft glow that makes the whole nook float at night. This is not a beginner project, but for a modern kitchen it is the cleanest, most architectural banquette you can build.
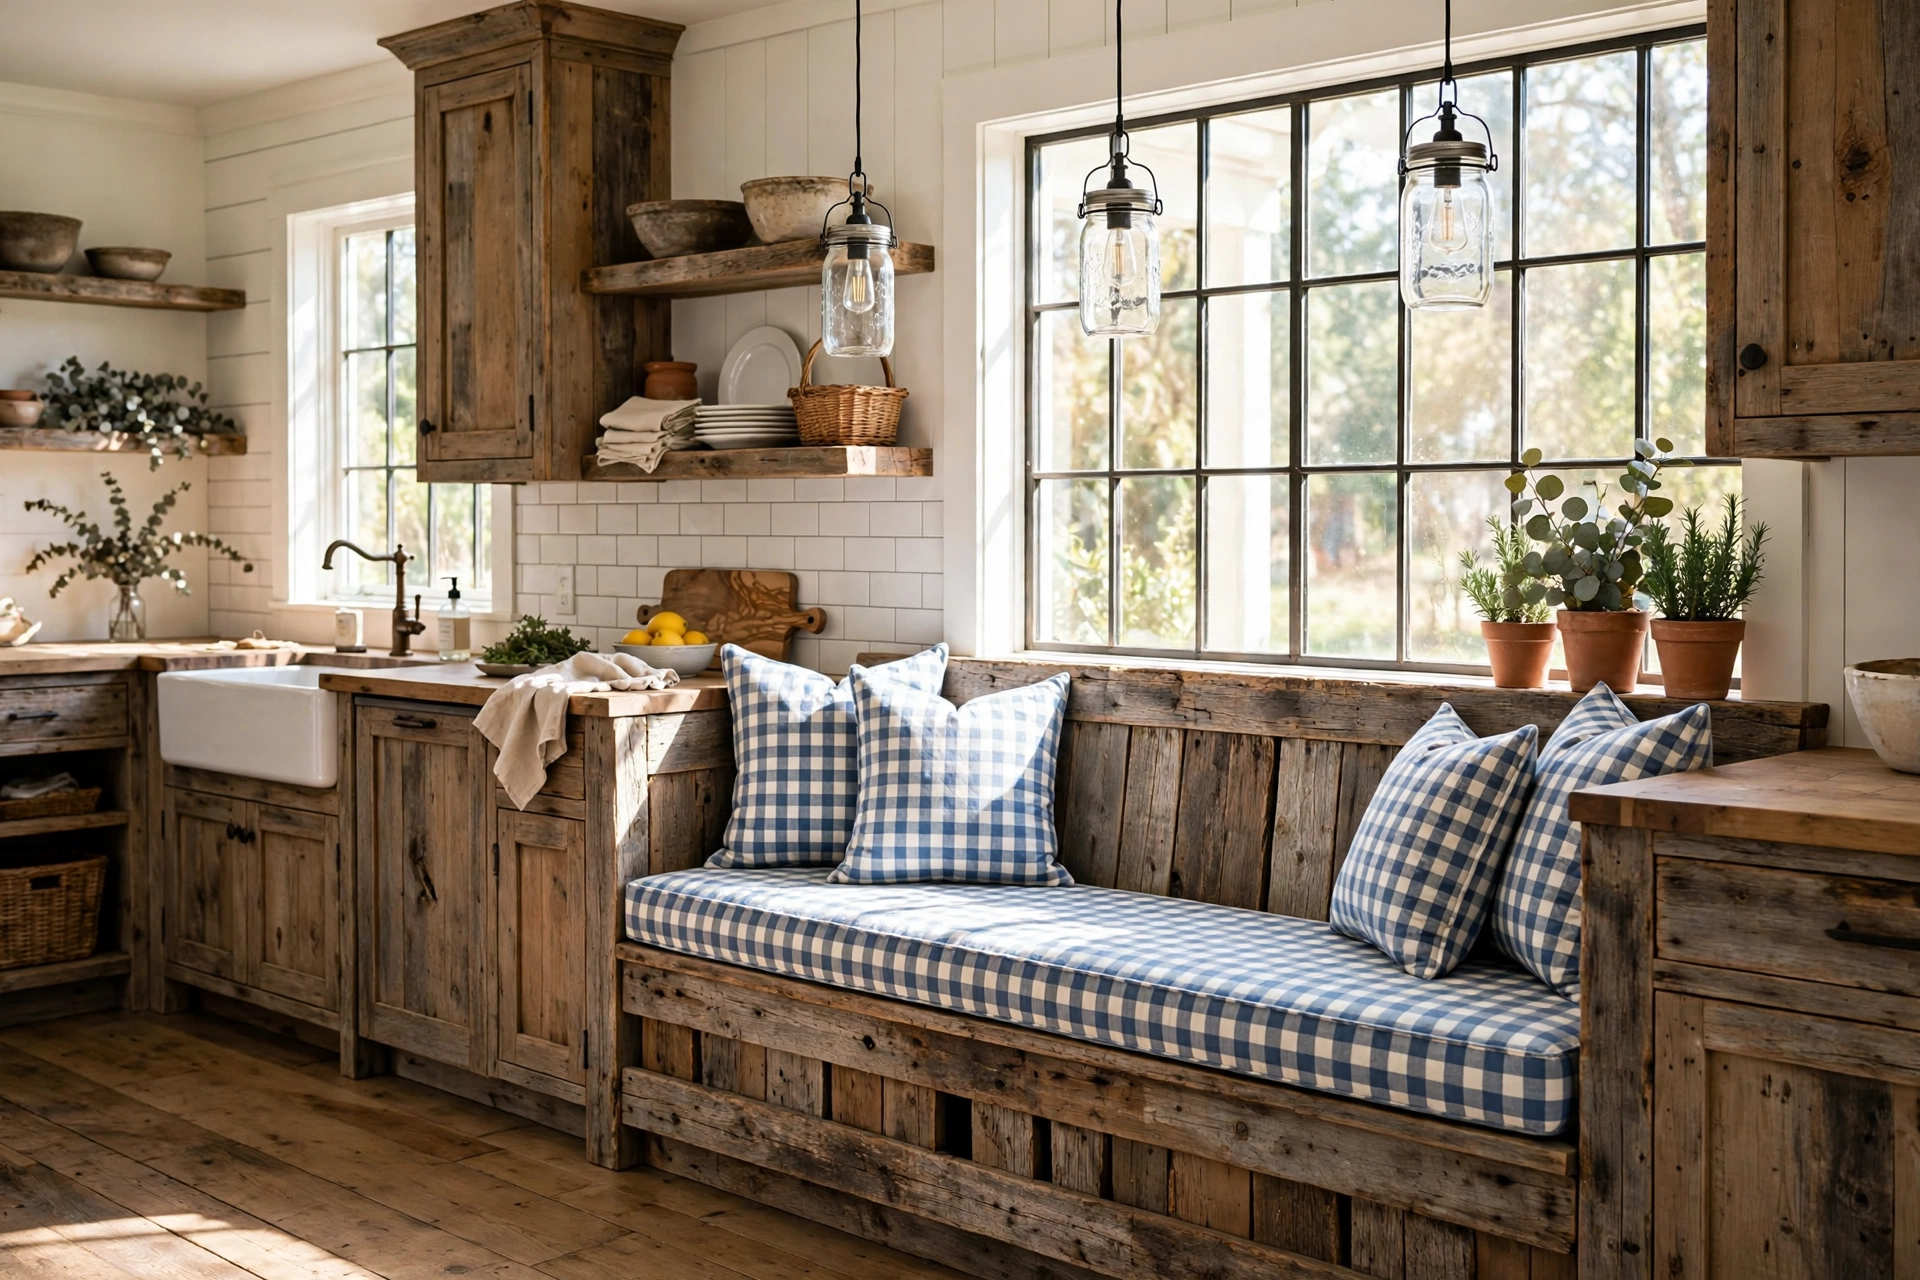
12. Farmhouse Banquette From Reclaimed Wood
Nothing says farmhouse like a banquette built from reclaimed wood — old barn boards, a salvaged door, or a flea-market tabletop with a century of character already in the grain. Use the reclaimed boards for the visible parts — the bench front, the seat edge, and the backrest — and hide modern plywood and 2×4 framing inside where nobody sees it, so you get the look without fighting warped lumber for structure. Sand the reclaimed faces just enough to remove splinters while keeping the saw marks and nail holes that tell the story, then seal everything with a matte polyurethane so tomato sauce wipes off. Pair it with a gingham or ticking-stripe cushion and a mason-jar pendant light, and the nook feels like it has been in the family for generations, even if you built it last Saturday.
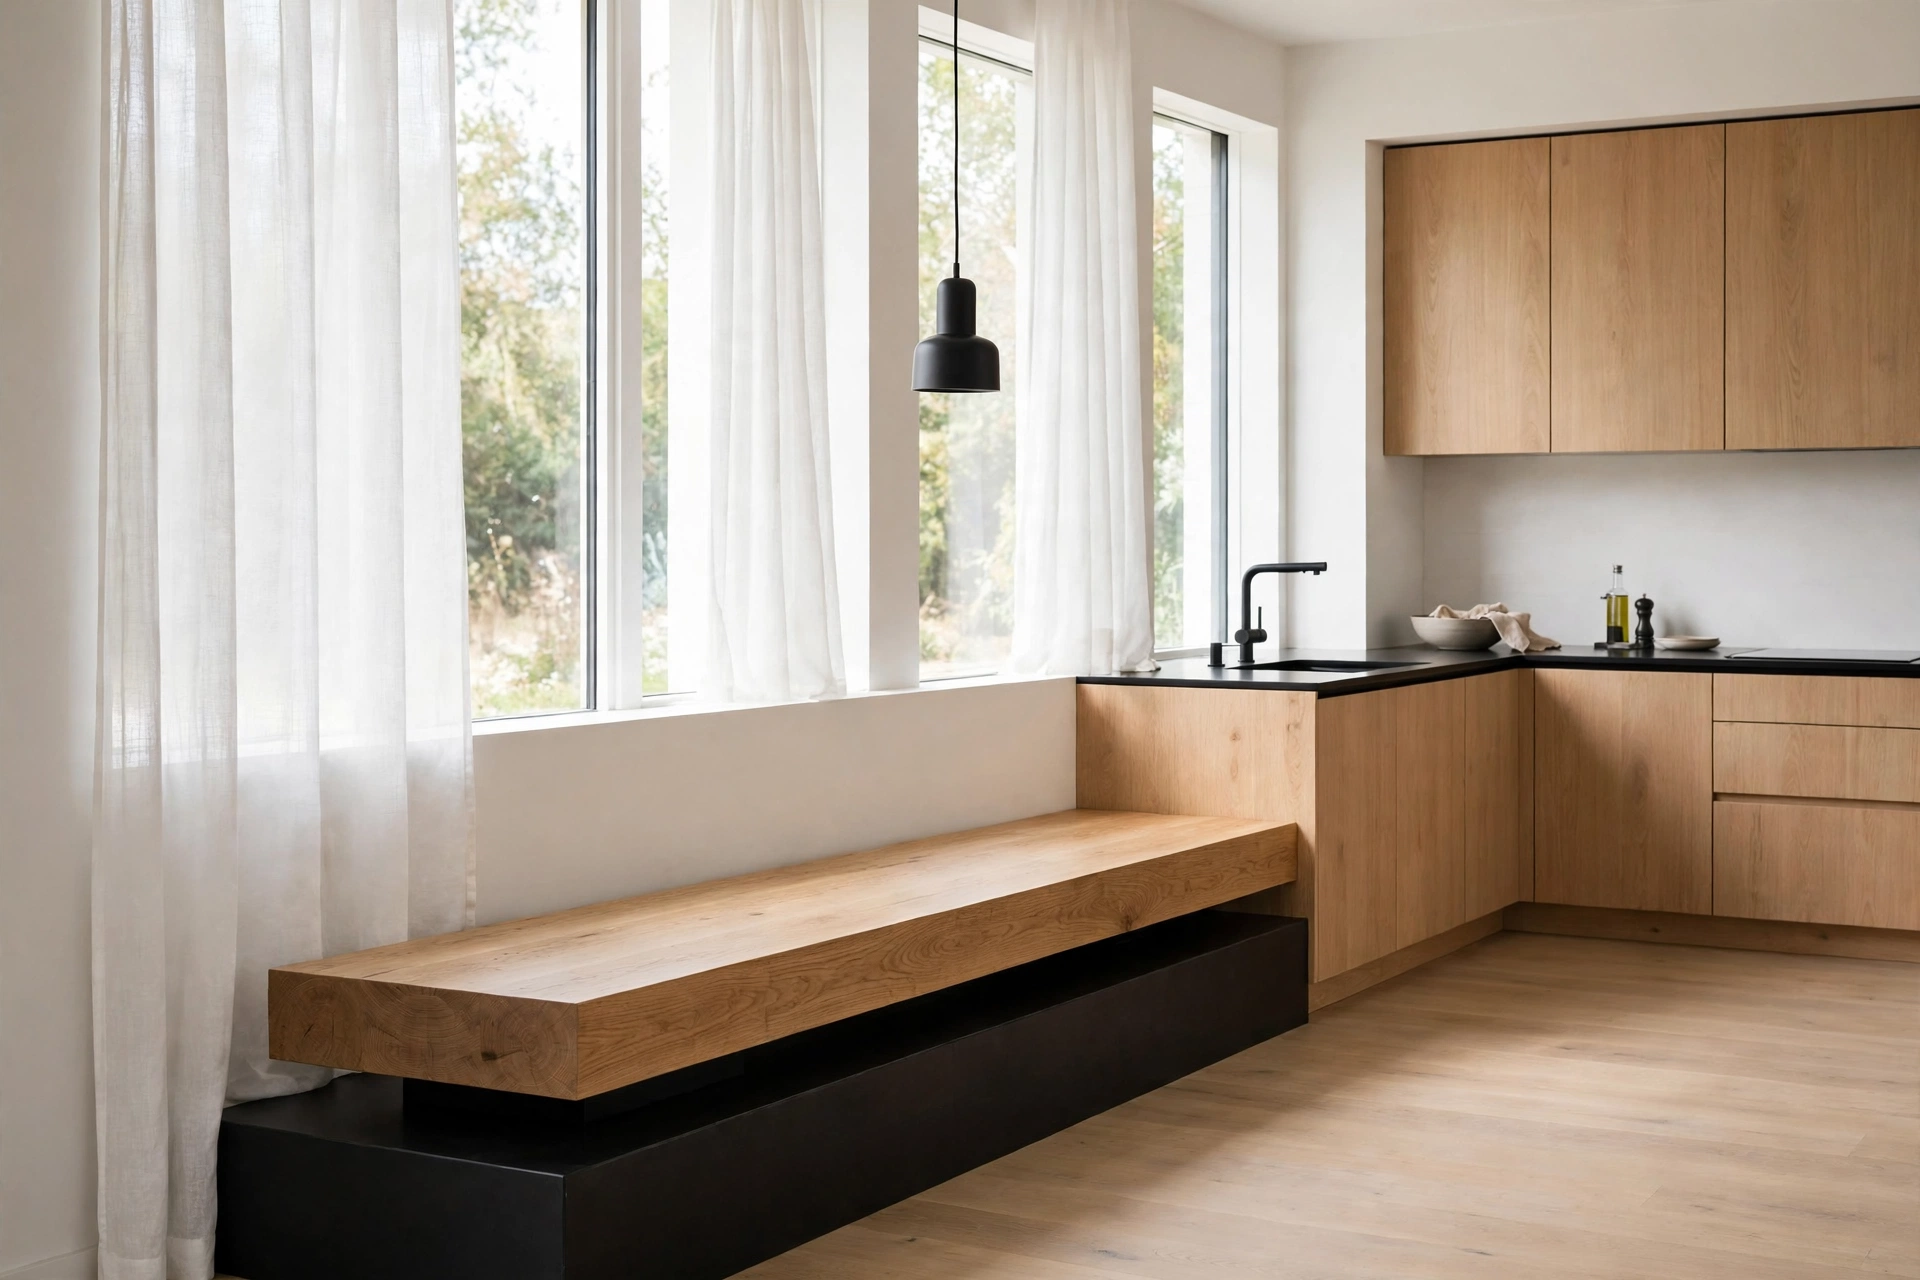
13. Modern Minimalist Slab Banquette
For a contemporary kitchen, skip the backrest, the cushions, and the fuss: a modern minimalist banquette is a single clean slab of oak or walnut floating on a recessed plinth, and its beauty is in what it leaves out. The seat is a thick butcher-block-style slab, the base is set back six inches so it reads as a shadow line, and there is nothing to dust except one smooth surface. This style demands precision — every edge must be square, every joint tight, because there is no trim to hide behind — but the build itself is simple: a slab, a plywood carcass, and a plinth. Style it with a single black metal pendant and a linen runner, and the nook feels like a spread from a design magazine. It is also the easiest banquette to keep clean, which is a design feature in its own right.
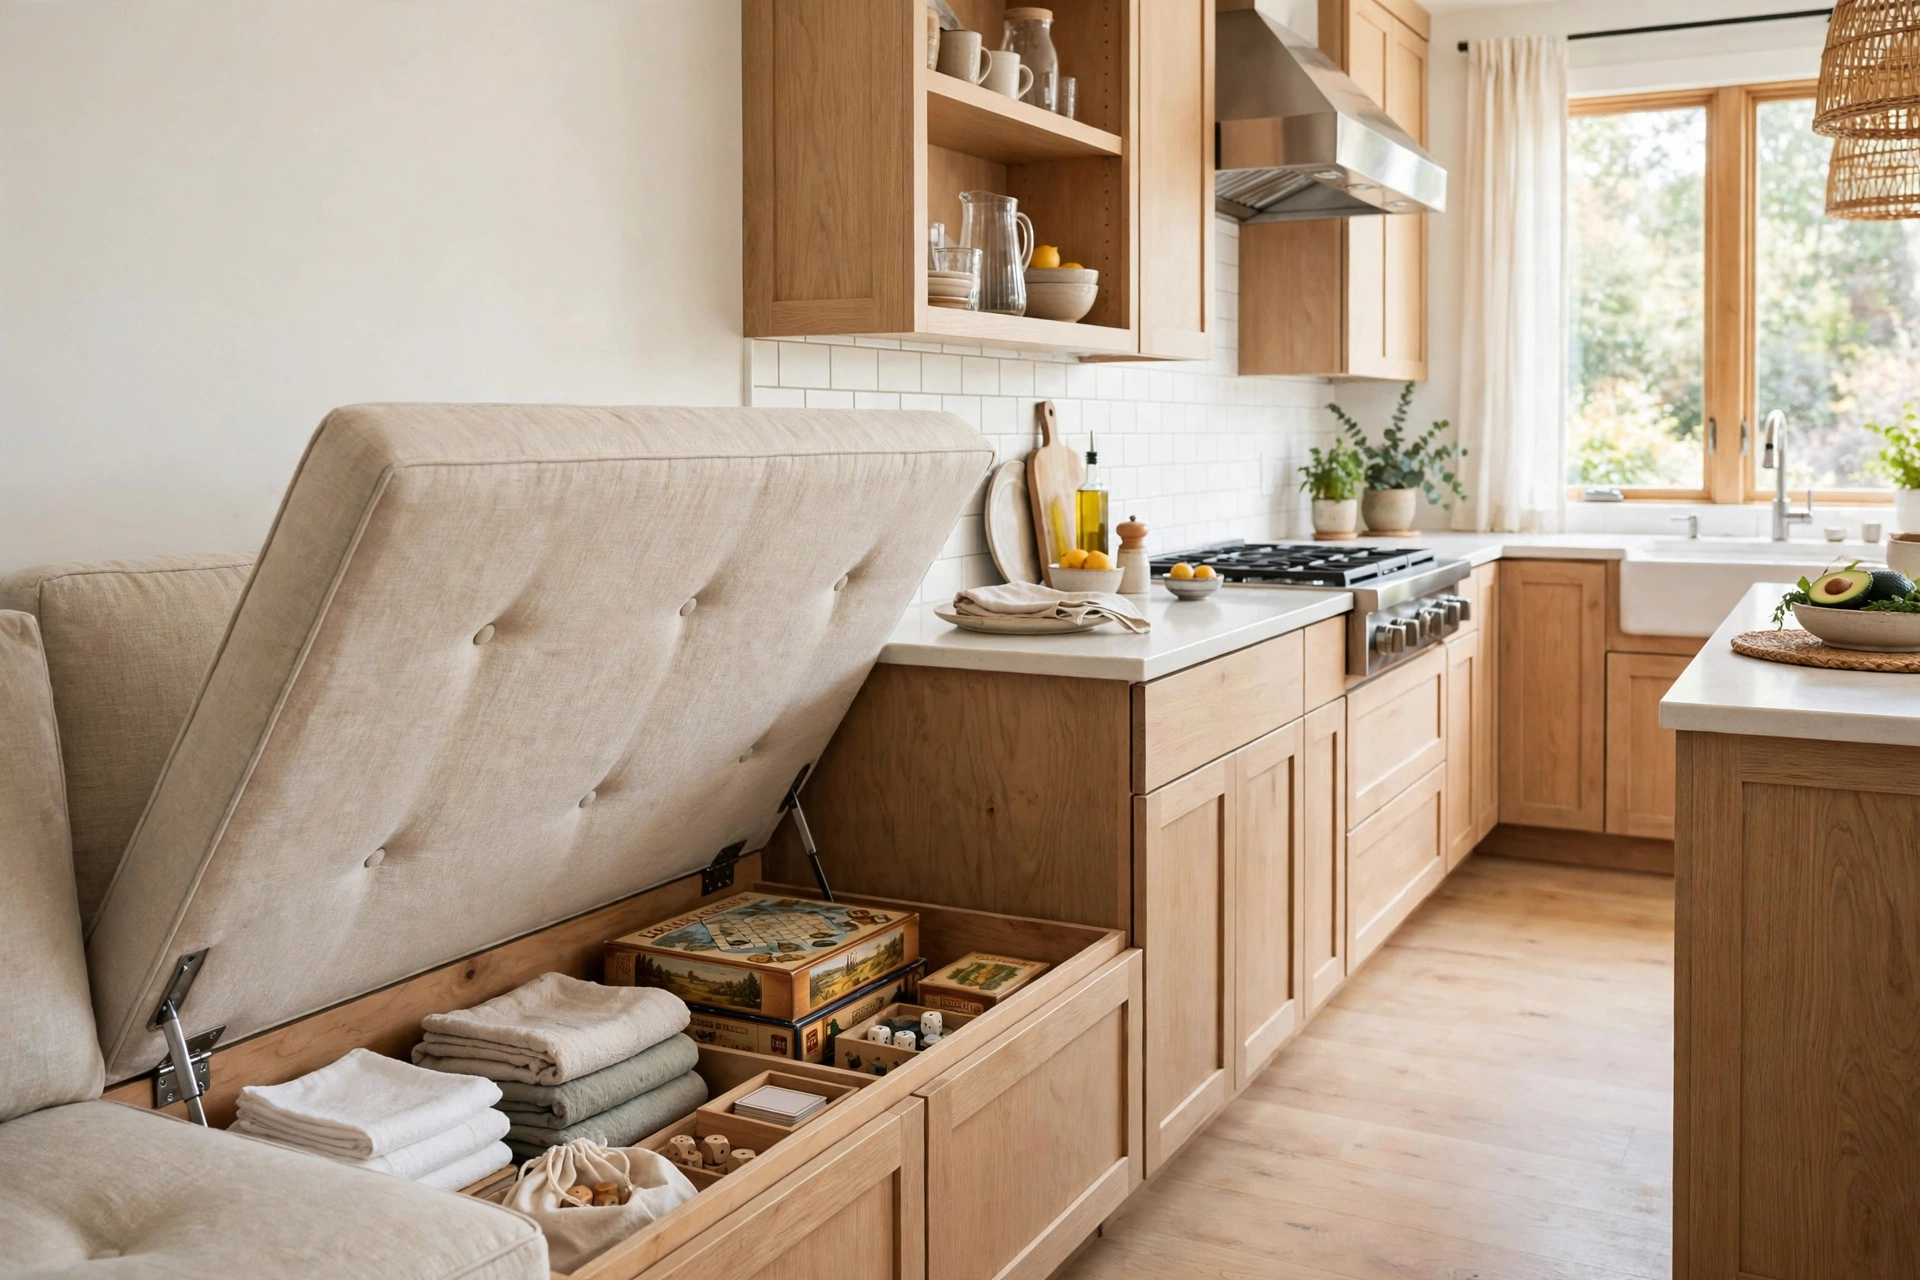
14. Banquette With Hidden Hinged-Lid Storage
The single most useful feature a banquette can have is a hinged lid, because the hollow bench you are already building is the biggest hidden storage box in the kitchen. Fit the seat top with concealed hinges and a pair of soft-close lid stays, and the whole cushion lifts to reveal a deep bin that swallows board games, table linens, seasonal placemats, and the kids’ art supplies. Add a finger pull or a leather loop at the front edge so the lid opens without a handle breaking the clean line, and line the inside with cedar or a wipeable liner so nothing stored there picks up a musty smell. Keep heavier items — the stand mixer, the big roasting pan — in the bins nearest the wall, where the lid is easiest to lift. It is storage that guests never suspect and you will use every single day.
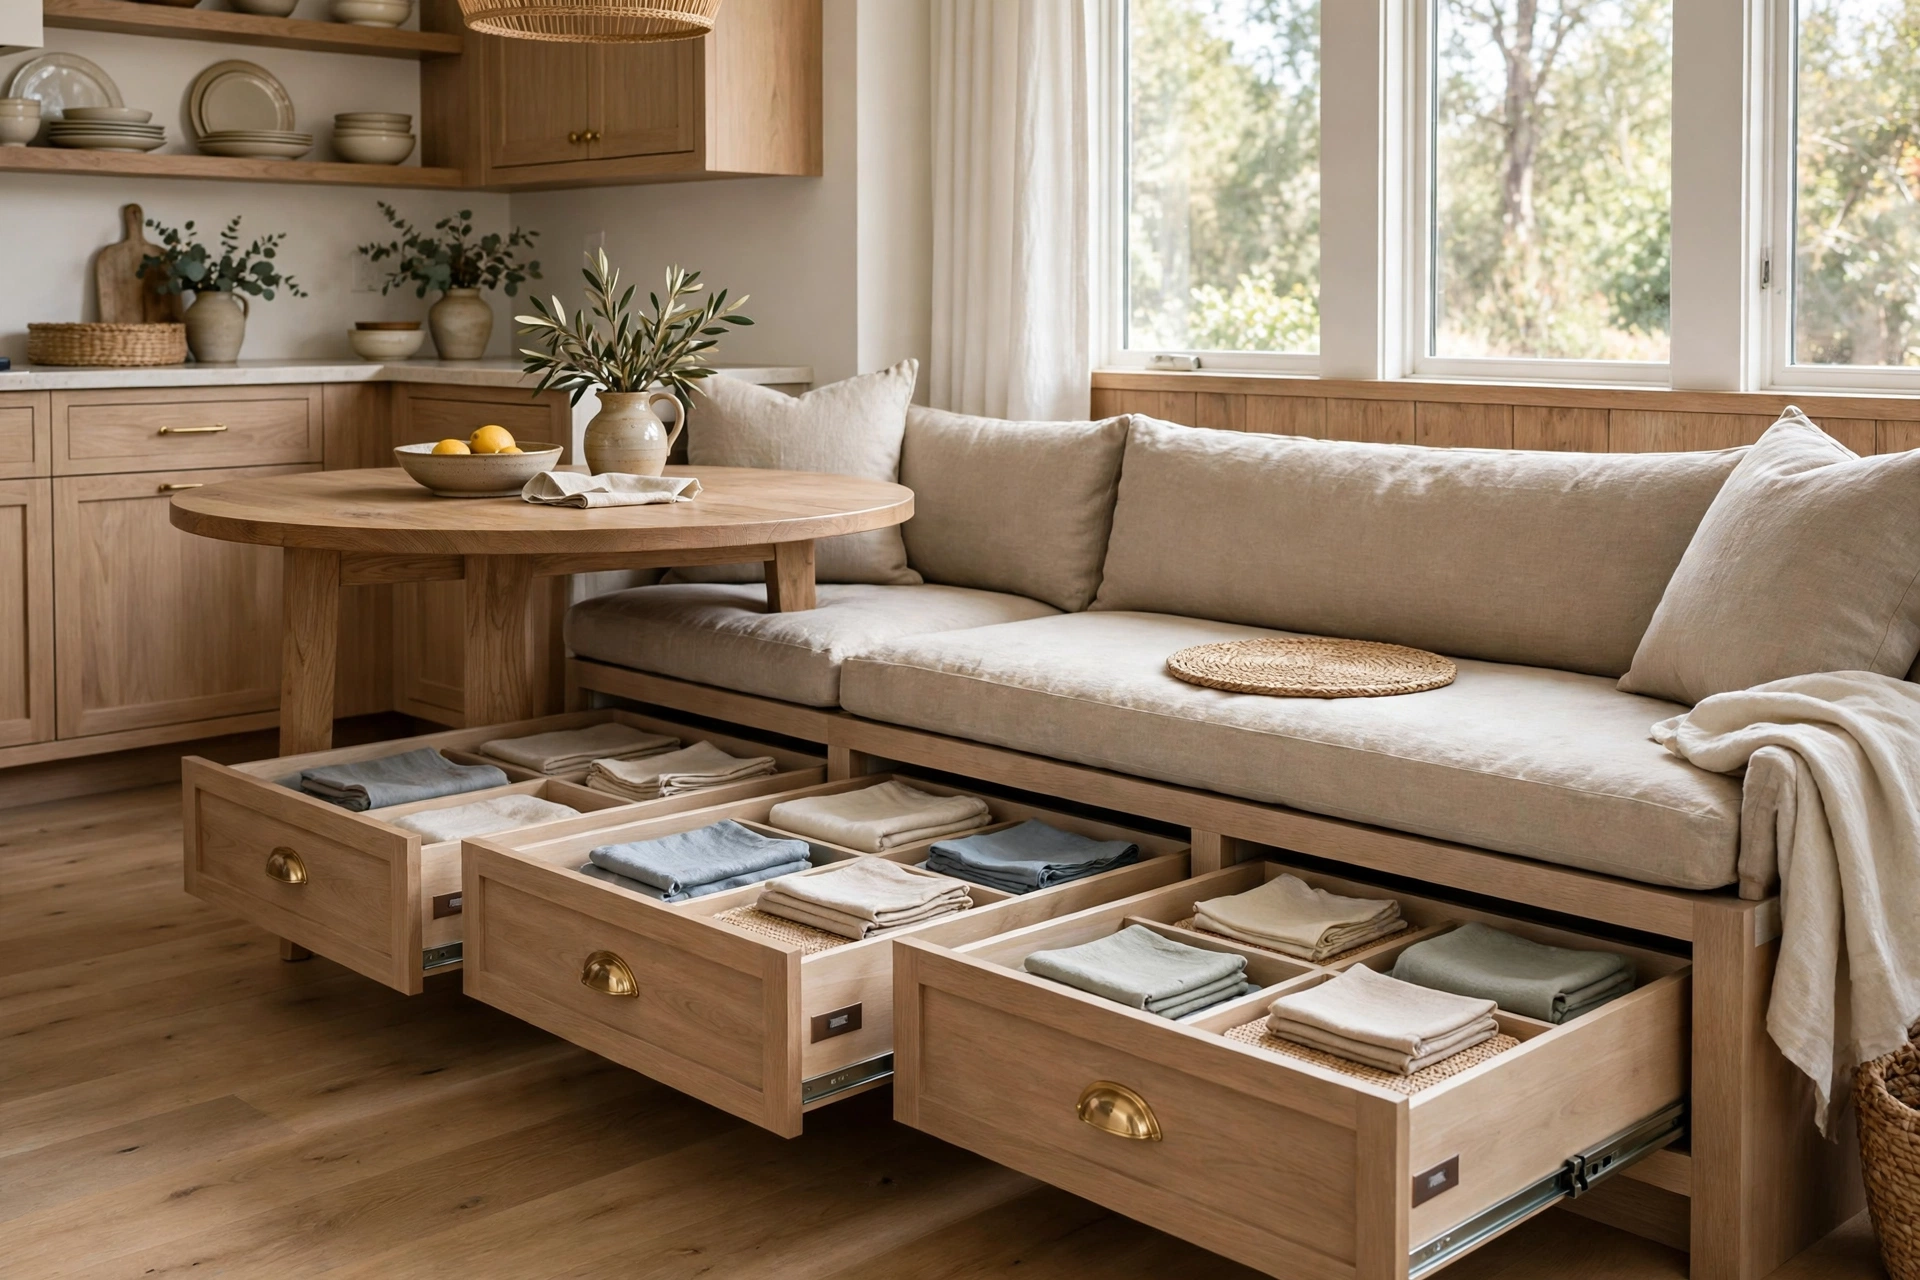
15. Banquette With Pull-Out Drawers
Hinged lids are great, but drawers are better when you need to reach something without clearing the table: a banquette with pull-out drawers lets you grab the placemats while breakfast is still on the table. Build the bench carcass with drawer openings on the front face, fit full-extension drawer slides, and use deep drawer boxes — twelve inches of depth is plenty for linens and games without eating into legroom. Shallow top drawers are perfect for cutlery, napkins, and homework supplies, while the deep bottom drawers take the bulky stuff. Choose push-to-open hardware if you want a handle-free front, or add slim brass pulls that double as jewelry for the bench. If you are short on drawer-building confidence, our guide to kitchen corner cabinet ideas covers the same drawer logic for corners — the skills transfer directly.
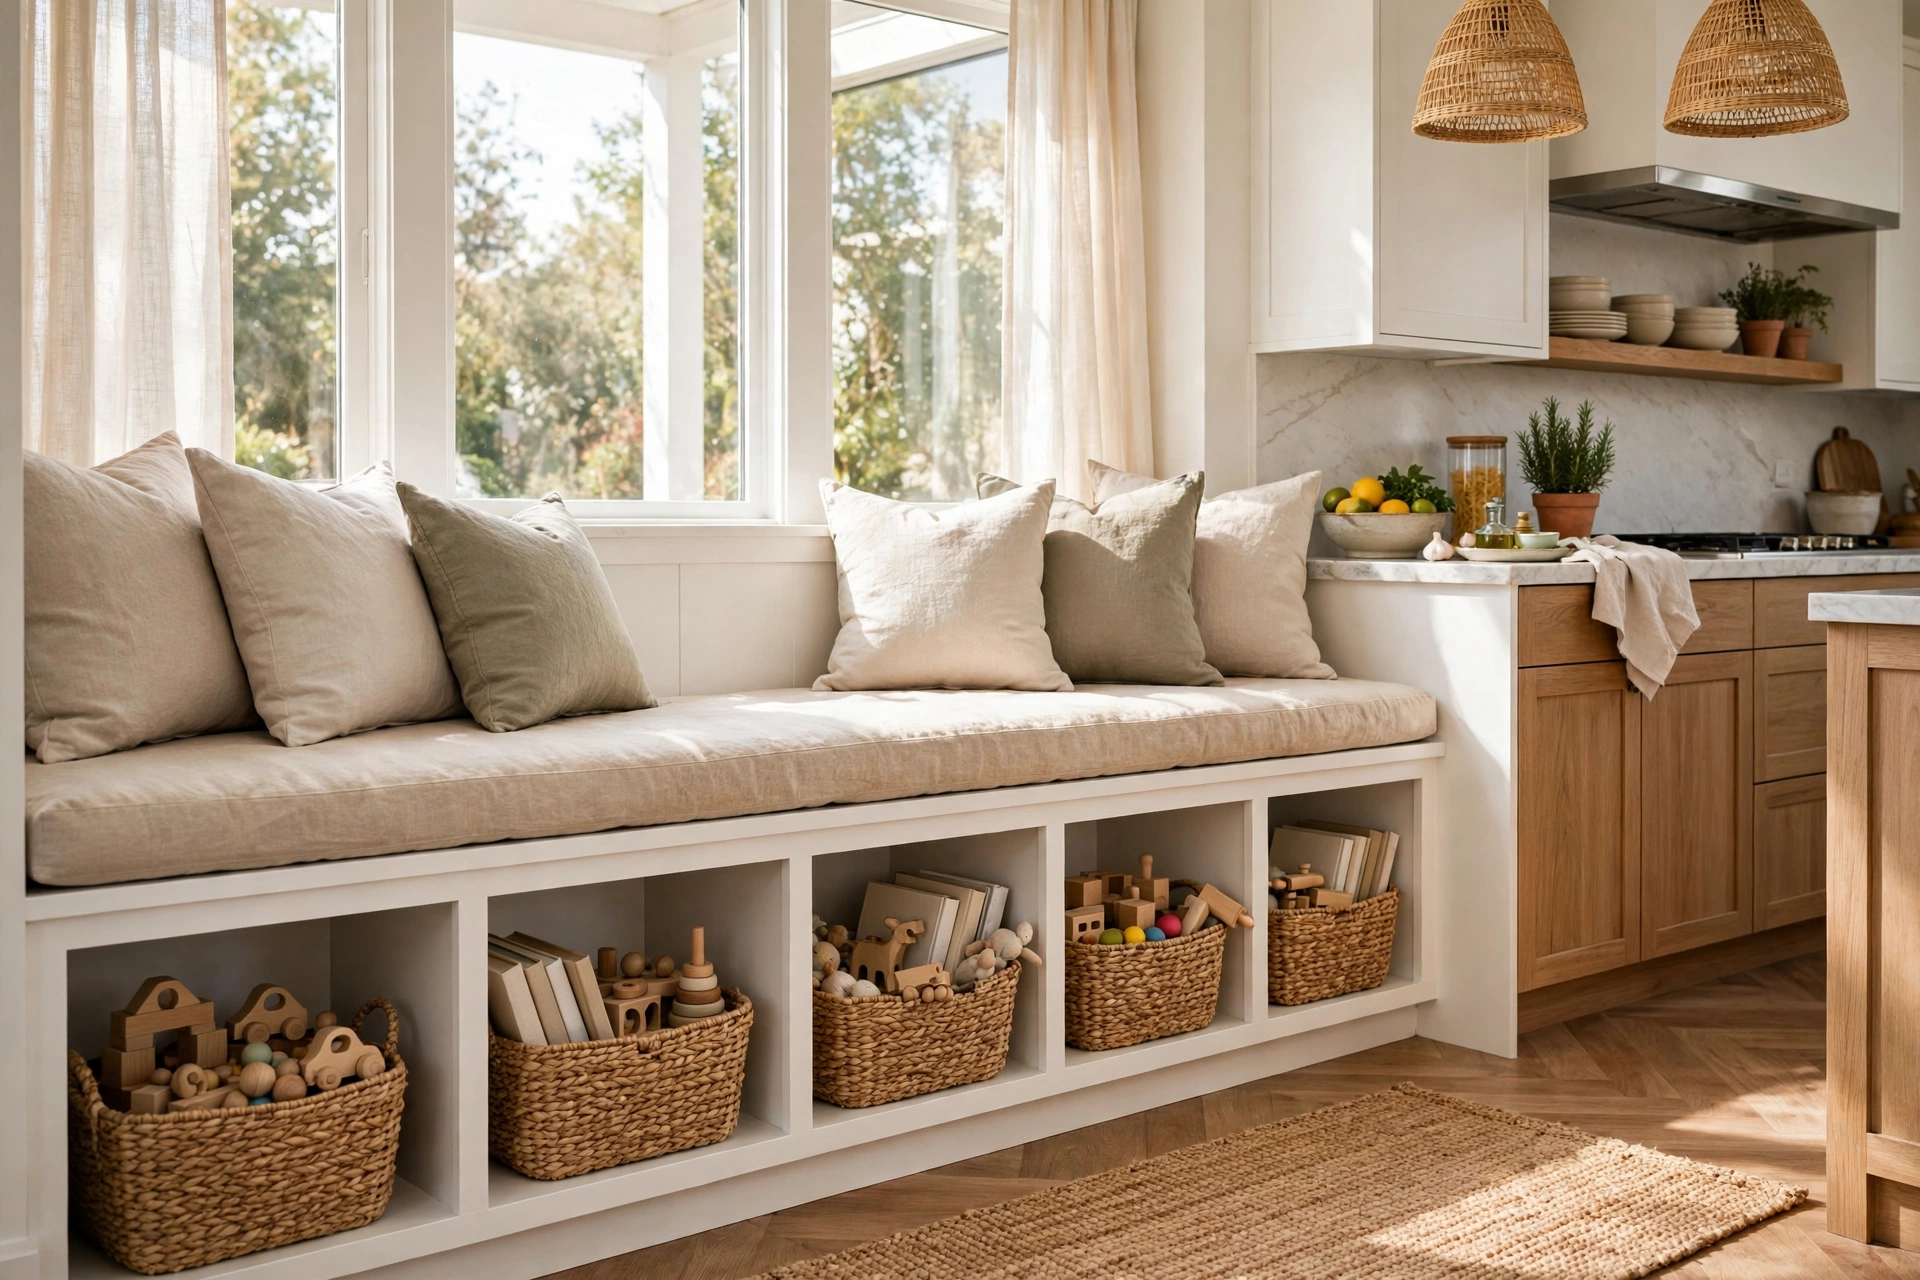
16. Banquette With Open Cubby Storage
Open cubbies are the lowest-effort storage a banquette can offer: no hinges, no slides, no doors — just a row of square openings under the seat that hold baskets, books, and bins. Build the bench as a grid of dividers, slide in woven seagrass or canvas baskets, and suddenly the kids’ shoes, the dog’s toys, and the board-game collection all have a home that looks intentional instead of cluttered. The open design also keeps the bench light and airy, which suits small kitchens where a solid front would feel heavy. Label the baskets if the cubbies belong to different family members, and keep one cubby free for the things that never have a home — the charging cables, the tape measure, the random LEGO pieces. It is the banquette for families who need storage now, not after a weekend of hardware installation.
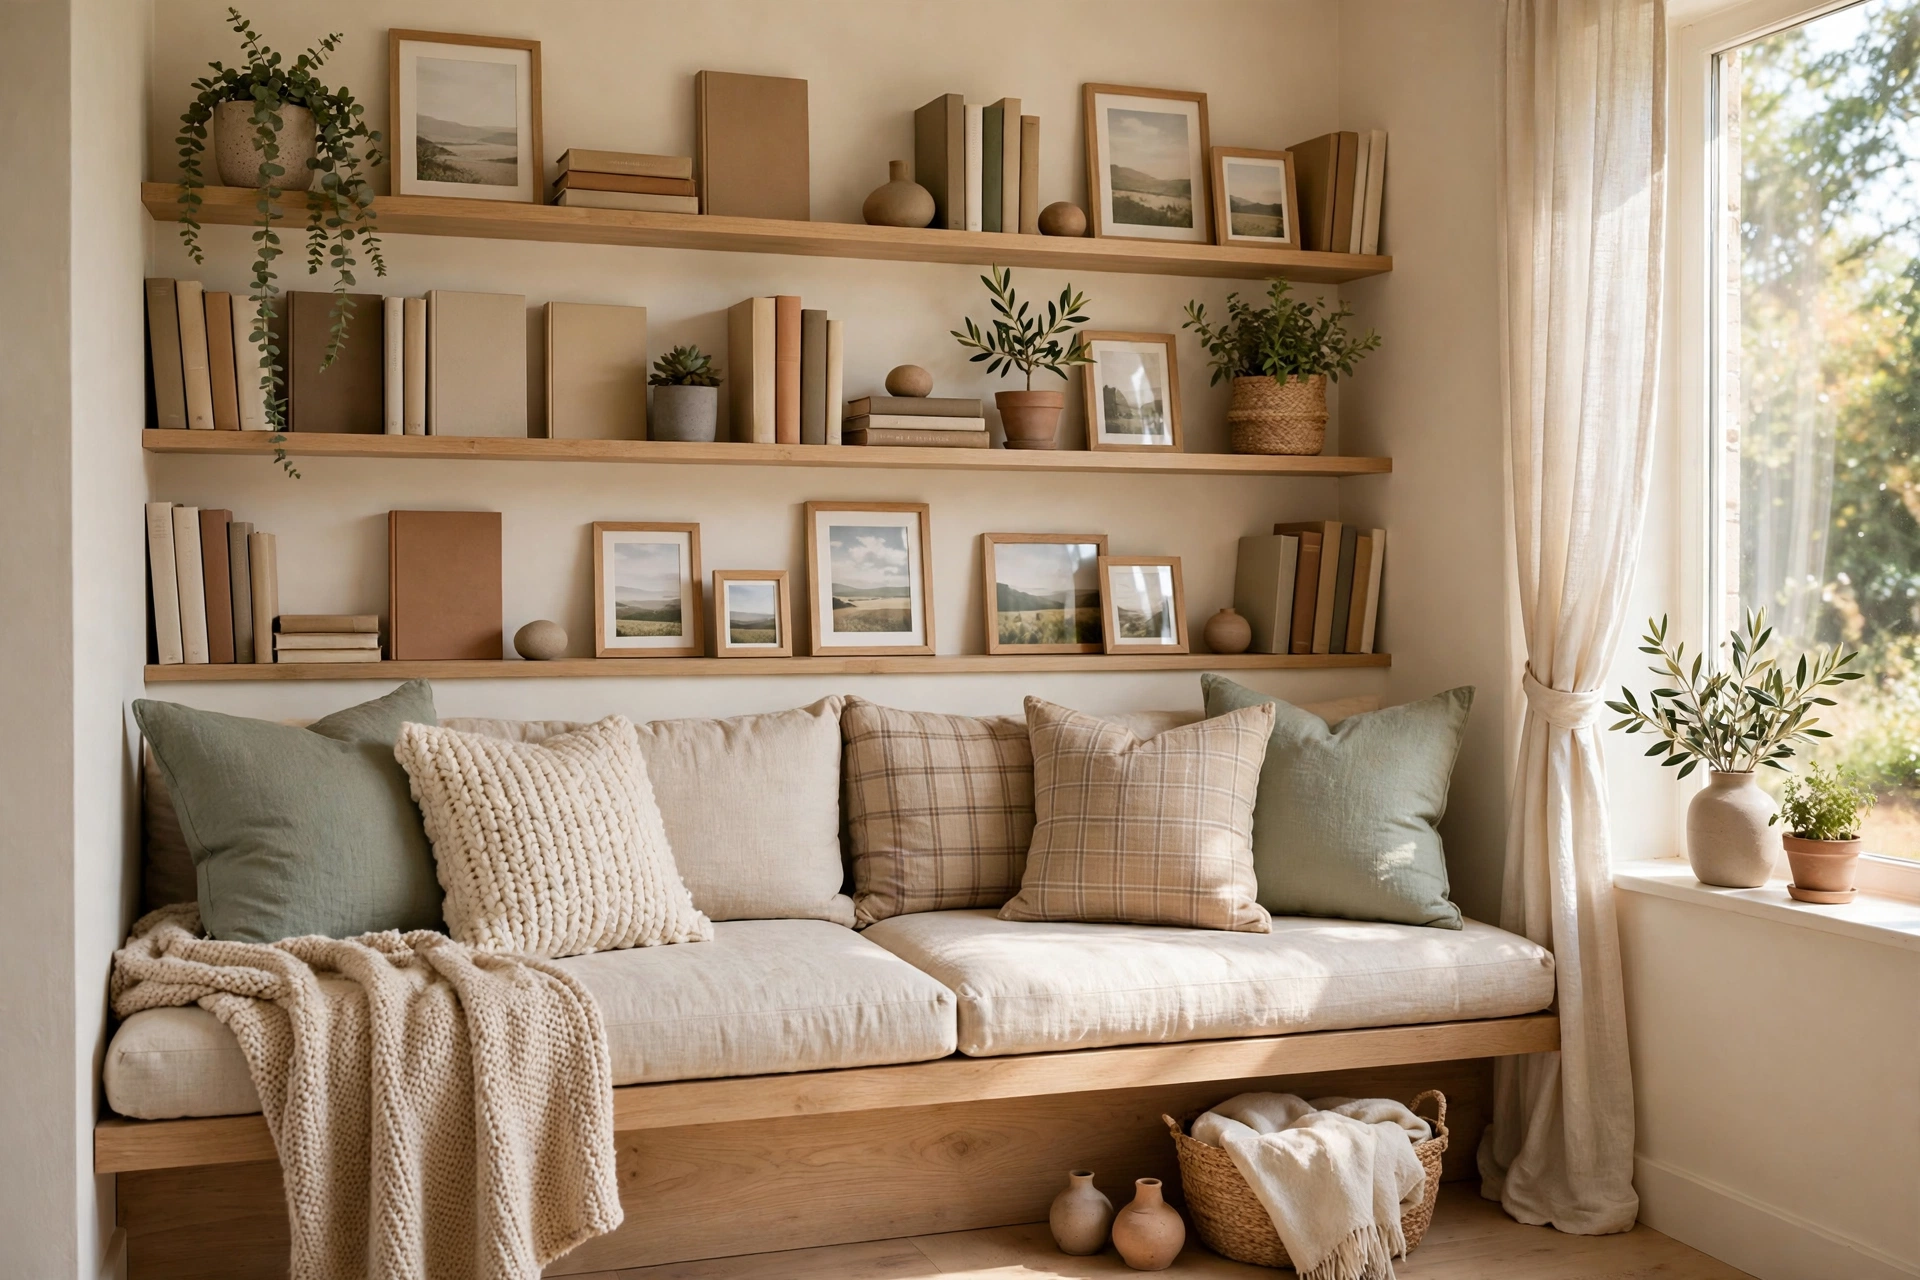
17. Banquette With a Built-In Bookshelf Back
Give the wall behind your banquette a job and it stops being dead space: a built-in bookshelf back turns the nook into a reading corner, a cookbook library, or a display for the dishes too pretty to hide. Build a shallow shelf unit — eight to ten inches deep — directly above the backrest, with two or three shelves for cookbooks, plants, and framed photos, and let the bottom shelf sit at cushion height so it doubles as a ledge for coffee mugs. Keep the heaviest books on the lowest shelf and leave the top shelf for light decor, so nothing ever falls on a diner. Paint the shelves the same color as the bench for a single built-in look, or stain them in a contrasting wood for a furniture feel. It is the banquette for people who eat with a book open.
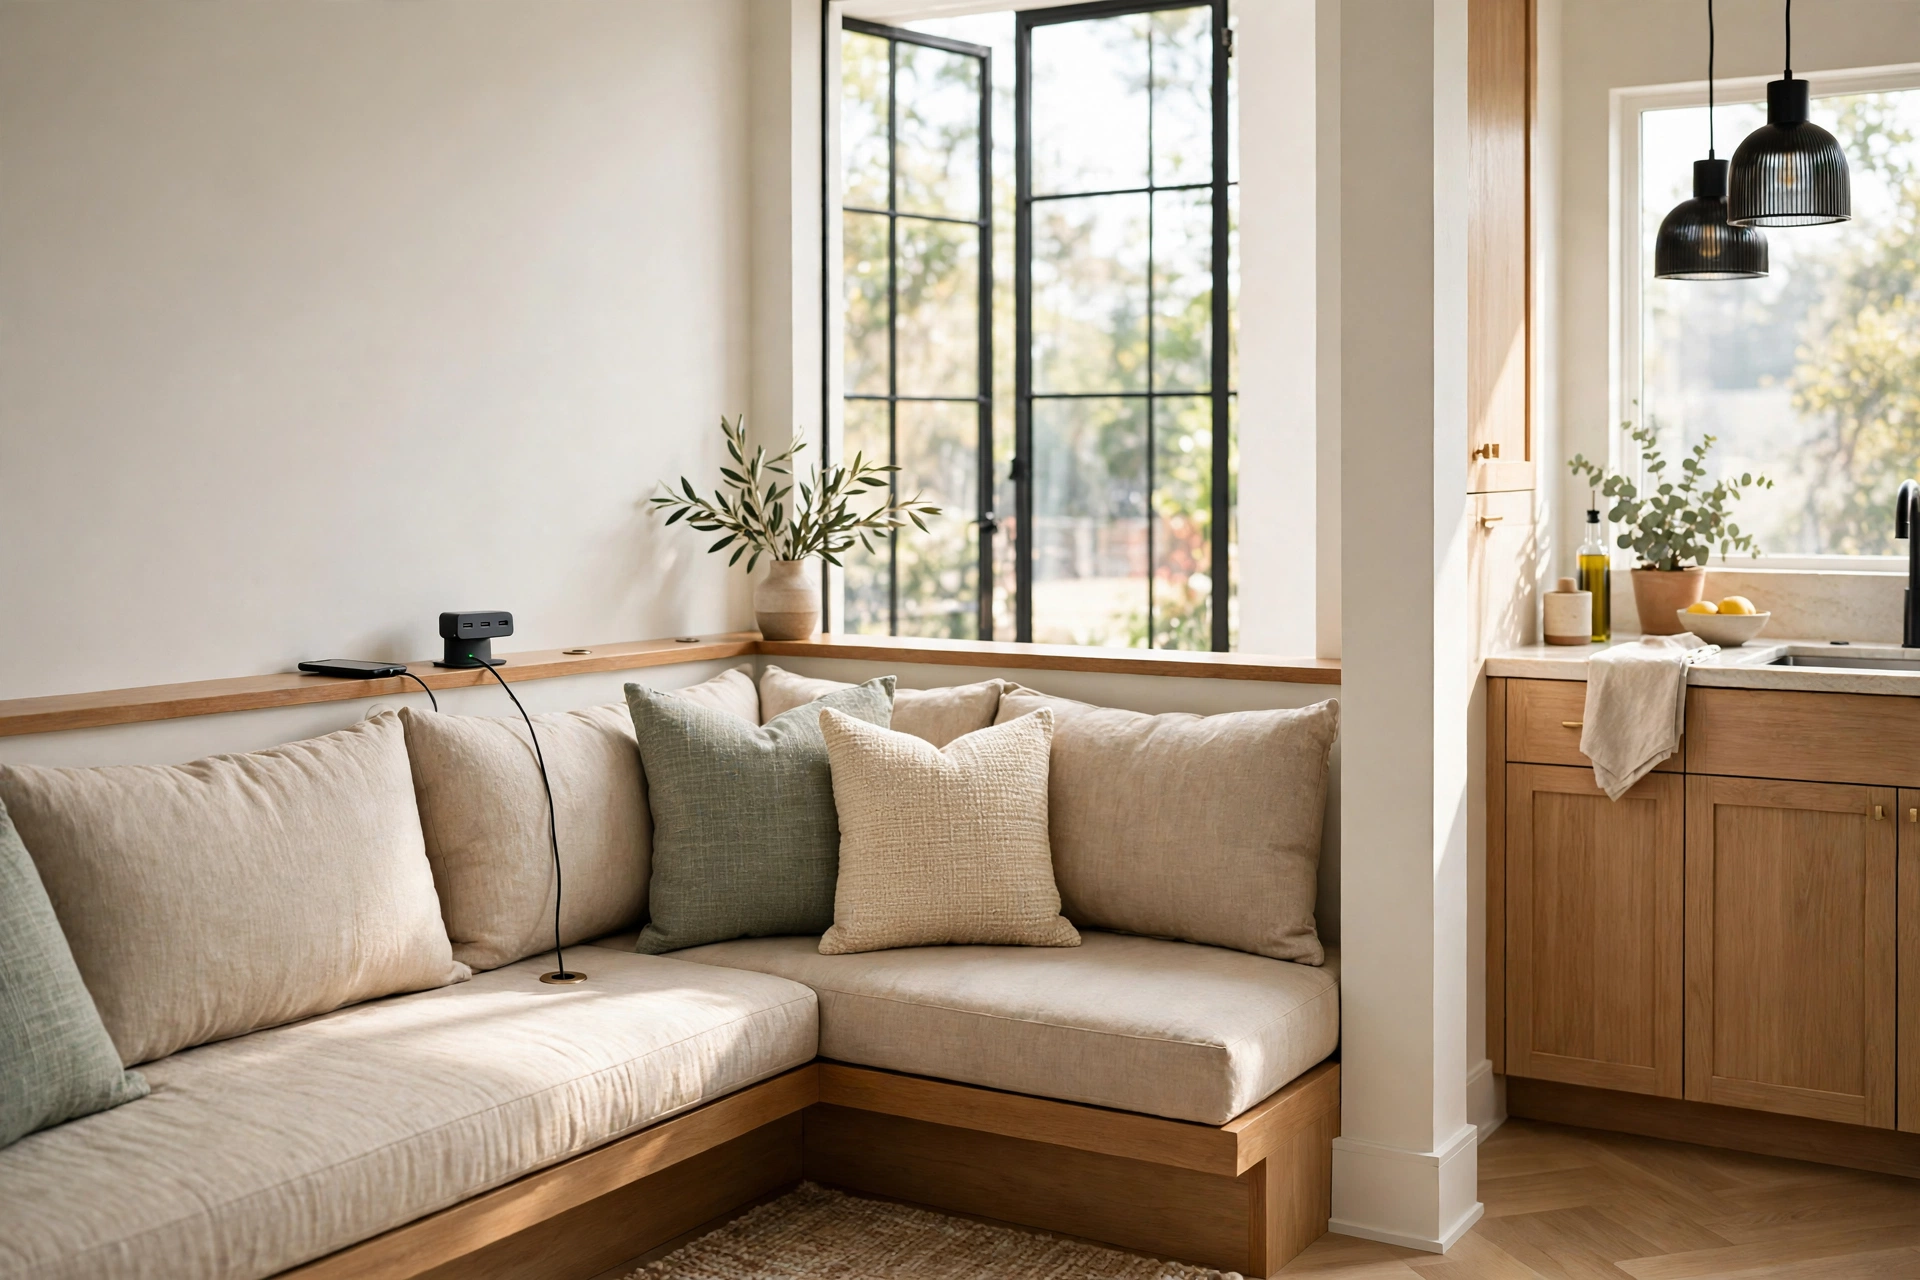
18. Banquette With a Built-In Charging Station
The modern dining table is also a homework desk and a phone-charging hub, so build the power in: a banquette with a charging station hides a power strip and a couple of USB outlets inside the bench, with a small grommet hole in the seat for cables. Mount a surge-protected strip to the inside wall of the bench, run a single cord out the back to the nearest outlet, and add a shallow cable channel along the backrest so phones can charge on the shelf while the family eats. Keep all wiring inside the bench and away from the cushion foam, and use a strip with an on-off switch you can reach without lifting the seat. It is a small detail that ends the daily argument over the one free outlet — and it makes the nook the natural homework spot after school.
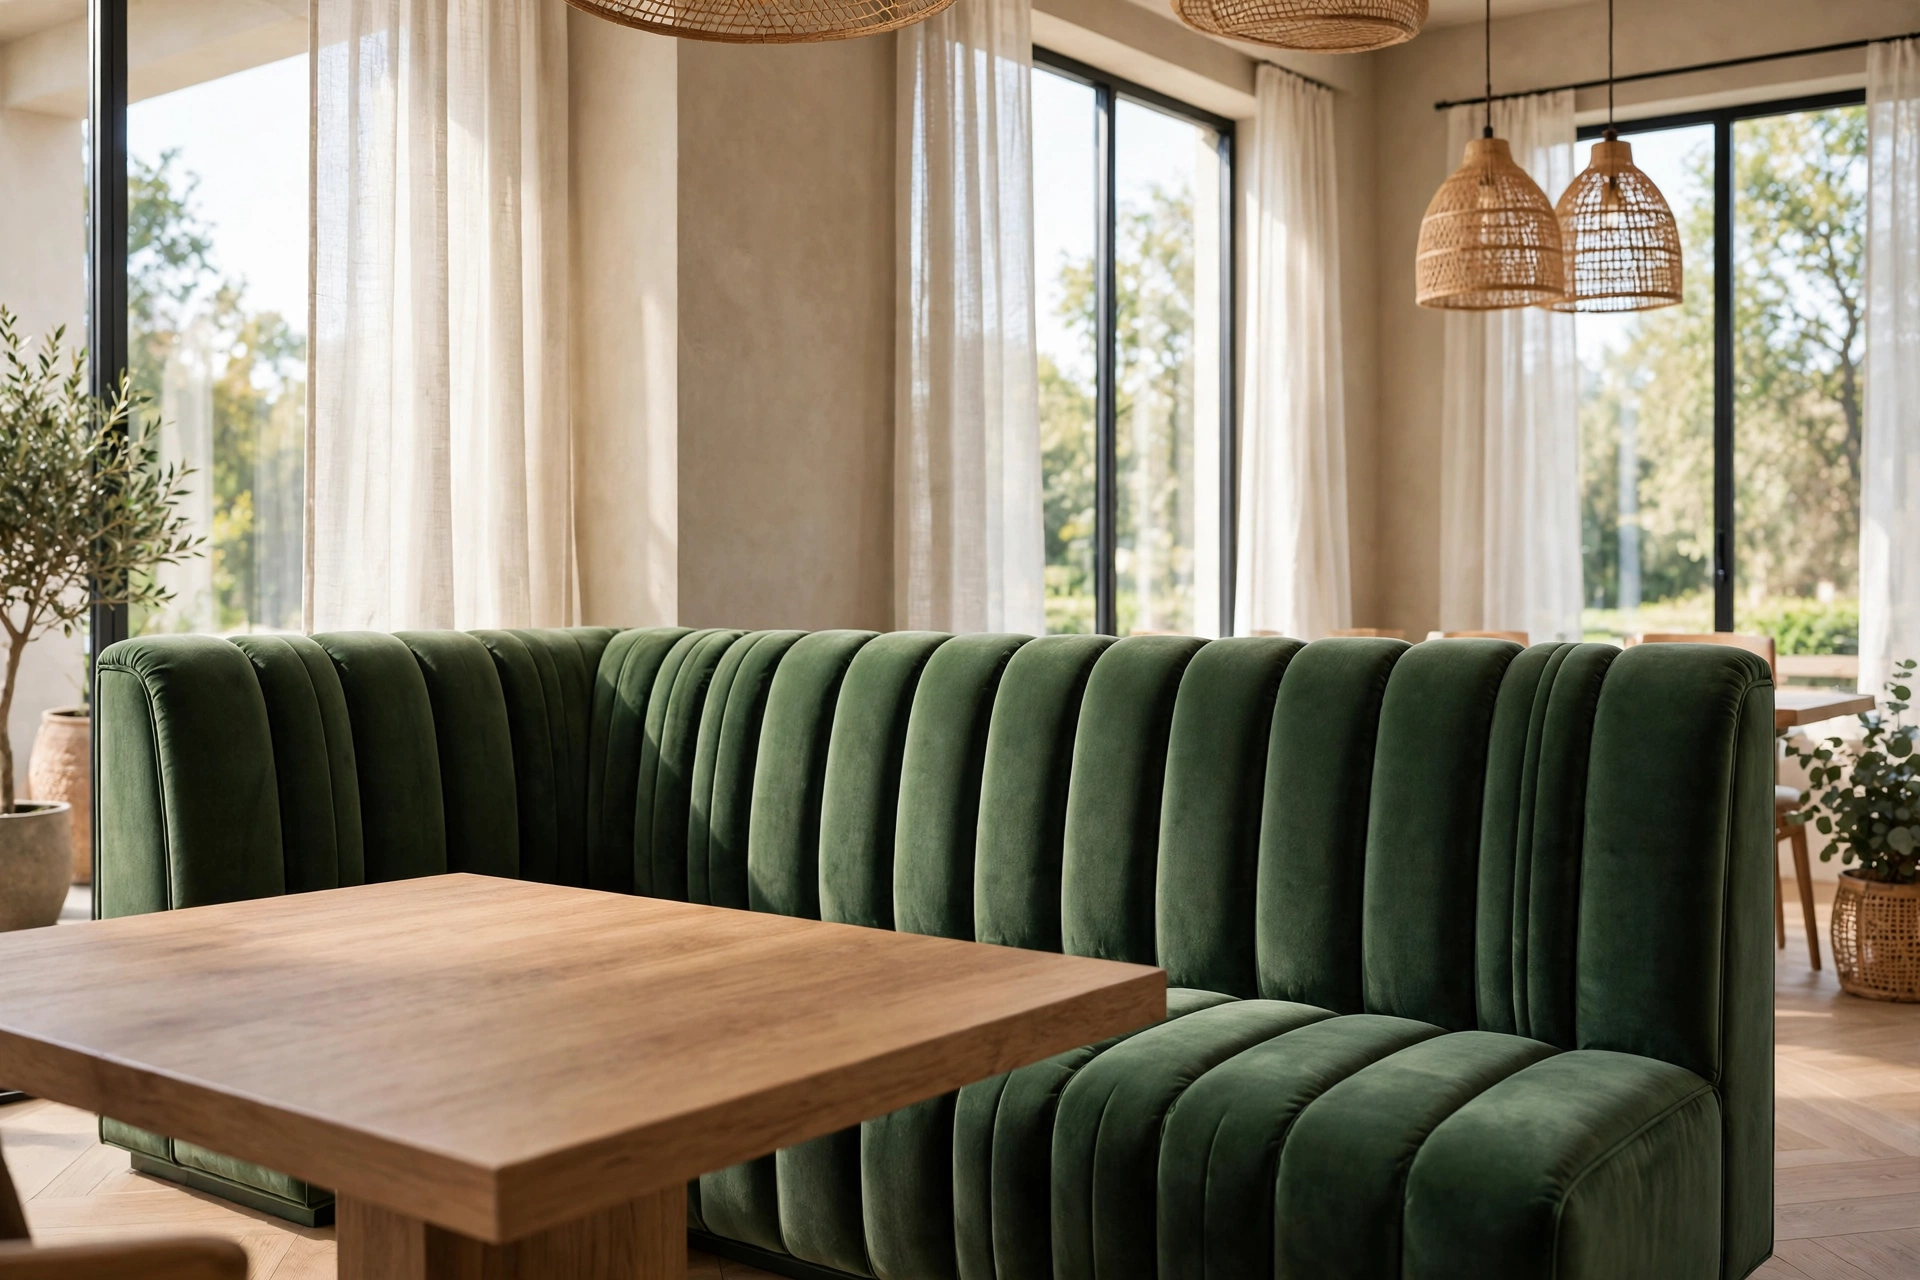
19. Banquette With a Channel-Tufted Backrest
Channel tufting — those long vertical rolls of padded fabric — is the fastest way to make a DIY banquette look like it came from a high-end restaurant. The technique is simpler than it looks: cut foam into strips, wrap each strip in fabric, and staple the strips side by side onto a plywood back panel, pulling the fabric tight between channels so the rolls stand proud. Choose a velvet or a nubby bouclé for maximum luxury, or a wipeable faux leather if the nook feeds small children. The vertical lines also make a low ceiling feel taller, which is a gift in a cramped breakfast nook. Keep the backrest angle at about ten degrees for comfort, and the tufted wall becomes the backdrop for every family photo taken at that table.
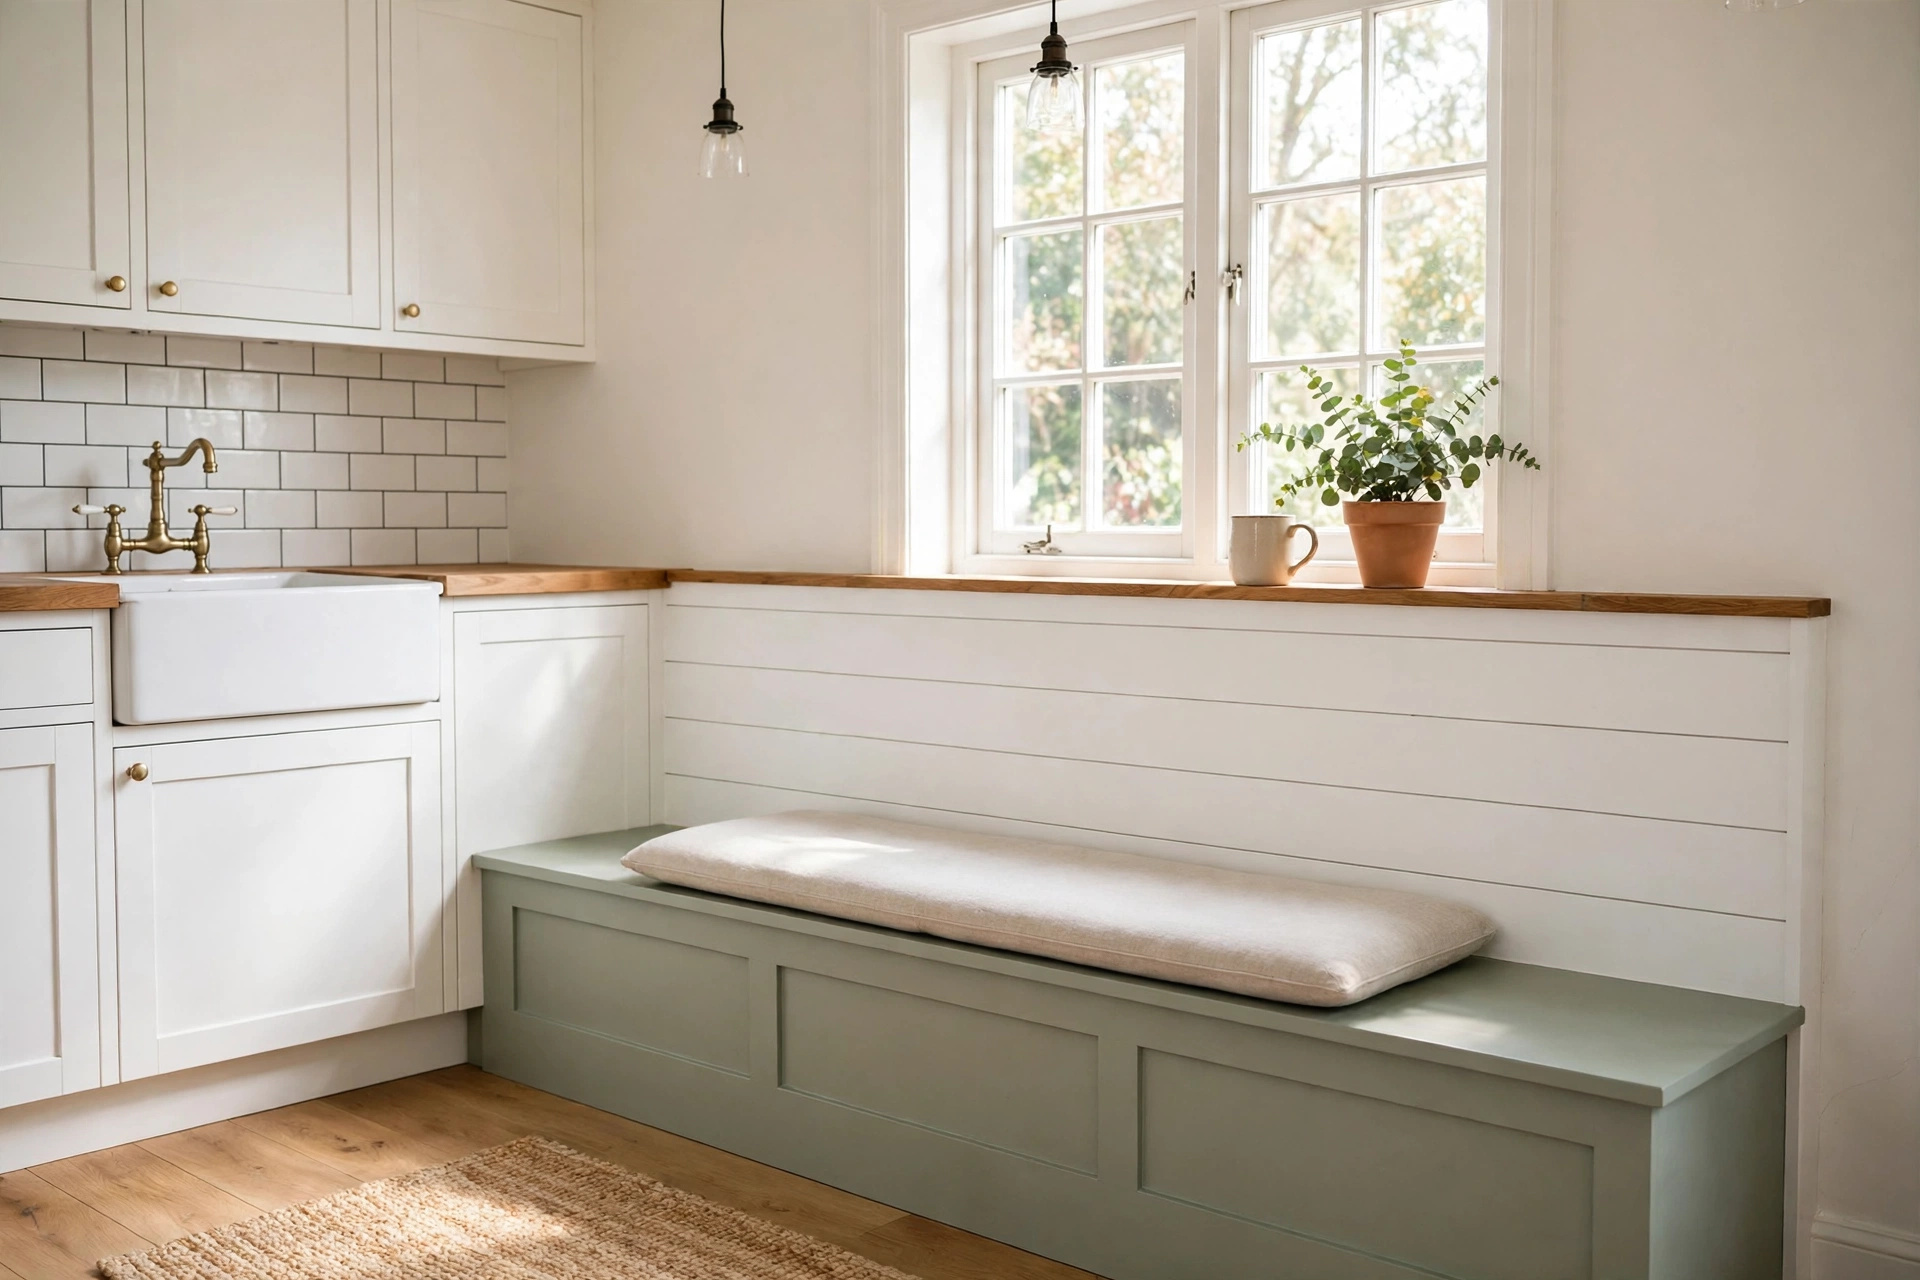
20. Banquette With a Wainscoting or Shiplap Backrest
If tufting feels too soft for your style, a wainscoting or shiplap backrest gives the banquette architectural backbone instead. Run beadboard, board-and-batten, or horizontal shiplap up the wall behind the bench to about 36 inches high, cap it with a slim ledge, and paint it the same color as the bench for one continuous built-in. The ledge is the quiet hero: it holds a phone, a coffee mug, or a row of small plants without a single extra piece of furniture. Shiplap reads coastal and casual, board-and-batten reads traditional, and beadboard reads cottage — pick the profile that matches the rest of your kitchen and the nook will look like it was drawn into the original plans. Seal the paint well, because the backrest is the part that takes the most scuffs.
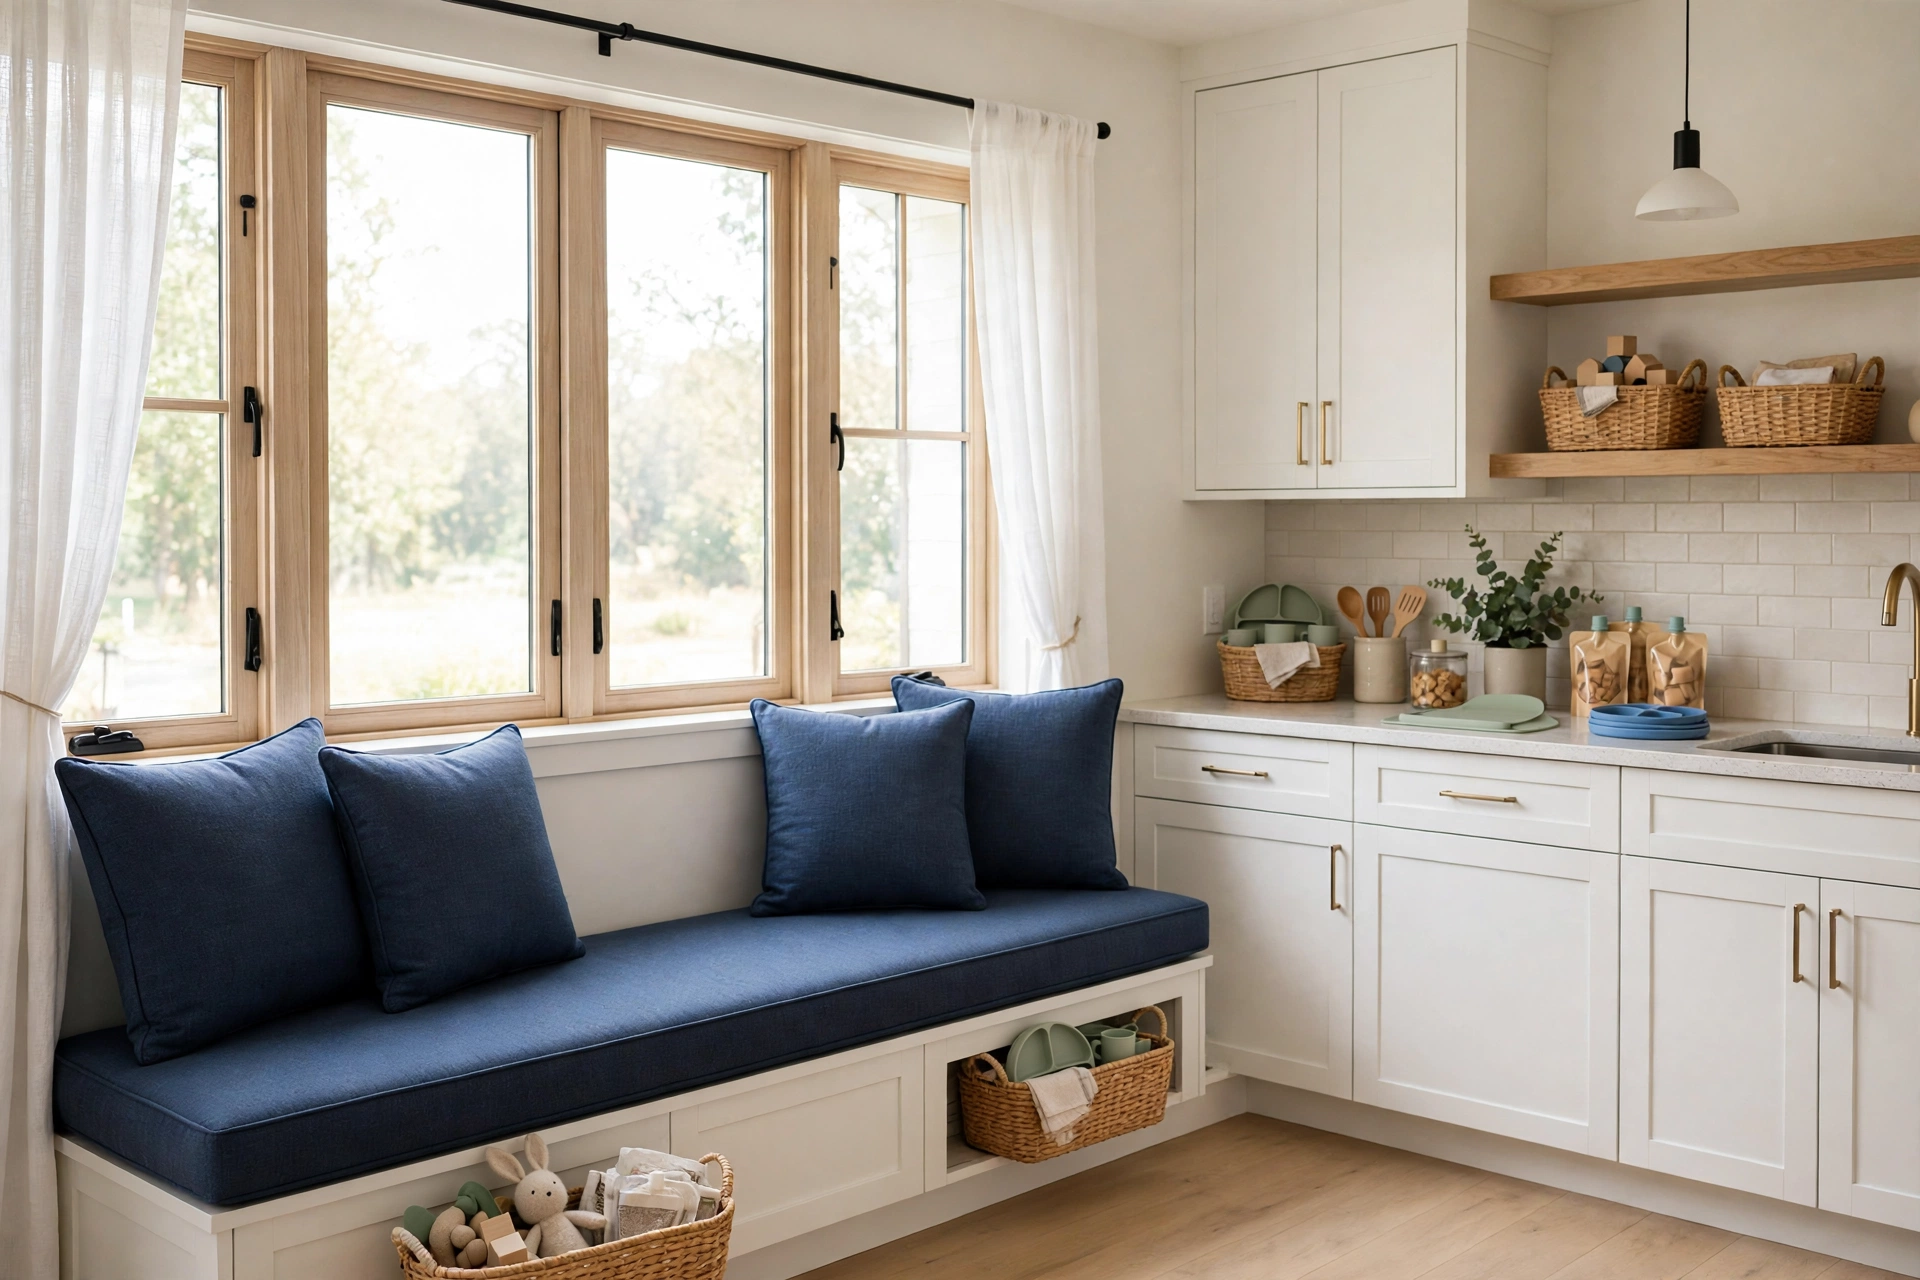
21. Banquette With Washable Performance-Fabric Cushions
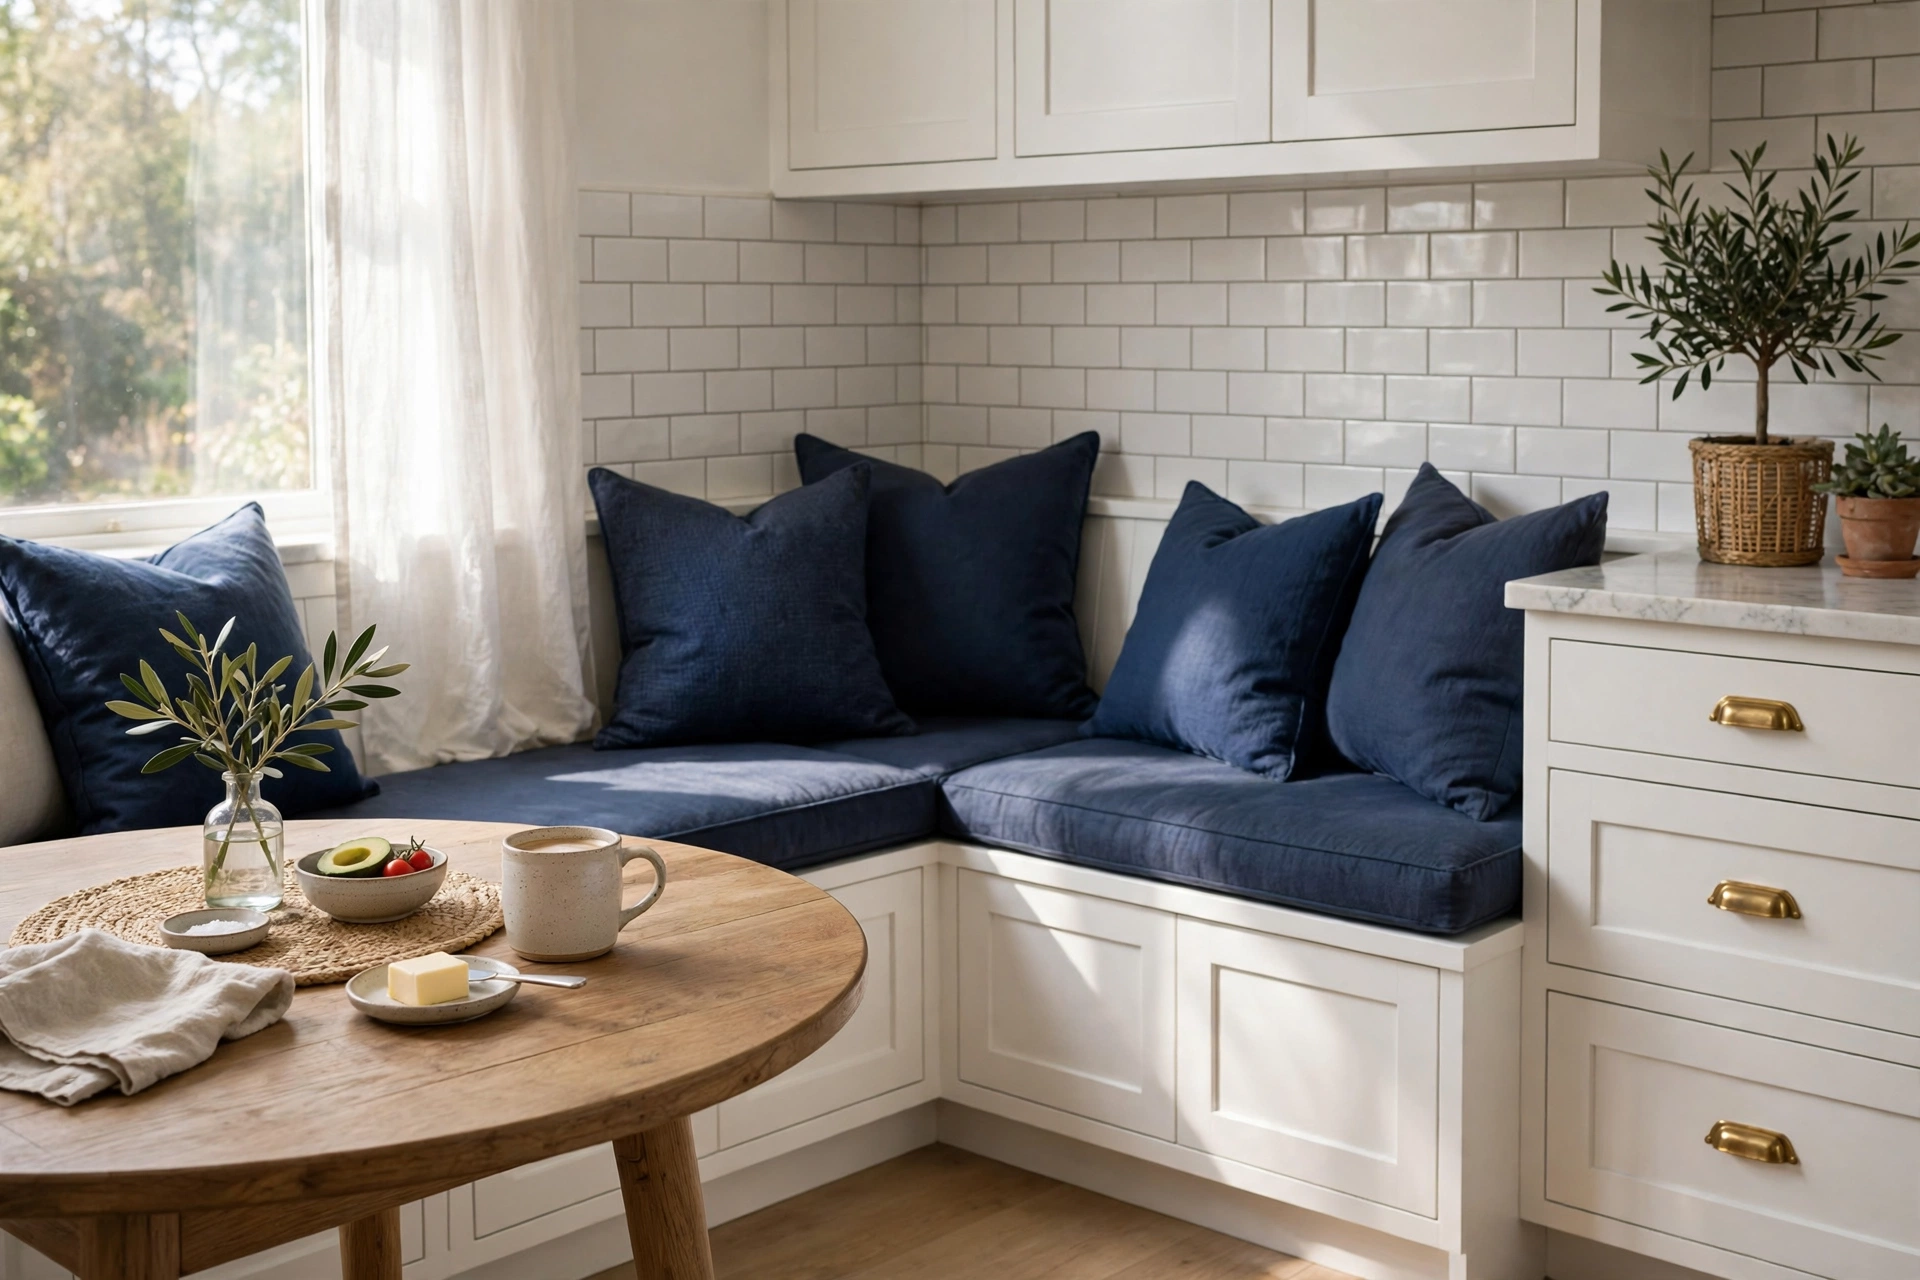
A banquette that feeds kids and pets lives or dies by its cushions, so choose performance fabric and the nook stays beautiful through spaghetti night. Solution-dyed acrylics and polyesters shrug off tomato sauce, grape juice, and muddy paws, and most of them can be spot-cleaned with soap and water or even tossed in the washing machine if you sew the covers with zippers. Build the cushions from high-density foam wrapped in batting, then cover them in a mid-tone fabric — navy, sage, or charcoal — that hides a stain between cleanings far better than white ever will. Add a second set of covers if you can, so one set is always clean while the other is in the wash. It is the difference between a banquette you use every day and one you protect with a towel.
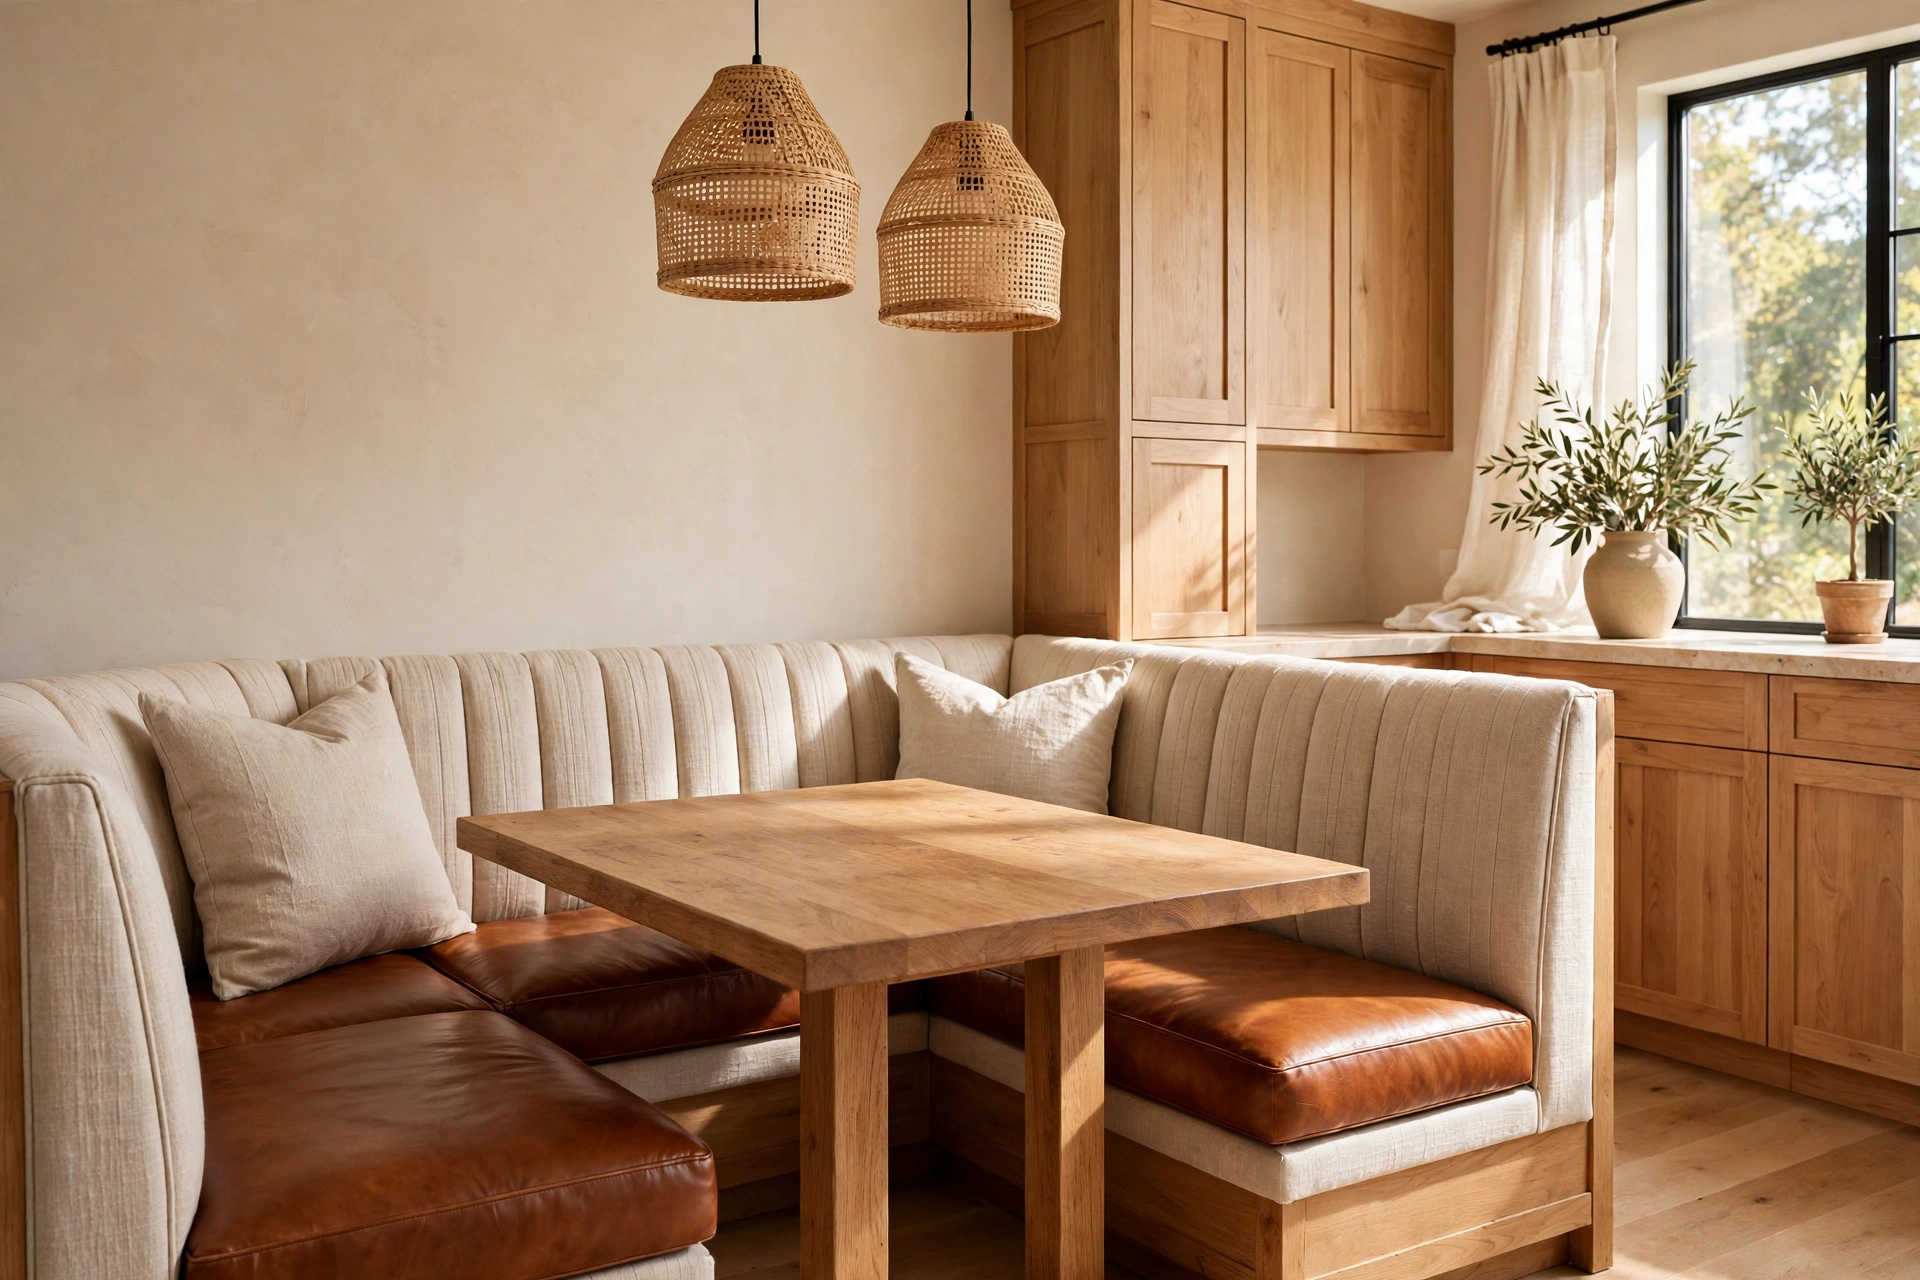
22. Banquette With Leather or Faux-Leather Cushions
Leather cushions are the wipe-clean luxury option: a spill beads up instead of soaking in, a quick pass with a damp cloth restores the seat, and the material only gets better-looking with age and use. Real leather is an investment, but a good faux leather — sometimes called vegan leather — gives you the same wipeable surface at a fraction of the price and comes in colors real leather never offers, from cognac to forest green. Upholster the seat and backrest in the same leather for a diner-booth feel, or mix a leather seat with a fabric backrest so the part you sit on wipes clean while the part you lean on stays soft. Keep the cushions out of direct sun where possible, since leather fades faster than fabric, and condition real leather twice a year. It is the banquette for hosts who serve red wine without flinching.
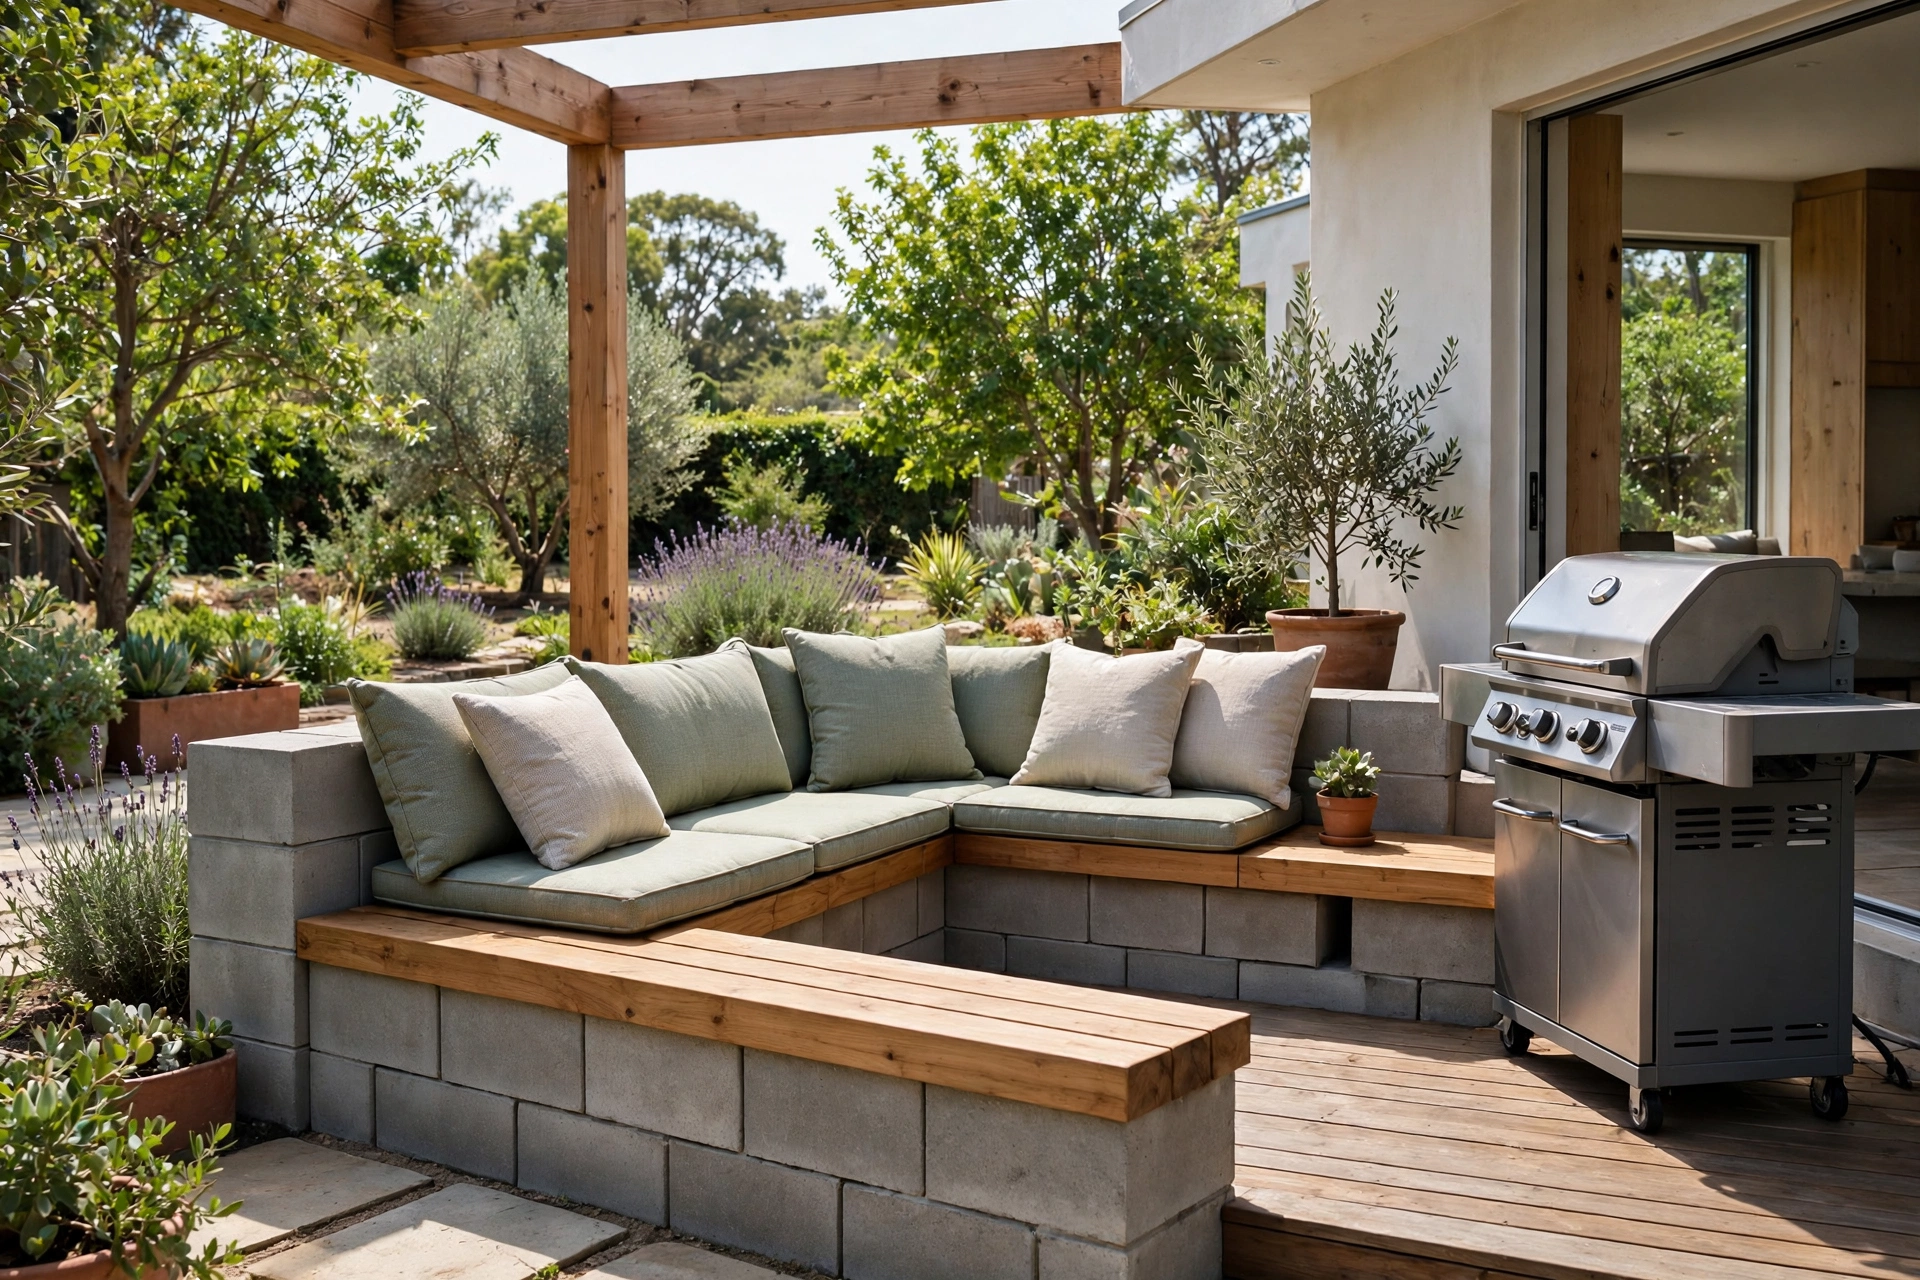
23. Outdoor Patio Banquette
Banquettes belong outside too, and a patio version turns a bare deck corner into an outdoor dining room. The sturdiest build uses concrete blocks as the base — stack them dry, cap them with a pressure-treated wood or stone top, and you have a bench that will outlast the house. For a softer look, build a cedar or teak frame with slatted sides so rain drains through instead of pooling under the seat, and use outdoor foam and Sunbrella fabric for cushions that survive a summer storm. Face the bench toward the grill or the garden view, and add a slim outdoor rug under the table to define the nook. For more outdoor seating inspiration, browse our backyard ideas — the same zones-and-views thinking applies. Store the cushions in a deck box over winter and the bench itself needs nothing at all.
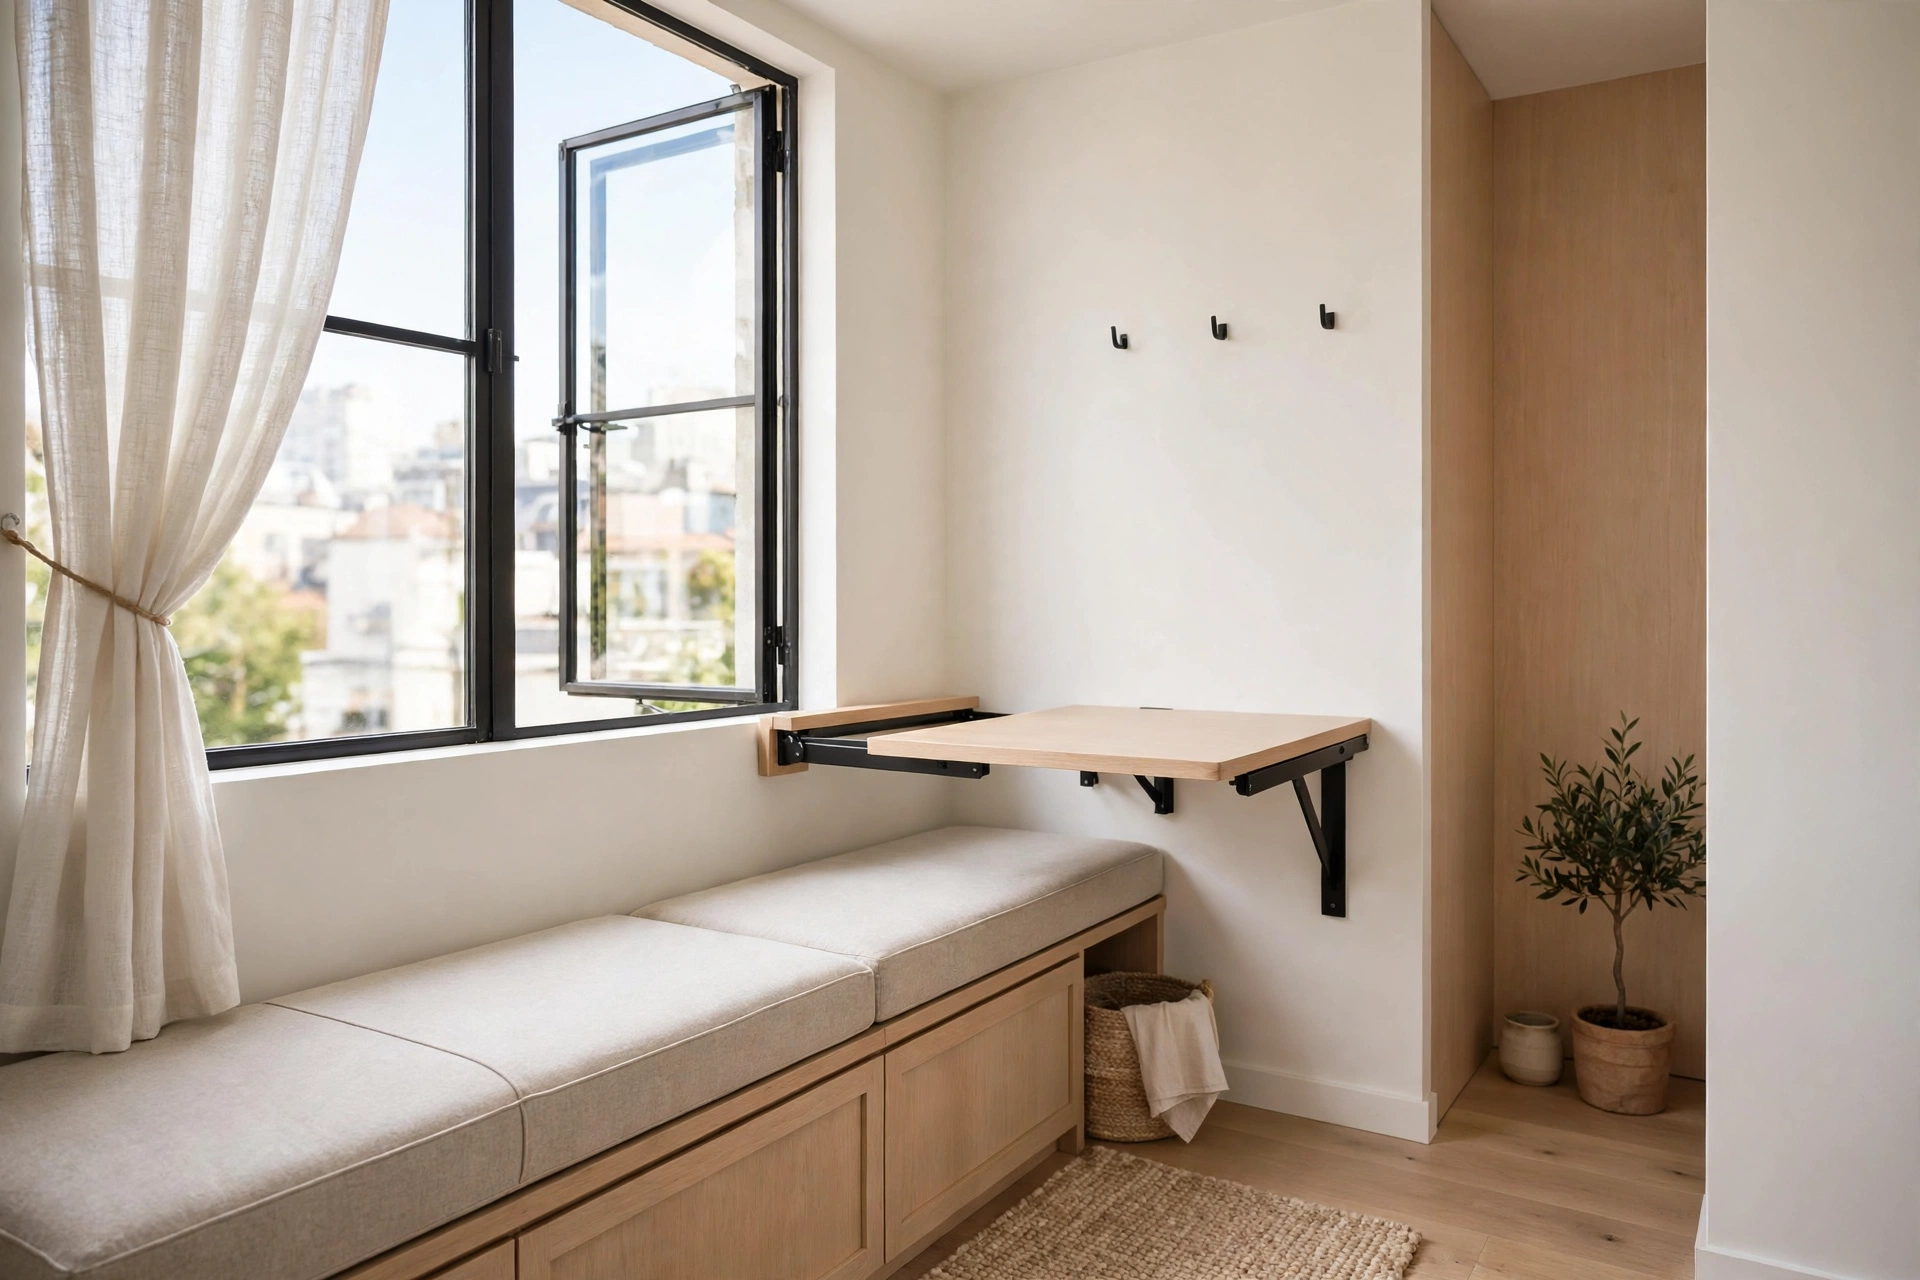
24. Small-Space Apartment Banquette With a Fold-Down Table
In a studio or a tiny apartment, a banquette earns its floor space by pairing with a table that disappears: mount a fold-down table to the wall opposite the bench, and the dining nook folds flat against the wall when dinner is over. The bench itself stays slim — 16 inches deep instead of the usual 18 to 20 — and the storage underneath holds the folding chairs for guests, so the whole setup seats four in a footprint smaller than a bookshelf. Build the bench freestanding so your landlord never sees a screw hole, and choose a table leaf that folds down to a shelf when not in use, so it holds a plant or a coffee mug between meals. It is the banquette that proves a small apartment can still have a real dining room — one that folds away after dessert.
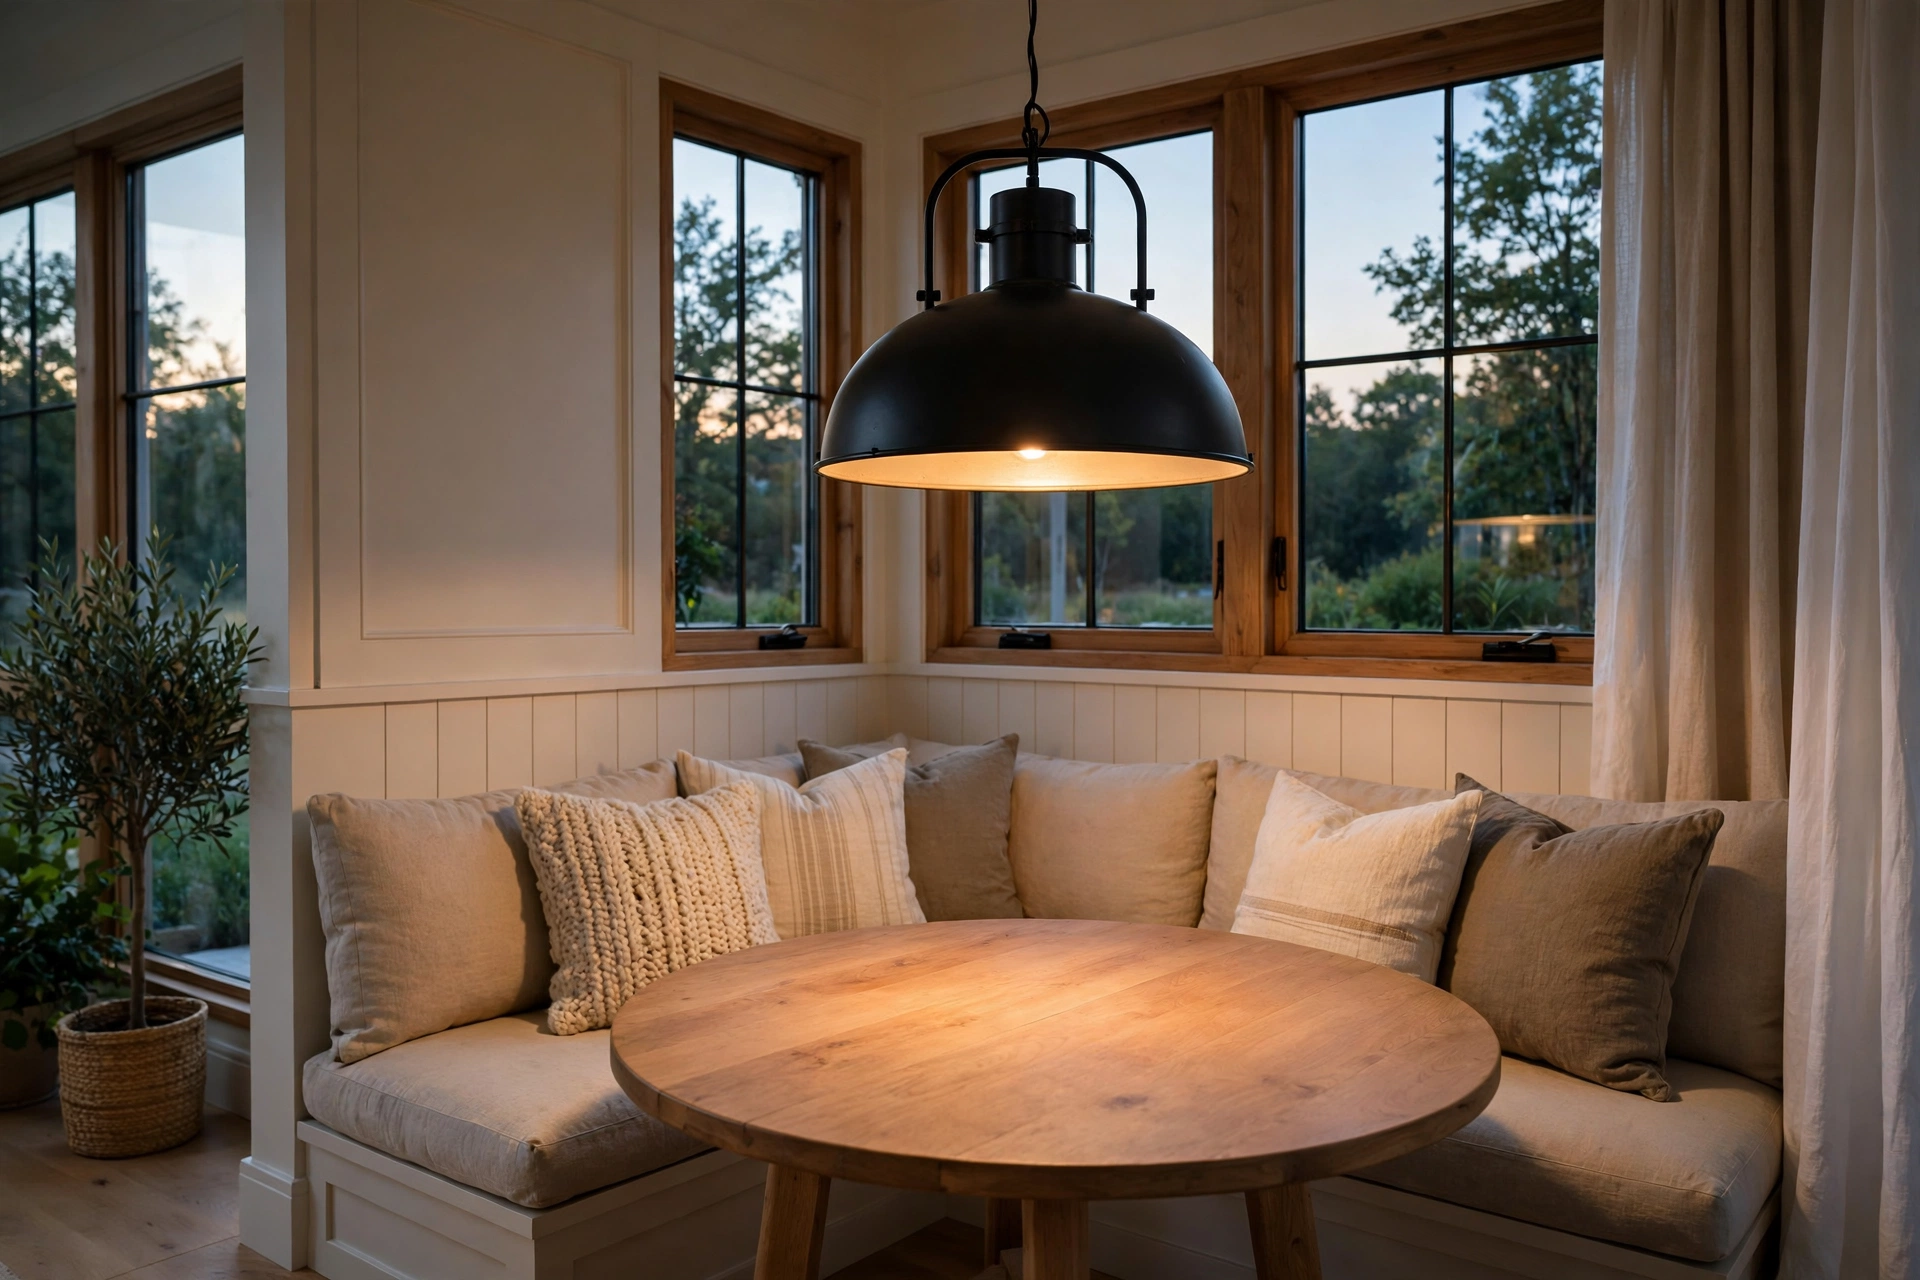
25. Breakfast Nook Banquette With Pendant Lighting
Sometimes the banquette is already built and what it needs is light: a pendant hung over the table is the single upgrade that makes the whole nook feel finished. Hang one large pendant or a pair of small ones 30 inches above the table surface — low enough to pool light on the food, high enough that nobody bumps their head sliding into the bench. A black metal dome reads modern, a rattan shade reads coastal, and a brass pendant warms up a white kitchen instantly. If you are building the banquette from scratch, wire the pendant first while the wall is open, and add a dimmer switch so the same nook goes from bright homework lighting to low dinner glow. The bench gets the credit for comfort, but the pendant is what makes people linger.
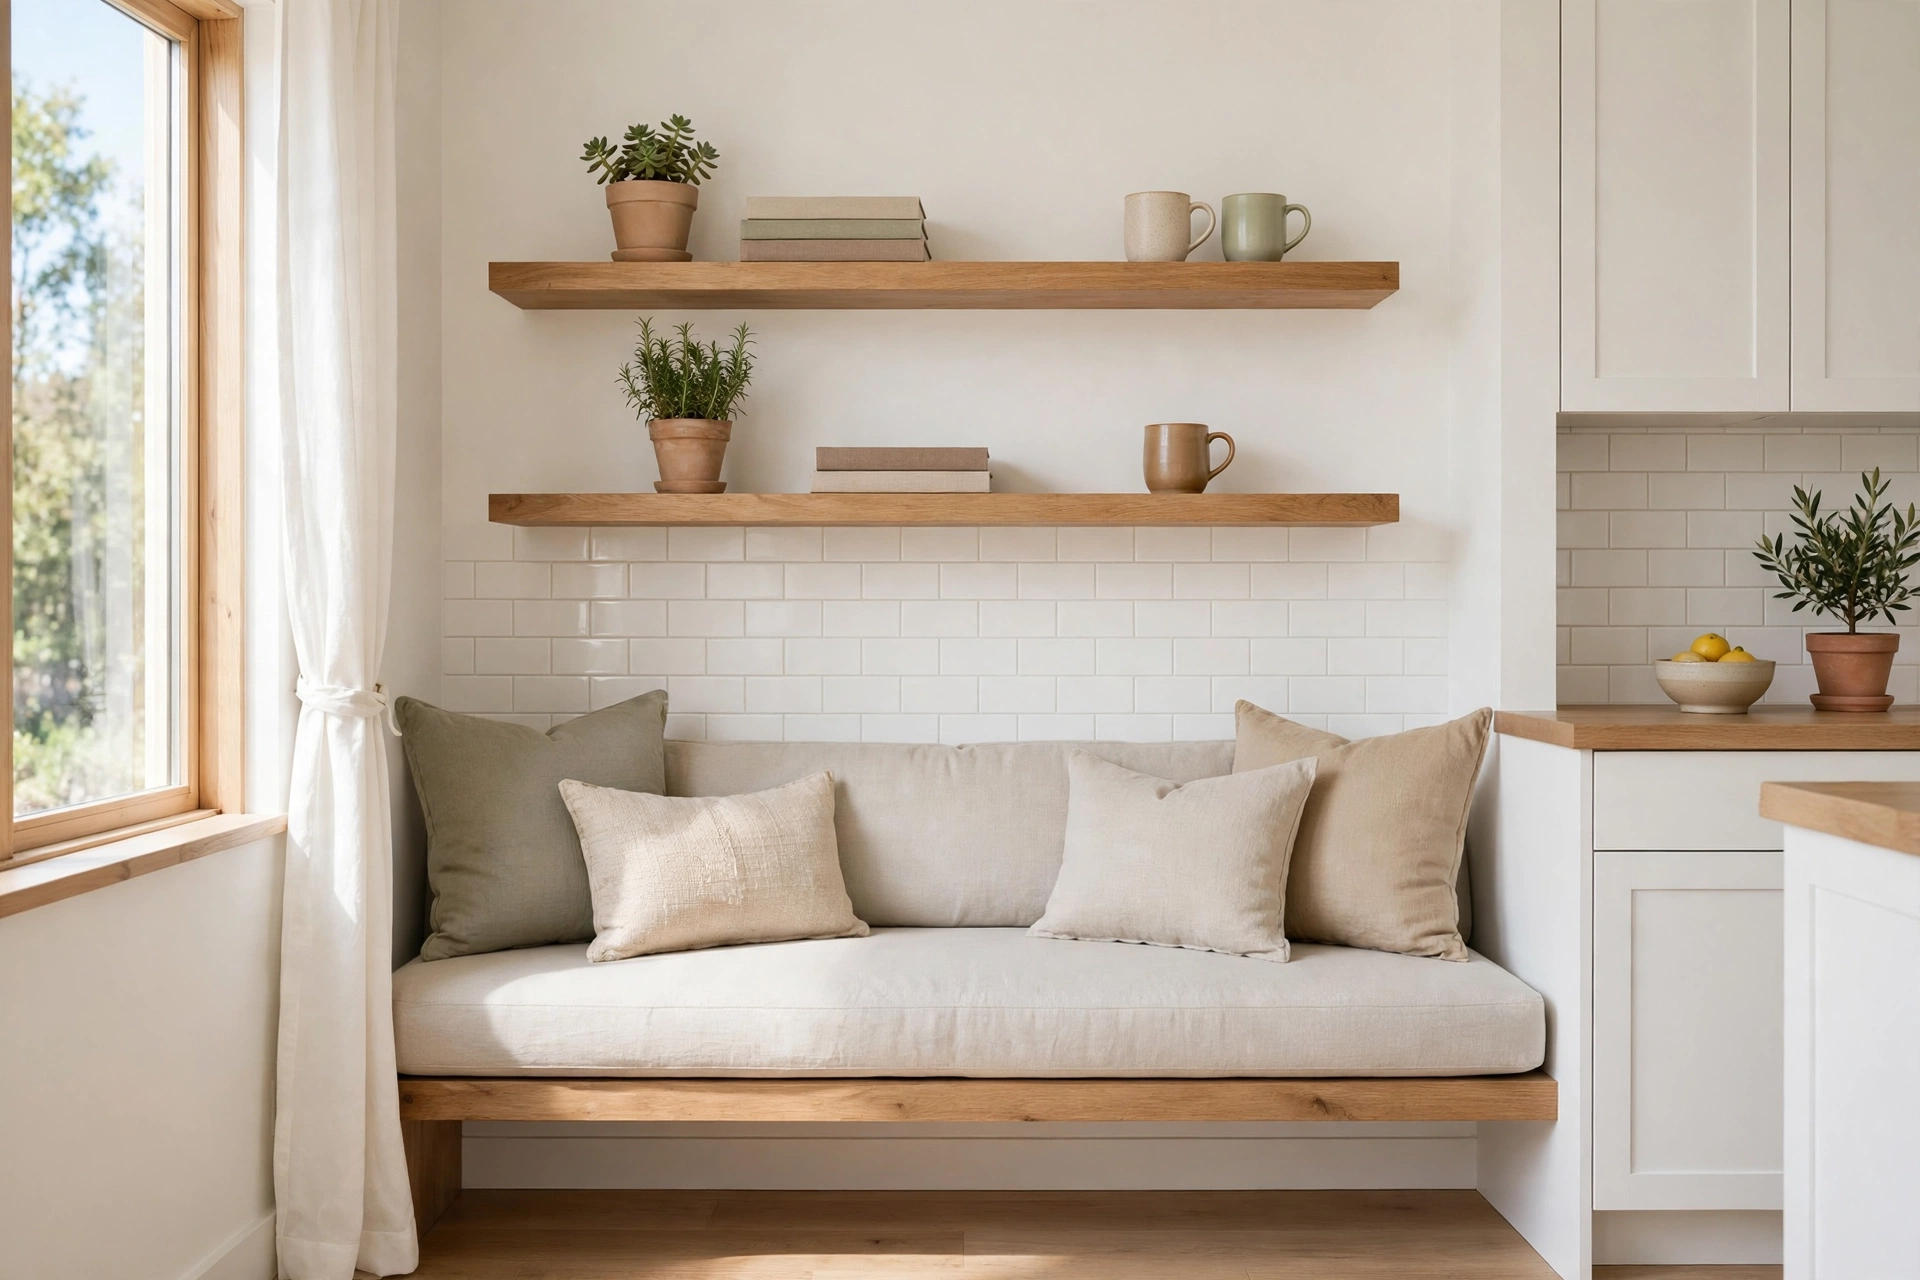
26. Banquette With Floating Shelves Above
Floating shelves above the banquette finish the wall and add the storage a small kitchen always needs, without a single cabinet door. Mount two shelves — one at about 24 inches above the backrest and one higher — and style them with the things you actually reach for: coffee mugs, cookbooks, small plants, and a row of matching jars. Keep the shelves shallow, eight to ten inches, so nobody bumps their head sliding into the bench, and anchor every bracket into a stud, because a shelf of dishes is heavier than it looks. The shelves also give the nook its personality: swap the styling with the seasons and the whole corner feels new without touching the bench. It is the cheapest way to make a simple bench look like a designed room.
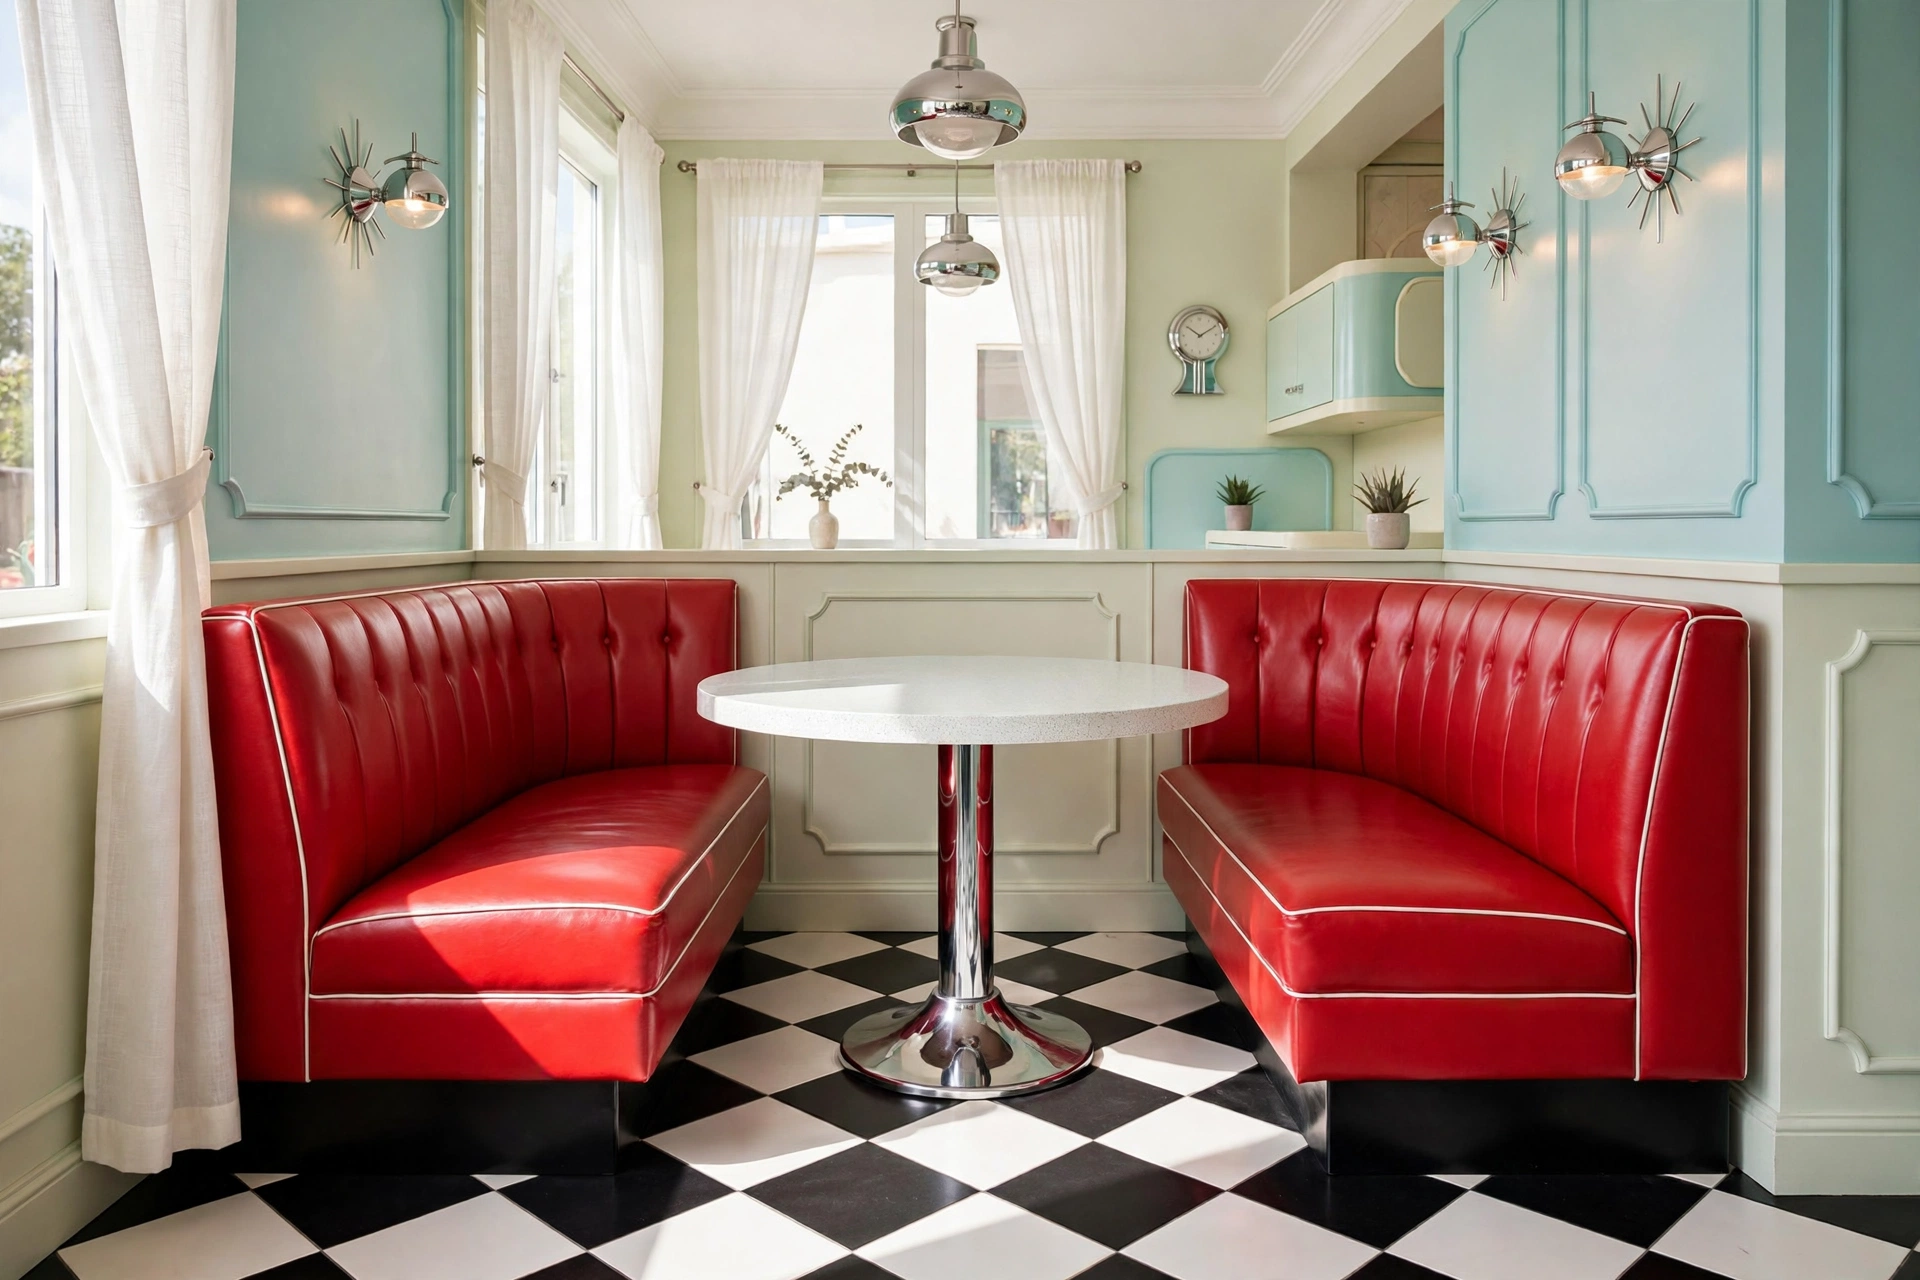
27. Retro Diner-Style Booth Banquette
End with the original: a retro diner booth, all chrome-edged tables, red vinyl, and black-and-white checkerboard attitude. Build two facing benches with high padded backs, upholster them in wipe-clean red or teal vinyl with white piping, and top the table with a laminate or butcher-block surface on a chrome pedestal base. The high backs are the key detail — they make the booth feel private and cozy even in an open-plan kitchen, and they hide the mess of a family dinner from the rest of the room. Add a mini jukebox speaker or a neon sign on the wall behind, and Saturday breakfast becomes an event the kids ask for by name. It is the most fun banquette on this list, and proof that a dining nook can have a sense of humor.
Frequently Asked Questions
How deep should a banquette seat be?
The ideal banquette seat depth is 17 to 20 inches, with 18 inches the sweet spot for most adults. Shallower than 17 inches feels like a perch, and deeper than 20 inches makes it hard to sit upright without a thick back cushion. If your bench doubles as a lounge spot, go a little deeper and add back cushions to fill the gap.
What is the best seat height for banquette seating?
Build the seat platform 18 inches tall, which pairs perfectly with a standard 30-inch dining table and matches a normal dining chair. If you are adding a thick foam cushion, build the platform an inch or two lower so the finished seat height — platform plus cushion — still lands at 18 inches.
How much does a DIY banquette cost?
A simple plywood-box banquette can cost as little as $100 in materials, while a custom upholstered banquette with drawers, quality foam, and performance fabric can run past $1,000. The biggest cost drivers are the foam and fabric, the hardware for drawers or hinged lids, and whether you use ready-made bases like IKEA units or build everything from lumber.
How much space does each person need on a banquette?
Allow about 24 inches of bench width per person — the same as a dining chair. A 48-inch bench seats two comfortably, a 72-inch bench seats three, and an L-shaped corner banquette seats four to six depending on the length of each leg. Leave at least 24 inches between the bench edge and the table edge for knees.
Can I build a banquette without attaching it to the wall?
Yes — a freestanding bench banquette works just as well and is the best choice for renters or anyone who likes to rearrange. Build it with a sturdy base, finish all four sides, and add a lower stretcher rail for stability. The only trade-off is that a freestanding bench can creep away from the wall over time, so check its position now and then.
What fabric is best for banquette cushions?
Performance fabrics such as solution-dyed acrylic or polyester are the best choice for a family banquette because they resist stains and can be spot-cleaned or machine-washed. Leather and faux leather are the easiest to wipe clean and suit a diner-style look. Whatever you choose, pick a mid-tone color and zippered, removable covers so cleaning is never a project.
Conclusion
A DIY banquette is one of the highest-payoff projects in the whole house: a single weekend of building turns a dead corner into the seat everyone wants, adds storage you will use daily, and gives your kitchen the custom, built-in look of a far more expensive remodel. Start with the layout — an L-shaped corner for a classic nook, a straight wall for a narrow room, or a U-shape for a big family — then layer on the features that fit your life: hidden storage for the clutter, performance fabric for the kids, a charging station for the homework hour, or a retro booth just for fun. And if your nook sits under a window, finish it with the right dressing — our guide to kitchen window curtains has ideas that pair beautifully with a sunny banquette. Measure twice, build the bench 18 inches high, and pick the two or three ideas from this list that solve your biggest frustration first. The breakfast nook will thank you every morning.